
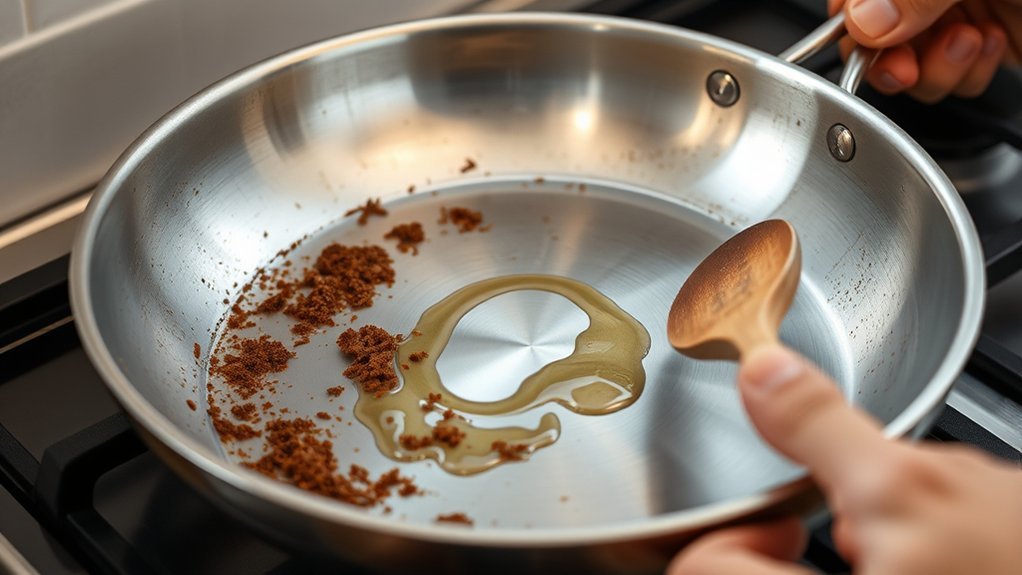
Stainless steel pans usually stick when the pan is not properly preheated, there is too little fat between the food and metal, the food is wet or crowded, or it is moved before it has browned enough to release. The reliable sequence is simple: preheat the dry pan, add oil or another cooking fat, add relatively dry food, control the heat, and wait before flipping. Stainless steel is not naturally nonstick, but good temperature and timing make sticking much easier to control.
Quick Answer
To keep food from sticking to stainless steel, preheat the empty pan over moderate heat, add enough oil to coat the cooking surface, wait until the oil flows easily or lightly shimmers, then add dry food. Avoid overcrowding, control excessive heat, and let proteins brown until they release with gentle pressure before flipping.
Key Takeaways
- Preheat the pan first, then add oil or another cooking fat.
- Dry surface moisture from meat and fish and avoid overcrowding the pan.
- Do not force proteins loose; a browned surface often releases more easily when it is ready to turn.
- A smoking pan is too hot for many foods. Reduce the heat instead of assuming hotter is always better.
- Stainless steel does not need a permanent seasoning layer to work properly.
At a Glance
| Time Required | About 1–3 minutes to preheat most pans; cooking time depends on the food |
| Difficulty | Easy once heat and timing are familiar |
| Tools Needed | Stainless steel pan, burner, cooking fat, spatula or tongs; food thermometer for applicable proteins |
| Cost | No special product is required beyond normal cooking fat and cleaning supplies |
Why Stainless Steel Pans Stick
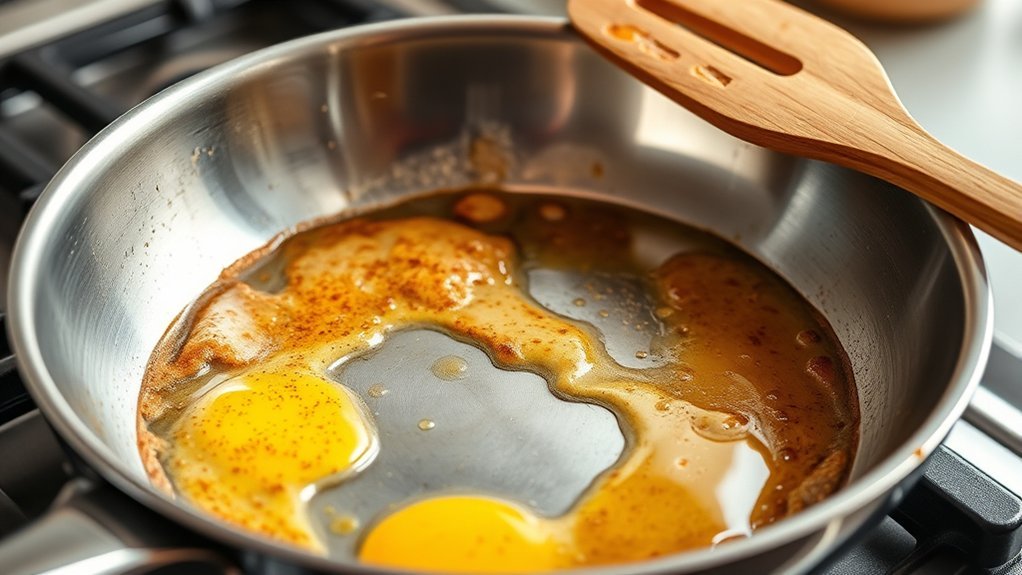
Stainless steel has no low-friction coating, so food can make direct contact with the metal. Protein-rich foods such as eggs, fish, chicken, and meat are particularly prone to adhesion while their proteins are changing during cooking.
The practical problem is not simply that stainless steel has “pores.” Real cooking involves several factors at once: surface roughness, protein adhesion, moisture, temperature, cooking fat, and how long the food remains in contact with the pan. Research has demonstrated that proteins can adhere to stainless steel surfaces, while cookware manufacturers consistently emphasize preheating, oil, dryness, and patience as the useful controls for home cooks.
If food is added to a relatively cool pan, it may remain in close contact with the steel before a browned surface develops. Wet food can also cool the pan and create steam instead of immediate browning. Overcrowding intensifies the problem because several cold ingredients enter at once and release moisture.
A thin, continuous layer of cooking fat reduces direct contact with the metal. As food browns and its surface becomes drier and firmer, many proteins become easier to lift or turn without tearing.
Why Heat Control Matters Most
Heat control matters because stainless steel can stick when it is too cool, but excessive heat creates a different set of problems: smoking oil, scorched fond, burned food, and a pan that is difficult to clean.
The goal is not the hottest possible pan. The goal is enough even heat to brown the food without burning the fat or surface.
For many stainless steel skillets, low-to-medium or medium heat is a useful starting point. Pan thickness, burner power, food type, and pan size all affect the actual temperature, so a fixed number of minutes cannot be correct for every stove.
All-Clad’s stainless steel guidance recommends preheating on low or medium heat, adding oil after preheating, drying food, and allowing it to cook without unnecessary disturbance. These are more useful cues than simply turning the burner to high.
Crowding also affects heat control. A pan filled edge-to-edge with cold ingredients can lose heat quickly, while released moisture accumulates as steam. Cooking in batches often improves browning and release.
Pro Tip: Listen when food enters the pan. A steady sizzle is a useful sign that the surface has enough heat for browning. Little or no sizzle often means the pan cooled substantially; violent crackling, smoke, or rapidly burning oil means the heat may be excessive.
Why Proteins Stick Most
Protein-rich foods often seem especially sticky on bare stainless steel because proteins can adhere to the metal as they heat and change structure. Eggs and delicate fish make the effect particularly obvious because their cooked structure tears easily.
That does not mean every protein should be blasted with high heat. The correct approach depends on the food. Steak or chicken can tolerate stronger browning than scrambled eggs or a fragile fish fillet.
Protein Bonds Strongly
Proteins can adsorb to stainless steel surfaces, and food-processing research has measured adhesion involving protein-rich materials on steel. In a skillet, cooking fat, temperature, moisture, and contact time all influence how much of that adhesion becomes troublesome.
For practical cooking, patting the surface of meat or fish dry and coating the pan evenly with fat are more useful than trying to manipulate microscopic properties of the metal.
Delicate foods need particular care. Rather than scraping aggressively, let the exposed surface set before attempting to lift it. If it resists gentle pressure, give it more time unless the food is clearly burning.
Browning Forms a Crust
As many proteins cook, their exterior becomes firmer and browner. This cooked surface can separate more cleanly from the pan than a wet, partially cooked surface.
- Food initially contacts the hot fat and pan.
- Surface moisture evaporates and the exterior begins to cook.
- Browning and drying create a firmer outer layer.
- When that surface is sufficiently developed, many foods lift with less resistance.
The process should not be confused with a guarantee that every food will release perfectly. Eggs, fragile fish, sugary marinades, and very lean foods may still require more fat or gentler heat.
Don’t Move Too Soon
Trying to flip a protein immediately after it enters stainless steel often tears the developing surface. Instead, place it in the pan and allow the first side to cook with minimal disturbance.
Test gently with a spatula or tongs. If the food lifts without significant resistance and has reached the desired browning, turn it. If it remains firmly attached but is not burning, continue cooking briefly and check again.
This technique is especially useful for steaks, chops, chicken, and skin-on fish. Eggs require gentler heat and usually benefit from a more generous, evenly distributed layer of butter or oil.
How to Prevent Food From Sticking
The most repeatable stainless steel method is preheat → fat → food → wait → release.
- Preheat the empty pan gradually. Start around low-to-medium or medium heat rather than immediately using maximum burner output.
- Check the heat. Use the dry-pan water test described below if appropriate for your cookware, or simply learn how quickly oil begins to flow and shimmer on your stove.
- Add enough cooking fat to coat the cooking area. Swirl it across the bottom instead of leaving dry patches.
- Add relatively dry food without crowding. Pat meat and fish dry when surface moisture is not needed for the recipe.
- Let the first side cook before moving it. Turn when it releases with gentle pressure and has developed the desired color.
Do not assume more heat is always better. The correct setting for eggs may be much lower than the setting used to sear a steak.
When to Add Oil to a Stainless Steel Pan
For common sautéing and searing techniques, add oil after the stainless steel pan has preheated. Swirl in enough to create a thin, continuous film over the area where the food will cook.
Tramontina’s stainless steel cooking guidance likewise recommends preheating before adding oil and using the oil’s movement or shimmer as a readiness cue.
Different fats tolerate heat differently, so match the fat to the recipe and temperature. Butter is useful for eggs and moderate-temperature cooking but can brown or burn more quickly because of its milk solids. Oils intended for higher-temperature cooking can be easier to manage when searing.
The oil should flow easily across the pan. A light shimmer can be useful. If it is producing substantial smoke, reduce the heat and allow the pan to cool slightly before proceeding.
Note: Stainless steel does not normally need permanent stovetop “seasoning” in the way cast iron or carbon steel does. All-Clad states that seasoning its stainless cookware is not required. Proper preheating and cooking fat provide the useful release effect during each cooking session.
How to Tell Your Pan Is Ready
No single burner setting or preheat time works for every stainless steel pan. A heavy multi-ply skillet on an electric range behaves differently from a thin pan on a powerful gas burner.
Useful signs include a pan that has heated evenly, water that beads and glides during a dry-pan test, and oil that spreads readily and begins to shimmer without smoking heavily.
Water Drop Test
The water-drop test can help you learn how your pan behaves. Heat the empty pan first, then place a very small amount of water on the dry cooking surface.
- If water sits or boils sluggishly, the pan may still be relatively cool.
- If water rapidly bubbles away on contact, continue judging the pan carefully rather than relying on that signal alone.
- When a small bead forms and glides around the surface, the pan has entered a Leidenfrost-type regime in which vapor supports the droplet.
- Once testing is complete, let all water evaporate before adding oil.
The University of Chicago’s Leidenfrost research explains that water on a sufficiently hot surface can ride on a thin vapor layer, which is why a droplet can move across a hot pan.
Warning: Perform the water-drop test only on a dry pan before adding oil. Never flick water into hot cooking oil; water can flash into steam and cause hot oil to spatter.
Shimmering Oil Signal
After the water is completely gone, add the cooking fat. Oil that becomes thinner, flows easily, and develops a light shimmer is a useful visual cue that it has heated.
This does not create a permanent “natural nonstick layer.” The oil simply provides a temporary lubricating barrier between food and the stainless steel during cooking.
If the oil starts smoking heavily, reduce the heat. Excessive heat can burn the oil, scorch food, and leave dark residue that is harder to clean.
Common Sticking Problems and Fixes
| Problem | Likely Cause | Fix |
| Food sticks immediately with little sizzle | Pan or oil may be too cool | Preheat more thoroughly and add food after the fat has heated |
| Oil smokes before food goes in | Pan is too hot for the fat being used | Reduce heat and let the pan cool slightly |
| Meat browns poorly and releases liquid | Wet surface or overcrowding | Dry the surface and cook in smaller batches |
| Fish tears when flipped | Moved too early or insufficient fat | Wait for better release and use enough oil to coat the pan |
| One area burns while another barely browns | Uneven burner contact, thin cookware, or a warped base | Match pan and burner size, reduce heat, and inspect the pan base |
Food-Specific Stainless Steel Tips
Eggs: Use gentler heat than you would for a steak. Coat the surface well with butter or oil, add the eggs after the fat has heated, and let fried eggs set before trying to slide a spatula underneath them.
Fish: Pat the surface dry, especially when crisping skin. Use enough oil to coat the contact area, place the fish in carefully, and avoid repeated flipping. Very fragile fillets can still be easier in nonstick cookware.
Steak, chops, and chicken: Dry the exterior, preheat thoroughly, add oil, and leave space between pieces. Let the first side brown before checking for release.
Vegetables: Excess water encourages steaming. Dry vegetables when browning is the goal and avoid loading so many into the pan that the surface temperature collapses.
Starchy foods: Potatoes and similar foods can stick if their wet, starchy surfaces contact inadequately heated steel. Adequate fat, moderate heat, and enough time for a crust to form help.
What to Do When Food Sticks
If food is sticking during cooking, first decide whether it is simply not ready to move. For a browning protein, test one edge gently. If it remains firmly attached and is not burning, waiting briefly may allow the surface to finish browning and release more cleanly.
If the food has already been removed and browned bits remain, those bits are often fond, not a cooking failure. Fond can be dissolved into a pan sauce by deglazing with water, broth, wine, or another recipe-appropriate liquid.
- Reduce the heat if the pan is excessively hot.
- Add the deglazing liquid carefully because steam can rise quickly.
- Let the liquid simmer.
- Use a wooden spoon or heat-safe utensil to loosen the browned bits.
- Continue with the sauce or remove the loosened residue for cleaning.
Stainless steel is prized for this browning-and-deglazing ability. All-Clad’s stainless cookware instructions specifically describe using browned food bits for sauce after deglazing with wine or stock.
How to Clean a Stuck-On Stainless Steel Pan
A stuck-on stainless steel pan is usually easiest to clean after it has cooled enough to handle safely. For fresh residue, warm water, dish soap, and a non-abrasive sponge may be sufficient.
For stubborn cooked-on food, add water to the pan and bring it to a gentle simmer. The heat and liquid soften the residue so it can be loosened with a wooden spoon or suitable heat-safe utensil.
Tramontina’s stainless steel cleaning guidance recommends deglazing or simmering stuck-on residue, washing with dish soap and a soft sponge, and drying the pan to limit water spotting.
Do not plunge an extremely hot pan into cold water. A large, sudden temperature change can stress or warp cookware. Let the pan cool first.
Abrasive pads and steel wool can visibly scratch or dull polished stainless steel. That does not mean the pan has lost a special nonstick coating—bare stainless steel has no such coating—but following the manufacturer’s cleaning instructions helps preserve the finish.
Dry the cookware after washing to reduce water spots. If staining or discoloration remains, use only a cleaner that the cookware manufacturer approves for that specific finish.
When to Use a Different Pan
Stainless steel is highly versatile and is especially good for browning meat, sautéing vegetables, creating fond, deglazing, reducing sauces, and cooking foods where seeing the surface color is useful. It does not need to be replaced simply because a recipe uses high heat or sauce.
A different pan can still be more convenient in certain situations:
- Very delicate eggs: A conventional nonstick pan can require less fat and less technique for fried, scrambled, or omelet-style eggs.
- Fragile fish: Nonstick cookware can make turning thin, tender fillets easier.
- Foods that benefit from a seasoned surface: Well-seasoned cast iron or carbon steel may provide easier release for some recipes while still tolerating substantial heat.
- Recipes requiring a specific pan shape or thermal behavior: Deep braises, large batches, or long simmering tasks may be easier in a saucepan, Dutch oven, or saucepot because of capacity rather than because stainless steel itself is unsuitable.
For syrup and caramel, stainless steel can be an excellent choice because its light-colored interior makes changes in sugar color easier to see. The best pan depends on the recipe, not simply whether the ingredients are sticky.
Food Safety: Browning and easy release do not prove that meat, poultry, fish, or egg dishes are safely cooked. Use a food thermometer where appropriate. USDA guidance lists 145°F (62.8°C) plus a 3-minute rest for whole cuts of beef, pork, veal, and lamb; 160°F (71.1°C) for ground meats and egg dishes; 145°F (62.8°C) for fish; and 165°F (73.9°C) for poultry.
Frequently Asked Questions
How to Stop Sticking on Stainless Steel Pans?
Preheat the empty pan over moderate heat, add enough oil or cooking fat to coat the cooking area, then add relatively dry food without crowding. Let proteins cook long enough to brown before trying to turn them. If the oil smokes heavily, reduce the heat rather than continuing to increase the temperature.
How Do I Get My Stainless Steel Pan to Be Non-Stick?
Bare stainless steel does not become permanently nonstick like coated cookware. Instead, use a repeatable technique: preheat the pan, add an even film of fat, add the food, and wait for adequate browning before moving it. Permanent seasoning is generally unnecessary for stainless steel cookware.
Why Are My Eggs Sticking to a Stainless Steel Pan?
Egg proteins readily adhere to bare metal, and eggs are delicate enough that even modest sticking becomes obvious. Use moderate rather than extreme heat, coat the cooking area thoroughly with butter or oil, and allow the egg to set before trying to move it. If convenience matters more than browning, a nonstick pan is also a reasonable choice.
What Causes Stainless Steel to Stick?
Common causes include inadequate preheating, too little cooking fat, wet food, overcrowding, excessive temperature loss, moving proteins before their surface has set, or using heat that is so high that oil and food begin to burn. Residue left from previous cooking can also interfere with clean contact and should be removed.
Do Stainless Steel Pans Need to Be Seasoned?
Normally, no. Unlike cast iron and carbon steel, stainless steel does not require a permanent polymerized seasoning layer for ordinary cooking. Preheating and using cooking fat each time are the more important techniques. Always follow the instructions supplied with your specific cookware.
Why Does Food Still Stick Even When I Use Oil?
Oil alone cannot compensate for poor temperature control. Food may still stick if the pan is too cool, if wet ingredients rapidly lower its temperature, if the oil does not coat the full contact area, or if the food is flipped too early. Excessively high heat can also burn the oil and create sticky residue.
Conclusion
A stainless steel pan usually sticks because heat, moisture, fat, timing, or pan crowding is working against clean release. Preheat gradually, add cooking fat after the pan heats, keep the food surface reasonably dry, leave enough space between ingredients, and let proteins brown before forcing them loose. Stainless steel will never behave exactly like coated nonstick cookware, but with these habits it becomes predictable, especially for browning, searing, and building flavorful pan sauces.
Sources
- All-Clad Product Support & FAQ — stainless steel preheating, oil, heat control, food release, and seasoning guidance.
- Tramontina: How to Cook With Stainless Steel — preheating, oil timing, water testing, browning, and release technique.
- Tramontina: How to Clean a Stainless Steel Pan — deglazing, simmering stuck-on residue, washing, and drying.
- USDA Food Safety and Inspection Service — safe minimum internal cooking temperatures.
- University of Chicago Nagel Group: Leidenfrost Effect — scientific explanation of water droplets moving on a vapor layer above a hot surface.

3 thoughts on “Why Is My Stainless Steel Pan Sticking? Reasons Explained & What to Do”