
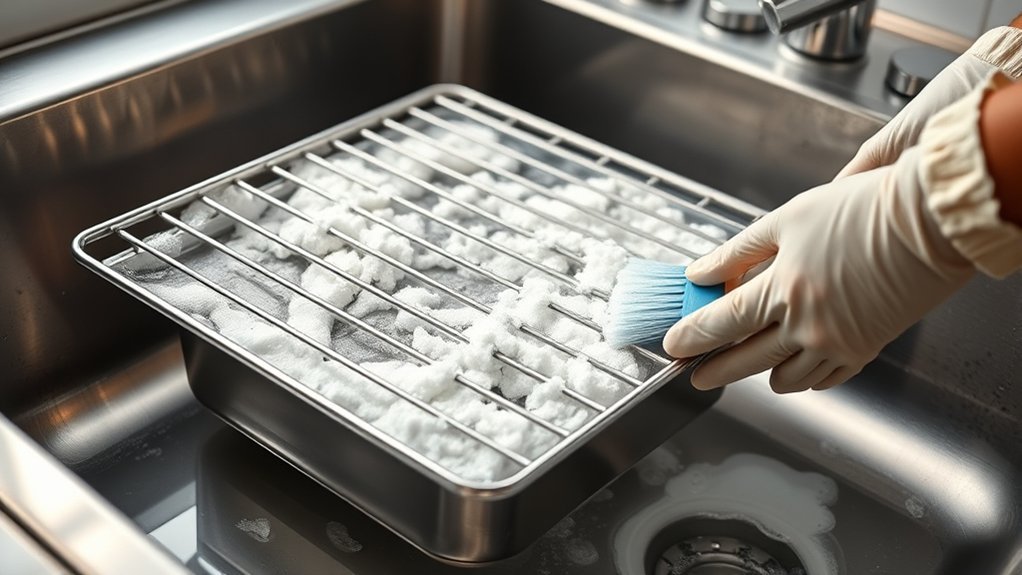
Cleaning oven racks is usually easiest when the oven is completely cool, the racks are removed, and grease is softened with warm or hot soapy water before scrubbing. The safest method depends on the rack finish and design, so check the oven manual before using steel wool, commercial oven cleaner, a self-clean cycle, or lubricant on gliding and extension racks.
Quick Answer
For most standard oven racks, let the oven cool, remove the racks, soak them in hot water with mild dish soap, scrub away loosened grease, rinse thoroughly, and dry completely. Check your owner’s manual first because porcelain-coated, self-clean-rated, telescopic, and roller racks may need different cleaners, lubrication, or self-clean instructions.
Key Takeaways
- Start with the oven off and fully cool, and remove the racks before cleaning unless your model manual specifically says otherwise.
- Mild dish soap, water, and a soft cloth or sponge are the safest starting point for many standard racks.
- Line a bathtub with old towels before soaking racks so the metal does not scratch the tub.
- Do not assume steel wool, oven cleaner, vegetable oil, or a self-clean cycle is safe for every rack finish.
- Gliding and extension racks may require model-specific cleaning and lubricant, so the owner’s manual takes priority over generic cleaning advice.
At a Glance
| Time Required | About 30 minutes of hands-on work; soaking can take 30 minutes to several hours depending on soil and the method your manufacturer allows. |
| Difficulty | Easy |
| Tools Needed | Old towels, large sink/tub/bin, soft cloth or sponge, nylon brush; optional manufacturer-approved scrubber or cleaner. |
| Cost | Usually low if you already have dish soap and cleaning cloths; specialty cleaners or rack lubricant cost extra. |
Before You Start: Check Your Rack Type
Oven racks are not all built the same. Standard chrome-plated racks, porcelain-coated self-clean racks, nickel-coated roller racks, and telescopic or extension racks can have different care instructions. GE Appliances, for example, distinguishes enamel-coated self-clean roller racks from nickel-coated racks that should not be self-cleaned.
Before using an abrasive pad, commercial cleaner, self-clean cycle, or lubricant, check the owner’s manual for your exact oven model. If you cannot confirm the rack type, start with mild dish soap, water, and a soft sponge or cloth.
Warning: Clean only when the oven and racks are cool. Never mix cleaning chemicals, and never combine a commercial oven cleaner with a self-clean cycle. Follow the cleaner label and your oven manual if their instructions are more restrictive than this guide.
How to Remove Oven Racks
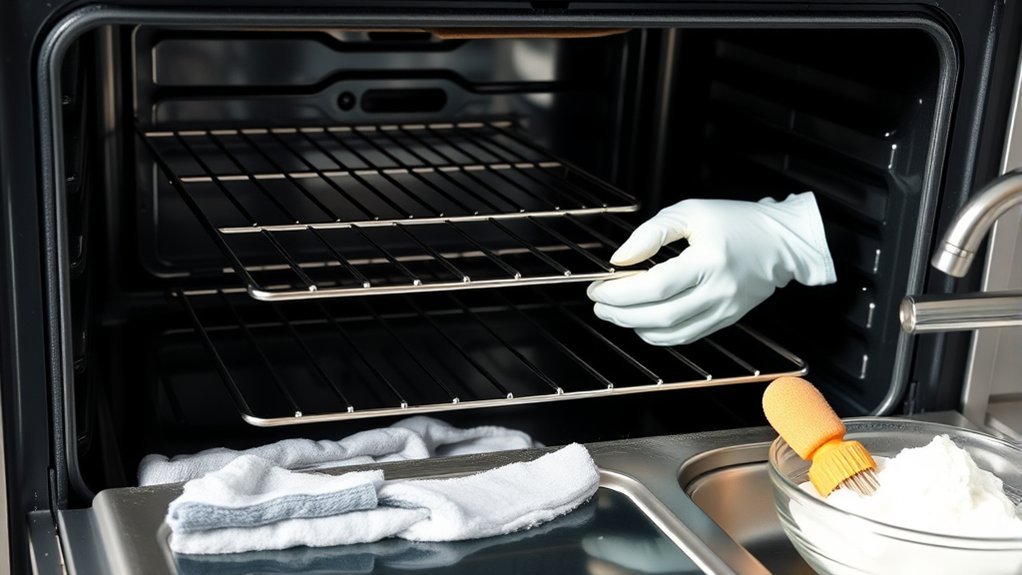
To remove oven racks, first make sure the oven is off, empty, and cool. For many standard racks, pull the rack forward until it reaches the stop, then raise the front edge and lift or pull it free. Whirlpool describes this pull-to-the-stop-and-lift method for its standard racks, while some GE models use a slightly different stop-lock arrangement, so the model manual should settle any difference.
Keep a secure grip on both sides so the rack does not slip or scratch the oven liner. If resistance is felt, stop and check the alignment instead of forcing the rack.
Pull the cool rack to its stop, lift only as your manual directs, and never force a rack that catches on the supports.
Most standard oven racks do not need to be disassembled for cleaning. If your rack has telescoping rails, bearings, removable sections, stop balls, or other moving parts, do not use a generic “rotate past the stop” disassembly method. Follow the instructions for that exact rack assembly so the slides and stops are not bent or stripped of their lubricant.
How to Soak Oven Racks
For standard removable racks, fill a large utility sink, basin, storage bin, or bathtub with enough hot water to cover the racks, then add mild dish soap. Maytag recommends lining a bathtub with old towels to help prevent scratches and soaking dirty racks in hot water with mild detergent.
Fully submerge each compatible rack so water reaches the greasy bars and corners. A 30-minute soak can soften light residue, but heavily soiled racks may need a longer soak. Some manufacturer guidance uses two hours or even overnight for stubborn buildup, so there is no single soak time that fits every condition.
If you want to add baking soda, first check that the rack finish tolerates a mild abrasive. Baking soda can help with greasy residue, but mild dish soap and water are the safer default when the rack finish is uncertain.
After soaking, lift each rack out carefully and let excess water drain before scrubbing. The goal is to soften baked-on grease so less force is needed later.
Pro Tip: If you use a bathtub, place old towels under the racks before adding water. This protects enamel, acrylic, or porcelain surfaces from scratches caused by sliding metal.
How to Scrub Oven Racks
Once the racks have soaked, start with a non-abrasive sponge, nylon brush, or soft scrubber. Work from one end to the other and pay extra attention to corners, wire intersections, and baked-on grease.
Use firm but controlled pressure. If a stain does not release, re-soak it or move to a method that your rack manufacturer approves instead of immediately reaching for the harshest abrasive.
- Scrub each bar and intersection for full coverage.
- Treat stubborn spots with extra passes or a longer soak.
- Use steel wool or a soap-filled steel-wool pad only when the oven manufacturer says it is suitable for that rack type.
Whirlpool allows steel wool for harder-to-remove stains on certain standard racks, but that does not make steel wool universal for coated, polished, telescopic, or specialty racks.
How to Rinse Oven Racks
Rinse the racks thoroughly with clean warm water after scrubbing so detergent, loosened grease, and any approved cleaning product are removed. Normal household faucet or shower flow is enough; a pressure washer or other high-pressure cleaning tool is unnecessary.
Use a clean sponge or cloth along corners and bar intersections where cleaner can remain. Continue rinsing until the surface feels clean and no visible foam or residue remains.
Thorough rinsing matters most after abrasive or commercial products because residue can bake onto the rack the next time the oven heats.
How to Dry Oven Racks Completely
After rinsing, set the racks on clean, dry towels and remove as much water as possible. Drying the racks thoroughly before reinstalling them helps reduce the chance of corrosion and keeps water from sitting in joints, welds, or slide mechanisms.
Racks can also air dry in a well-ventilated area after towel drying. Do not reinstall them until they are dry to the touch, including corners and crevices.
Towel Drying Method
Use a clean, dry towel to wipe every bar, edge, joint, and seam. A microfiber towel works well because it absorbs water quickly without adding abrasion.
- Wipe the top and bottom of each bar.
- Refold the towel as it becomes damp.
- Check welded joints, corners, and moving parts for trapped water.
Do not return the racks to the oven while obvious moisture remains.
Air Drying Time
There is no reliable universal 1-, 2-, or 3-hour drying rule. Drying time changes with room temperature, humidity, airflow, rack design, and how thoroughly the racks were towel-dried. Use dryness, not a timer, as the deciding factor.
| Condition | Drying time | Action |
|---|---|---|
| Low humidity / good airflow | Until fully dry | Check joints and undersides |
| Moderate humidity | May take longer | Rotate racks for airflow |
| High humidity | Longer still | Improve ventilation or towel-dry again |
| Residual moisture | Not ready | Wipe again |
| Fully dry | Ready | Reinstall according to the manual |
Preventing Rust Formation
To help prevent rust or corrosion, rinse off cleaning products completely and dry the racks before reinstalling or storing them. Do not leave cleaned racks sitting wet in a sink or humid cabinet.
A light coating of vegetable oil should not be treated as a general rust-proofing step. Some manufacturers recommend a very small amount of vegetable oil on the side edges or rack guides specifically to restore sliding after cleaning or self-cleaning. GE gives this advice for flat racks, while extension racks may require a dedicated graphite lubricant instead.
- Rinse off all cleanser completely.
- Towel-dry every surface and joint.
- Air dry fully before reinstalling or storing.
- Use only the lubricant your oven manufacturer specifies for that rack type.
How to Reassemble Oven Racks
For a standard one-piece rack, reinstallation is usually simpler than “reassembly.” Hold the rack level, place it on the correct supports, and slide it back until the stop-lock features sit in their normal position. Make sure the rack is level and stable before placing cookware on it.
If your oven uses a multi-piece telescopic or roller rack, the original instructions about holding a “top rack” diagonally across a “bottom rack,” rotating one side past a stop ball, or placing back edges under a guide are not universal. Those details should be used only if they appear in the manual for your exact rack assembly.
After reinstalling, pull the rack in and out once or twice while the oven is cool. It should move smoothly without catching, twisting, or lifting from the supports. If it binds, remove it and verify orientation and rack position before trying again.
Can You Clean Oven Racks in Self-Clean Mode?
Sometimes, but only when the oven manufacturer says the rack is self-clean rated. Traditional high-temperature self-clean cycles commonly reach roughly 800°F to 900°F; Maytag states 800°F to 900°F, while GE says some cycles can reach about 885°F.
Many manufacturers tell owners to remove ordinary racks before self-cleaning because the heat can discolor them and make them harder to slide. However, GE also sells porcelain-coated self-clean racks designed to remain in certain ovens during the cycle.
- Check the owner’s manual for the exact rack type.
- Remove standard racks if the manual says to remove them.
- Leave in only racks specifically identified as self-clean or no-scrub racks for that model.
- After the cycle and full cooldown, use only the manufacturer-approved lubricant if sliding becomes difficult.
If a standard chrome rack was accidentally left in during self-clean, discoloration or a dull finish can be permanent even if the rack still works normally.
5 Effective Ways to Clean Oven Racks
The best method depends on rack material, soil level, and manufacturer instructions. Start mild and escalate only when needed.
Baking Soda Paste
A baking soda paste can help loosen greasy, baked-on residue on a compatible removable rack. Mix baking soda with just enough water to make a spreadable paste; roughly three parts baking soda to one part water is a practical starting consistency.
Apply the paste to dirty areas and let it sit briefly before scrubbing with a non-scratch pad. A 15- to 30-minute contact time is a reasonable household-cleaning range, but longer is not automatically better if the rack has a sensitive finish.
- Coat the dirty spots with the paste.
- Let it soften the residue.
- Scrub gently and rinse thoroughly.
Vinegar can make baking soda fizz, but the fizz should not be described as automatically giving “extra cleaning power.” The acid and base react with each other, so use vinegar mainly as a separate rinse or only when the surface and manufacturer allow it.
Dish Soap Soak
For many standard racks, a dish soap soak is the best first choice. Fill a lined tub, utility sink, or large bin with hot water and mild dish soap, then soak the racks until the grease softens.
| Step | Action |
|---|---|
| Soak | Start with 30 minutes; extend to a few hours for heavier soil if the rack can be immersed |
| Scrub | Use a soft sponge or nylon brush first |
| Rinse | Use clean warm water until residue is gone |
| Dry | Towel-dry, then air dry until fully dry |
For very dirty standard racks, manufacturer guides from Maytag and Whirlpool describe longer soaking or more aggressive scrubbing options. Specialty gliding racks should follow their own manual rather than an automatic overnight soak.
Steel-Wool or Soap Pad
Steel wool can remove stubborn residue from some standard metal racks, and Whirlpool lists it as an option for harder-to-remove stains on certain racks. Use it only when the oven manufacturer approves it. It can scratch or dull finishes that were not designed for abrasive cleaning.
Work lightly on the stained area, then rinse and dry the rack completely. Do not use a metal abrasive on telescopic slides, bearings, or decorative/coated surfaces unless the manual specifically allows it.
Cleaner And Polish
A cleaner-and-polish product can help with stubborn discoloration when the product label lists the rack’s material as compatible and the rack can be rinsed thoroughly.
For example, Bar Keepers Friend’s current cookware-cleanser directions say to wet the surface, rub gently, and rinse within one minute. The earlier 45- to 60-minute dwell time is not consistent with the manufacturer’s current directions. Do not leave an oxalic-acid cleanser sitting on a rack for an hour.
Test a small area first, avoid moving rails and bearings unless approved, and rinse until no cleanser remains.
Commercial Oven Cleaner
Commercial oven cleaner can be effective on compatible standard racks, but this is the method where label and appliance restrictions matter most. Some cleaner labels exclude aluminum, painted surfaces, or certain oven types, and some rack finishes may discolor.
If both the oven manual and the cleaner label permit use on the rack, clean it outside the oven or as the label directs, use the specified personal protective equipment, provide ventilation, and rinse thoroughly. Easy-Off Fume Free labeling, for example, says to use the product only as directed and warns against use on aluminum or painted surfaces.
How Often to Clean Oven Racks
There is no universal manufacturer rule that every oven rack must be deep-cleaned every two or three months. A better schedule is based on visible buildup, spills, smoke, odor, and how often the oven is used.
For many households, checking the racks every few months is reasonable. Heavy roasting or frequent spillovers may justify a monthly inspection, while a lightly used oven may need deep cleaning much less often.
Clean sooner when grease is visible, food has spilled onto the rack, the rack smokes during use, or sliding becomes rough.
Wiping fresh spills after the oven cools can reduce the need for aggressive scrubbing later and can help preserve the rack finish.
How to Keep Oven Racks Cleaner Longer
Keeping oven racks cleaner starts with preventing drips and removing spills before they carbonize. Use oven-safe cookware sized to contain food, and place a rimmed sheet pan under dishes that are likely to bubble over when your recipe and oven setup allow it.
- Use oven-safe cookware and avoid placing food directly on bare racks unless the cooking method calls for it.
- After the oven cools, wipe fresh splatters from compatible racks with a damp cloth.
- Deep-clean the racks when visible buildup appears rather than waiting for thick carbon deposits.
Do not line the oven floor or racks with foil unless the oven manual specifically permits it. Many manufacturers warn that foil can interfere with heat flow or damage oven surfaces.
Special Rack Types and What to Avoid
Gliding, roller, and extension racks: These may contain bearings, coated rails, or manufacturer-applied lubricant. Do not assume they can be soaked overnight, scrubbed with steel wool, or lubricated with cooking oil. GE, for example, specifies graphite lubricant for certain extension-rack tracks.
Porcelain-coated or self-clean racks: Some are designed to stay in during self-clean, while shiny standard chrome or nickel racks often are not. Identify the rack from the manual, not from appearance alone.
Unknown rack finish: Use mild dish soap, water, and a soft cloth or sponge until you can confirm the material and care instructions.
Note: A dull gray rack after self-cleaning may be permanently discolored rather than still dirty. Repeated aggressive polishing can remove more finish without restoring the original shine.
Troubleshooting Stubborn Grease, Rust, and Sticking
Grease remains after soaking: Re-soak the rack, use a nylon brush, or move to a manufacturer-approved abrasive or cleaner. Avoid stacking multiple harsh products.
Rack looks rusty: First determine whether the brown color is actual corrosion, baked grease, or discoloration from heat or oil. If chrome is flaking, pitted, or structurally damaged, replacement may be more appropriate than aggressive refinishing.
Rack is hard to slide: Clean the rack supports and side edges first. Some flat racks can use a tiny amount of vegetable oil on the side edges, while some extension racks require graphite lubricant. Never oil bearings or rails unless the manufacturer tells you to.
Can Oven Racks Go in the Dishwasher?
Do not assume full-size oven racks are dishwasher-safe. They can be too large for the machine, may damage dishwasher components, and specialty finishes or sliding mechanisms may not tolerate the cycle. Unless your oven manual specifically says the rack can go in the dishwasher, hand-washing is the safer choice.
Frequently Asked Questions
How Do You Get Brown Stuff off Oven Racks?
Start with a hot-water and mild-dish-soap soak, then scrub with a soft sponge or nylon brush. If brown residue remains, use a baking soda paste or a manufacturer-approved abrasive or cleaner for that rack finish. Rinse thoroughly and dry completely. Brown discoloration left after a self-clean cycle may be permanent finish change rather than removable grime.
Can I Clean My Oven Racks With Easy-Off Oven Cleaner?
Possibly, but only if the oven-rack manufacturer and the exact Easy-Off label both permit it. Easy-Off formulas have different restrictions, and some labels warn against aluminum or painted surfaces. Remove the rack and clean it separately as directed, use required protective gear and ventilation, and rinse thoroughly. Do not use oven cleaner during a self-clean cycle.
Does Dawn Powerwash Clean Oven Racks?
A grease-cutting dish spray can loosen grease on some removable standard racks, but rack finishes vary and manufacturer guidance generally starts with mild dish soap and water. If you use Dawn Powerwash on a removed rack, first make sure the oven manual does not prohibit it, test a small area, avoid specialty slide mechanisms, and rinse the rack very thoroughly.
How Do I Make My Oven Racks Shiny Again?
First remove grease with the least abrasive method that works. On some standard racks, a manufacturer-approved steel-wool soap pad can remove stubborn residue. If a chrome rack was dulled by a self-clean cycle, the original luster may not fully return. Vegetable oil is sometimes recommended in tiny amounts on side edges to improve sliding, not as a polish for the entire rack.
Should I Use Baking Soda and Vinegar Together on Oven Racks?
They will fizz when mixed, but the acid and base also neutralize each other. For cleaning, a baking soda paste can be used first on a compatible rack, then rinsed away. If vinegar is allowed on the rack finish, it is more useful as a separate light rinse than as a claim of stronger combined cleaning power.
What Should I Do if an Oven Rack Is Hard to Slide?
Clean debris from the rack edges and oven supports first. For some flat racks, manufacturers recommend a very light coating of vegetable oil on the side edges or guides. Extension or roller racks may require a specific graphite lubricant instead. Use only the lubricant listed for your rack design.
Can I Put Oven Racks in the Dishwasher?
Only if the owner’s manual explicitly says the rack is dishwasher-safe. Full-size racks may not fit safely, and specialty coatings, rails, bearings, or lubricants may not tolerate a dishwasher cycle. Hand-washing is the safer default when the manual is silent.
Conclusion
Clean oven racks make the oven easier to use and reduce the chance that old grease or food residue will smoke during cooking. The most dependable routine is simple: cool the oven, identify the rack type, remove compatible racks, soak with mild dish soap, scrub with the least abrasive tool that works, rinse well, and dry fully. For self-clean racks, gliding racks, commercial cleaners, or lubricants, the owner’s manual and product label should always outrank a generic cleaning hack.
Sources
- Whirlpool Product Help — Cleaning the Oven Racks — standard rack cleaning, removal, drying, steel wool, and glide care.
- Maytag — How to Clean an Oven — bathtub protection, detergent soaking, rinsing, and thorough drying.
- GE Appliances — Cleaning Standard Oven Racks in Self-Clean Ovens — chrome versus self-clean rack guidance and discoloration.
- GE Appliances — Roller / Extension Racks — self-clean compatibility and graphite lubricant for specialty racks.
- Reckitt SmartLabel — Easy-Off Fume Free Oven Cleaner — label precautions, excluded surfaces, and use directions.
- Bar Keepers Friend — Cookware Cleanser & Polish — current contact-time and rinsing directions.

1 thought on “How to Clean Oven Racks: Easy Step-by-Step Guide”