
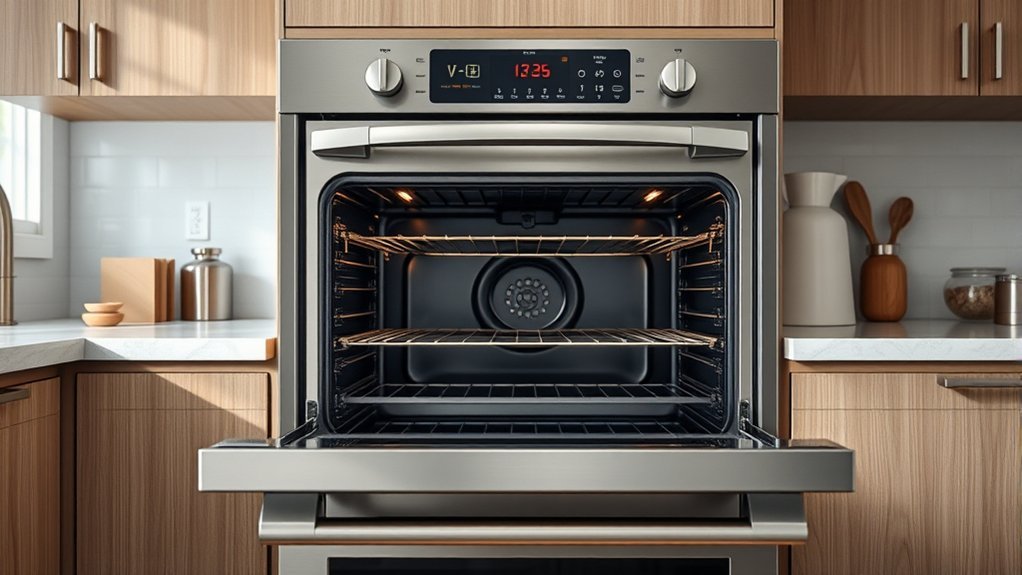
The broiler is usually a high-heat element or burner at the top of the oven cavity, although some ranges place the broiler in a separate drawer below the main oven. It cooks with direct radiant heat, making it useful for browning, searing, melting cheese, toasting, and quickly cooking thin foods. Because broiler design varies, the owner’s manual should be the final reference for rack position, preheating, and whether the oven door stays open or closed.
Quick Answer
The broiler is usually a heating element at the top of the oven cavity, but some ranges place the broiler in a separate drawer below the oven. Look for a Broil setting and check the owner’s manual before using a lower drawer, because it may instead be storage or warming space.
Key Takeaways
- Most broilers are at the top of the oven cavity, but some ranges use a separate lower broiler drawer.
- Do not assume the drawer below an oven is a broiler; it may be a warming or storage drawer.
- Use a broiler pan, shallow broiler-safe metal pan, or appropriately rated cast-iron cookware instead of ordinary glass bakeware.
- Rack position, preheating, Hi/Lo settings, and oven-door position vary by model, so follow the appliance manual.
- Watch food continuously and use a food thermometer for meat and poultry instead of judging safety only by color or texture.
At a Glance
| Time Required | Usually a few minutes for browning or finishing; total cooking time depends on the food, thickness, rack position, and oven. |
| Difficulty | Easy, but close supervision is required because food can brown or burn quickly. |
| Tools Needed | Broiler-safe metal pan or cast iron, tongs or spatula, oven mitts, and a food thermometer for meat or poultry. |
| Cost | Usually no added cost if suitable cookware and a thermometer are already available. |
Where Is the Broiler?
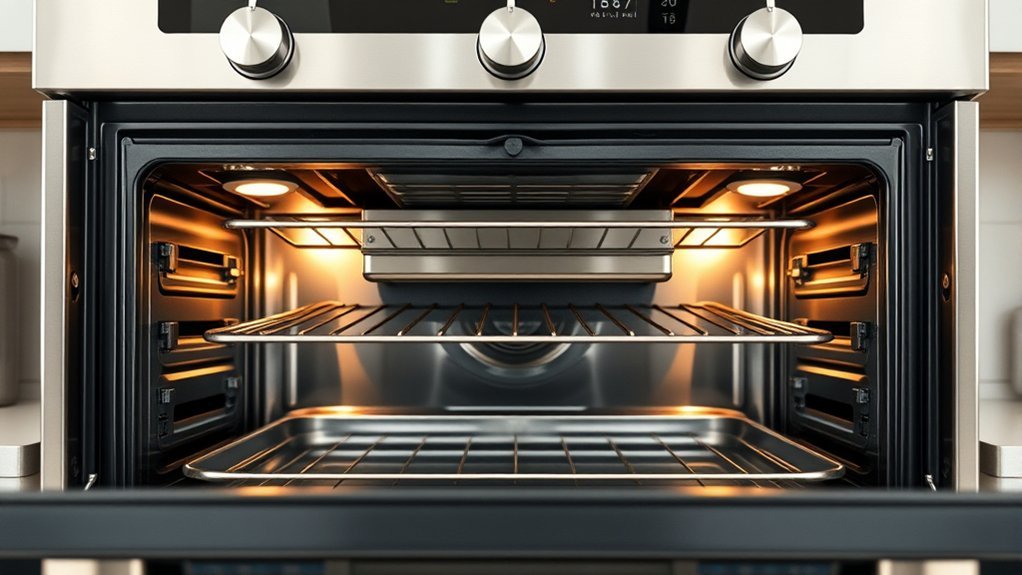
The broiler is most commonly located at the top of the main oven cavity, where an electric heating element or gas burner directs strong radiant heat toward the food. Some ranges instead use a separate broiler compartment or drawer underneath the main oven.
Broiler location, rack position, preheating, and oven-door position can vary by model, so the owner’s manual is the final authority for your appliance.
Whirlpool explains that most ovens place the broiler inside the main oven or in a separate compartment underneath. In a top-mounted design, the broiler element is normally visible or positioned above the highest rack locations. A lower broiler drawer places the food in a shallow compartment beneath the main cavity.
Electric broilers use high-output heating elements, while gas models use a gas burner. Both create concentrated radiant heat that can brown, char, toast, melt, or finish food rapidly.
Note: A drawer below the oven is not automatically a broiler. Depending on the range, it may be a broiler drawer, warming drawer, or storage drawer. Check the control panel, model documentation, or owner’s manual before heating anything in it.
How to Find the Broiler Setting?
The broiler setting is normally selected from the oven control panel. Look for a control labeled Broil, Broil Hi/Lo, or a broiling symbol. Some ranges use a dedicated button, while others place Broil inside a cooking-mode menu or on a mechanical selector dial.
If the control is not obvious, check the oven manual using the appliance model number. The manual will identify the broiler location, rack positions, door position, available heat settings, and whether preheating is recommended.
Locate Broiler Controls
Start at the control panel. On electronically controlled ovens, Broil may be a dedicated keypad or touchscreen mode. Mechanical ovens may use a temperature or function knob. If the oven offers High and Low broiling, choose the level recommended for the food and appliance.
Do not assume every oven has two broiler levels. On models equipped with Hi/Lo Broil, High is generally intended for faster surface browning, while Low slows the process for foods that need more time to heat through. For example, GE documents separate Hi and Lo Broil settings on many of its electronically controlled ovens.
Check Oven Manual
The owner’s manual is especially important for broiling because recommendations differ among appliances. Check it before assuming that the door should stay open, that the top rack is always correct, or that the broiler must always be preheated.
- Confirm where the broiler is located.
- Check whether the appliance offers High, Low, or adjustable broil heat.
- Find the recommended rack position for the food.
- Follow the model-specific instruction for the oven door.
- Check whether the manufacturer recommends preheating.
If the manual specifies a broiler pan, grid, rack position, or maximum cookware size, follow those directions.
How to Use an Oven Broiler Step by Step
Broiling is simple once the appliance setup is confirmed. The exact sequence can vary, but this general workflow works for most ovens when combined with the owner’s manual.
- Check the manual first. Confirm broiler location, door position, rack recommendation, and preheating requirement.
- Position the rack before heating. Place thin foods closer to the heat and thicker foods farther away, while staying within the manufacturer’s recommended positions.
- Choose broiler-safe cookware. Use a broiler pan, shallow metal baking pan, or broiler-rated cast iron.
- Select Broil. Choose High or Low if your appliance provides those options. Preheat only when the manual or recipe calls for it.
- Add the food and watch continuously. Broiling can change from browned to burned quickly. Turn food when the recipe requires it.
- Check doneness. For meat and poultry, use a food thermometer rather than relying only on surface color.
Pro Tip: If the surface is browning before the center is ready, move the rack farther from the broiler or use a lower broil setting if your oven provides one.
Where Should You Place the Rack?
Rack placement controls how strongly the broiler heats the food. A rack closer to the broiler promotes faster browning and searing. Moving the rack farther away slows surface browning and gives thicker food more time to heat through.
The correct rack number varies by oven, so use the rack-position chart in the owner’s manual whenever one is provided. A food that sits safely several inches from the element in one oven may be too close in another.
| Food | General Rack Approach | Goal |
|---|---|---|
| Thin fish fillets | Upper rack, at the manual-recommended distance | Fast browning without prolonged cooking |
| Chicken cutlets or thin chops | Upper or upper-middle rack | Quick sear while cooking through |
| Thicker steaks, chops, or roast surfaces being finished | Farther from the element | Reduce surface scorching before the center is ready |
| Vegetables | Upper or middle rack, depending on size | Brown edges while maintaining texture |
| Cheese toppings or toast | Upper rack with close supervision | Rapid melting and browning |
Watch the food throughout broiling because small changes in distance can noticeably change browning time.
What Cookware Works Best Under the Broiler?
Broiler-safe metal cookware is the most dependable choice because it can tolerate strong direct heat. A broiler pan with a slotted grid is especially useful for meat because drippings fall into the lower pan instead of remaining directly around the food.
Shallow sheet pans and metal baking pans can also work when their manufacturer permits broiler use. Cast iron is useful for steaks, vegetables, and other foods that benefit from strong heat retention, provided the entire pan—including its handle—is rated for the broiler.
Avoid ordinary glass bakeware unless its manufacturer specifically approves broiler use. Pyrex explicitly states that its glassware should not be used under a broiler because direct heat can damage the glass.
For nonstick cookware, check the product instructions rather than assuming every coated pan is broiler-safe. Coatings, handles, silicone parts, and temperature limits differ among products.
- Use a broiler pan and grid when recommended by the oven manufacturer.
- Choose shallow metal cookware for foods that need direct surface heat.
- Use cast iron only when the pan and handle are rated for broiling.
- Avoid cookware that the manufacturer does not approve for direct broiler heat.
What Foods Cook Best Under the Broiler?
Broiling works best with foods that benefit from intense surface heat. Thin proteins, vegetables, fruit, bread, cheese toppings, casseroles, and already-cooked dishes that need browning are common choices.
Because the heat is concentrated from one direction, thin or relatively flat foods are easier to cook evenly than very thick items.
Thin Proteins
Steaks, pork chops, fish fillets, chicken cutlets, and shrimp can develop strong browning under a broiler. Drying the food’s surface before broiling can improve browning, while a broiler pan or rack can keep meat above rendered fat.
- Position the food at the rack distance recommended for your oven.
- Watch continuously because browning can occur rapidly.
- Turn the food when the recipe calls for even cooking on both sides.
- Use a food thermometer to verify meat or poultry is safely cooked.
For food safety, FoodSafety.gov recommends minimum internal temperatures measured with a food thermometer.
| Food | Safe Minimum Internal Temperature |
|---|---|
| Beef, pork, veal, and lamb steaks/chops/roasts | 145°F (63°C), followed by a 3-minute rest |
| Ground meat | 160°F (71°C) |
| Chicken and other poultry | 165°F (74°C) |
| Fish | 145°F (63°C) |
Vegetables And Fruit
Vegetables and fruit can brown quickly under direct heat. Bell peppers, asparagus, zucchini, tomatoes, eggplant, Brussels sprouts, pineapple, peaches, and bananas are good candidates.
Cut pieces to a similar size so they brown at roughly the same rate. Arrange them in a single layer with some space between pieces, then monitor them closely. Foods with natural sugars can darken especially quickly.
Vegetables can be broiled until their edges brown and their interiors reach the desired tenderness. Fruit usually needs only enough time to caramelize its surface without turning mushy.
Melting And Toasting
The broiler is useful when a dish is already cooked and only its surface needs finishing. Thin, exposed surfaces brown quickly without requiring the entire dish to spend much longer in the oven.
Common uses include:
- Melting and browning cheese on nachos, casseroles, lasagna, or gratins.
- Toasting garlic bread, bagels, bruschetta, and flatbreads.
- Browning meringue or marshmallow toppings.
- Adding char to sliced vegetables and fruit.
These foods can change rapidly under the broiler, so stay close and remove them as soon as the desired color develops.
Broiler High vs. Low Settings
Some ovens provide High and Low Broil, while others offer only one Broil mode or permit an adjustable broil temperature.
On ovens equipped with both settings, High Broil is generally used for faster browning, searing, toasting, and thinner foods. Low Broil slows surface browning and can help with thicker foods that require more time before the center is ready.
High Broil favors fast surface browning; Low Broil gives thicker foods more time to cook before the exterior becomes too dark.
The actual temperature or burner-cycling behavior is appliance-specific. For example, GE describes Hi Broil at 550°F and Lo Broil at 450°F on many equipped models, but those numbers should not be applied to every brand or oven.
Rack position remains important with either setting. If food browns too quickly, increase its distance from the heating element or choose a lower setting when available.
How to Broil Safely?
Safe broiling depends on suitable cookware, the correct rack position, close supervision, and following the appliance manufacturer’s directions. Broilers generate intense heat, so food should never be left unattended.
Warning: Do not automatically leave the oven door open while broiling. Door requirements vary by appliance, and many modern ovens—including gas models and many current electric ovens—are designed for closed-door broiling. Follow the owner’s manual for your exact model.
GE notes that most of its currently produced electric ranges use closed-door broiling and that gas ranges should be broiled with the door closed. Other designs, particularly some older electric ovens, may specify a broil-stop position. This is why model-specific instructions matter.
- Use cookware that is explicitly suitable for broiler heat.
- Position the rack and pan as recommended by the appliance manufacturer.
- Keep flammable items away from the oven and broiling area.
- Stay nearby and watch food throughout the broiling cycle.
- Use oven mitts when moving racks, pans, or hot food.
- Keep the broiler pan and oven reasonably clean so accumulated grease and food residue do not add unnecessary smoke or fire risk.
If an oven fire occurs, U.S. Fire Administration guidance is to turn the oven off and keep the door closed. If flames escape the oven, leave the home and call emergency services from outside. Do not open the oven simply to inspect a contained fire.
Common Broiler Mistakes and Fixes
Most broiling problems come from incorrect rack placement, unsuitable cookware, lack of supervision, or applying instructions from another oven model. These fixes address the most common problems.
| Mistake | Risk or Result | Fix |
|---|---|---|
| Leaving food unattended | Burning or fire | Stay nearby and check continuously |
| Using ordinary glass or unapproved cookware | Damage or breakage | Use cookware specifically rated for broiling |
| Food too close to the element | Scorched exterior before the center is ready | Move the rack farther from the heat |
| Wrong High/Low setting | Too-fast or too-slow browning | Match the setting to food thickness and the manual |
| Assuming preheating is always required | Unnecessary heating or inconsistent results | Follow the model manual and recipe |
| Guessing whether the oven door stays open | Poor performance or unsafe operation | Use the door position specified for the oven model |
| Judging meat only by color or texture | Undercooked food | Check internal temperature with a food thermometer |
Once you know the correct rack position, cookware, door position, and heat setting for your appliance, broiling becomes much more predictable.
Frequently Asked Questions
What Does the Broiler Look Like?
In many electric ovens, the broiler is a visible heating element near the ceiling of the oven cavity. Gas ovens may use a gas broiler burner in the same general area. Other ranges have a shallow broiler compartment below the main oven. The exact appearance varies, so consult the appliance manual if the broiler is not obvious.
What Oven Setting Is Broil?
Broil is the cooking mode that directs intense radiant heat toward the surface of food. The control may simply say “Broil,” or the oven may offer High and Low Broil. There is no universal broiler temperature for every oven, so use the manufacturer’s instructions for the specific model.
Is the Drawer Under the Oven a Broiler?
Possibly, but not necessarily. The drawer below a range may be a broiler compartment, warming drawer, or ordinary storage drawer. Do not identify it by appearance alone. Check the control panel and owner’s manual for the model before using the drawer for cooking.
Does Every Oven Have a Broiler?
No. Many full-size ranges and wall ovens include a broiler, but some compact or specialty appliances may not. If there is no Broil control and no broiler information in the appliance specifications or manual, the oven may not provide that function.
Should the Oven Door Be Open or Closed When Broiling?
Follow the oven manual. Many newer ovens are designed for closed-door broiling, and some models will switch the broil element off when the door is open. Some older electric ovens use a partially open broil-stop position. Gas ranges commonly require the door to remain closed.
Do You Have to Preheat the Broiler?
Not in every oven. Some manufacturers and recipes recommend a brief broiler preheat for stronger initial browning, while other broiler designs do not require one. Use the appliance manual and recipe instead of assuming that every broiler should be preheated.
Sources
- Whirlpool — What Is a Broiler? — broiler location, cookware, and general operation.
- GE Appliances — Oven Door Position During Broil — open- versus closed-door broiling guidance.
- GE Appliances — Hi and Lo Broil Feature — High and Low Broil behavior on equipped GE models.
- FoodSafety.gov — Safe Minimum Internal Temperatures — thermometer-based safe cooking temperatures.
- Pyrex — Frequently Asked Questions — restriction against using Pyrex glassware under a broiler.
- U.S. Fire Administration — Cooking Fire Safety — supervision and oven-fire safety guidance.
Conclusion
In most ovens, the broiler is either a heating element or burner at the top of the main oven cavity or a separate broiler compartment below it. Once you identify the correct Broil control, rack position, cookware, door position, and preheating instructions for your model, the broiler is useful for quickly browning meats, vegetables, bread, cheese toppings, and finished dishes.
The most important rule is not to rely on assumptions from another oven. Follow the owner’s manual, stay near the appliance while broiling, use broiler-safe cookware, and check meat or poultry with a food thermometer. With those precautions, intense broiler heat can deliver fast browning and crisp surfaces without unnecessary burning or safety risks.

3 thoughts on “Where Is the Broiler on an Oven? Complete Guide”