Have you ever wondered how a simple roasting rack can elevate your cooking? A well-designed rack not only improves airflow around your food but also guarantees even cooking and enhanced flavor. Fortunately, you don’t need to buy one; making your own can be quick and easy. In this guide, you’ll discover various methods to create a functional roasting rack using everyday materials that you might already have at home. Let’s explore your options.
Understanding the Importance of a Roasting Rack
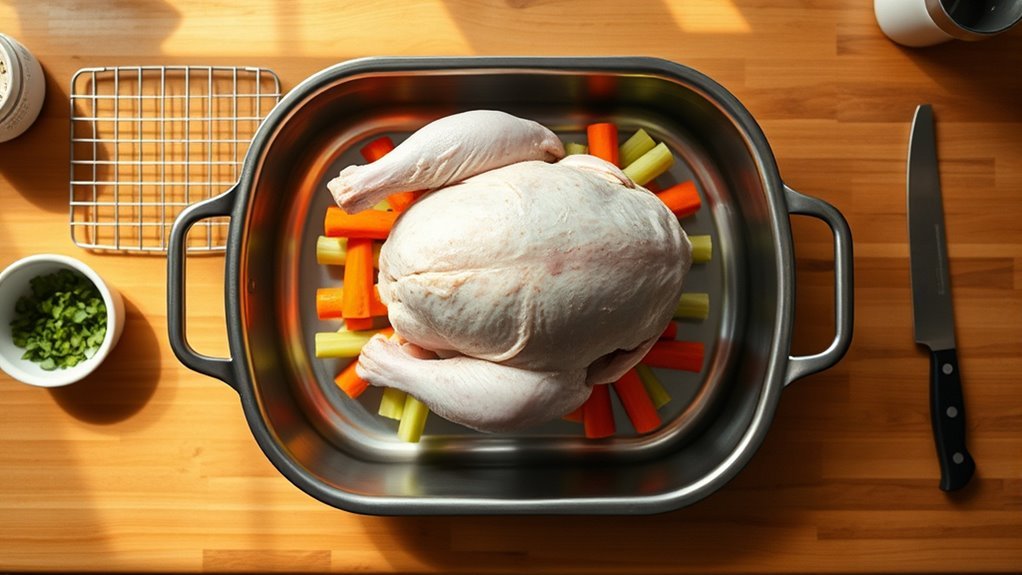
A roasting rack is an essential tool for achieving perfectly cooked meats. By elevating your meat above the pan’s bottom, it promotes even cooking and guarantees proper heat circulation. This prevents direct contact with the hot metal, which can lead to burning.
Plus, the rack allows excess fat to drain away, resulting in healthier meals and crispier skin on your turkey or roast.
With the right spacing of 2-3 inches between the meat and the pan, you’ll optimize air circulation and moisture retention. This setup simplifies the roasting process, eliminating the need to turn large cuts of meat during cooking.
Additionally, using a roasting rack enhances the drippings collected in the pan, perfect for creating flavorful gravies and sauces. Embrace this handy tool, and you’ll transform your roasting experience while enjoying liberating culinary delights.
Quick and Easy DIY Foil Rack
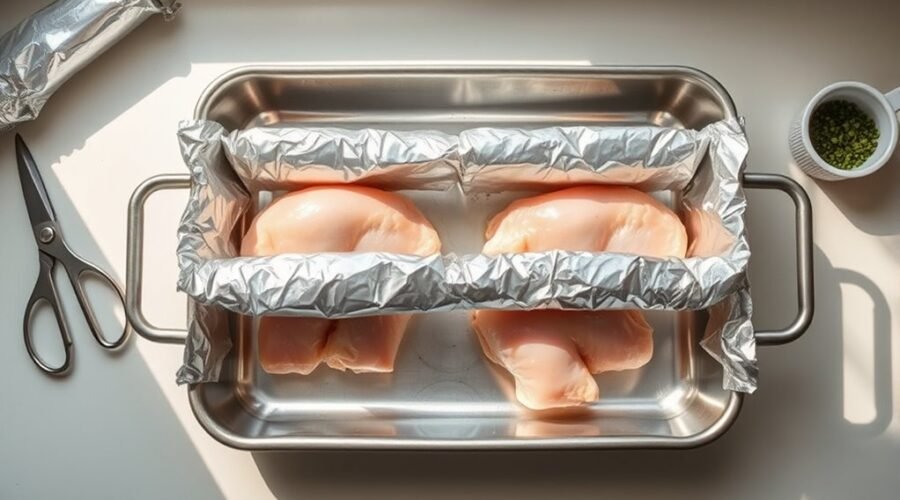
Creating a DIY foil rack is a simple and effective way to enhance your roasting experience. Start by taking a long sheet of aluminum foil and scrunching it into a thick rope. This rope serves as the base for supporting your turkey.
Shape the scrunched foil into a spiral or figure 8 to provide stability and elevate the turkey above the roasting pan. For added height, layer additional sheets of foil, ensuring your structure can support the turkey’s weight during cooking.
This method not only prevents the turkey’s bottom from burning but also promotes even cooking and moisture retention.
Plus, the versatility of the foil rack means you can use it for roasting other meats, making it a practical solution for various cooking needs.
The foil rack’s versatility makes it ideal for roasting various meats, enhancing your cooking experience.
With this quick and easy DIY foil rack, you’ll elevate your roasting game and enjoy delicious results every time.
Crafting a Chopstick Rack: An Innovative Approach
While you might be surprised by the versatility of everyday items, using chopsticks to craft a roasting rack can elevate your cooking game.
Start by gathering 6-12 pairs of wooden takeout chopsticks. Arrange them in a grid pattern, similar to tic-tac-toe, ensuring they’re spaced to support the size of your meat. Aim for a height of at least three layers of chopsticks for stability and to prevent tipping.
For added support, tie the corners of your chopstick grid with kitchen twine or unwaxed dental floss.
This DIY chopstick rack not only saves you money but also enhances air circulation, promoting even cooking and achieving that perfect crisp skin on your roast.
Creating an Edible Roasting Rack With Vegetables
Transforming leftover vegetables into an edible roasting rack can elevate your turkey dinner while minimizing waste. Start by chopping celery, onions, and carrots into large chunks. These will form a sturdy base for your turkey.
Adding halved potatoes not only enhances the flavor but also enriches the drippings for your gravy. Verify all vegetables are cut to a uniform height for stability.
Arrange these vegetable chunks in a single layer at the bottom of your roasting pan. This setup prevents the turkey from tilting during cooking, allowing for even heat distribution.
As the turkey roasts, the vegetables absorb its juices, turning into a delicious side dish. Using an edible rack like this minimizes the need for extra cooking tools and maximizes the ingredients you already have.
It’s a practical, flavorful solution that’s both resourceful and liberating for your kitchen!
What to Look for in a Sturdy Roasting Rack
Using an edible roasting rack made from vegetables can elevate your cooking, but having a sturdy roasting rack is just as important for ideal results. Here’s what to look for:
| Feature | Importance | Recommendation |
|---|---|---|
| Height | Guarantees proper air circulation | At least 2-3 inches |
| Material | Affects durability and heat resistance | Choose stainless steel or hard-anodized aluminum |
| Stability | Prevents tipping during cooking | Look for a stable base |
| Nonstick Coating | Aids in cleanup | Verify it’s high-heat compatible |
| Adjustable Size | Offers versatility in cooking tasks | Consider collapsible designs |
Selecting the right roasting rack can make a significant difference in your cooking experience. Prioritize these features to guarantee that your meals are cooked evenly and come out delicious every time!
Roasting Rack Cleanup Tips
Cleaning your roasting rack doesn’t have to be a chore.
Quick solutions, like soaking in warm, soapy water, can help loosen stubborn residues, making scrubbing easier.
Plus, addressing sticking issues early on will keep your rack in top shape for future meals.
Quick Cleaning Solutions
Maintaining your roasting rack doesn’t have to be a chore; a few simple steps can keep it looking brand new. For nonstick racks, use warm, soapy water and a non-abrasive sponge. Stainless steel racks benefit from soaking in a soapy solution before scrubbing with a nylon brush. Stubborn stains? Sprinkle baking soda and scrub with a damp sponge. Always rinse thoroughly and dry immediately to prevent water spots and corrosion.
| Rack Type | Cleaning Method | Tips |
|---|---|---|
| Nonstick | Warm, soapy water | Avoid harsh chemicals |
| Stainless Steel | Soak, then scrub with nylon | Check for warped areas |
| Both | Baking soda for tough stains | Guarantee proper air circulation |
Preventing Sticking Issues
To prevent sticking issues with your roasting rack, applying a layer of nonstick spray or oil before placing your turkey can work wonders. This creates a barrier that greatly reduces sticking, making cleanup easier.
Additionally, consider lining your roasting pan with foil; it catches drippings and minimizes residue, simplifying post-roast cleanup.
After roasting, soak the rack in warm, soapy water for 15-20 minutes to loosen any stuck-on food particles. Use a plastic or silicone spatula to gently scrape off residue without scratching the nonstick surface.
Regularly cleaning and maintaining both the roasting rack and pan helps prevent buildup, ensuring they stay in prime condition for future use.
Enjoy your stress-free cooking experience!
Frequently Asked Questions
Can I Use a Wire Mesh Instead of a Cooling Rack?
Yes, you can use wire mesh instead of a cooling rack.
Wire mesh offers benefits like increased airflow and heat distribution, making it a practical alternative. Just verify it’s food-safe and sturdy enough to hold your roasting pan.
While it may not have the same stability as a dedicated cooling rack, it can still effectively support your dishes.
Embrace this option for a versatile kitchen solution, giving you more freedom in your cooking.
How High Should the Rack Be Above the Pan?
Think of your rack as a bridge, connecting your food to the heat below.
For ideal clearance, aim for a rack height of about 2 to 3 inches above the pan. This allows hot air to circulate freely, ensuring even cooking.
Too low, and your dish might steam instead of roast; too high, and it won’t brown properly.
Find that sweet spot, and liberate your culinary creations!
What Materials Should I Avoid When Making a Rack?
When making your rack, avoid materials like plastic or low-grade metals. These won’t offer the durability you need and could warp or melt under high heat.
Also, steer clear of anything painted or treated with chemicals, as they can leach into your food.
Opt for suitable materials like stainless steel or heavy-duty wire, ensuring your rack stands strong and provides safe support for roasting, giving you peace of mind while cooking.
Can I Use Multiple Racks for Larger Meats?
Yes, you can use multiple racks for larger meats! Just guarantee they’re adjustable to accommodate different sizes and shapes.
Using multiple racks can enhance rack stability, allowing even heat distribution and preventing the meat from sagging. Make sure the racks are securely placed to avoid any wobbling during cooking.
This method not only supports larger cuts but also helps achieve that perfect roast you’re aiming for, giving you freedom in your culinary creations!
How Do I Prevent Sticking on My DIY Rack?
To prevent sticking on your DIY rack, consider using non-stick materials like silicone or aluminum foil for easy cleanup.
Curiously, almost 70% of home cooks struggle with food sticking to their racks.
For effective rack maintenance, regularly clean your materials and apply a light layer of cooking spray before use.
This way, you’ll enjoy perfectly roasted meats without the hassle of scraping off stubborn bits later.
Happy cooking!
Conclusion
In conclusion, savvy chefs can swiftly create a sturdy roasting rack using simple supplies. Whether you choose foil, chopsticks, or even vegetables, each option offers a unique and practical solution. So, don’t hesitate to harness your creativity and whip up a wonderful roasting rack that enhances your culinary creations. With these DIY delights, you’ll guarantee even cooking and delicious results every time you roast. Happy roasting!