
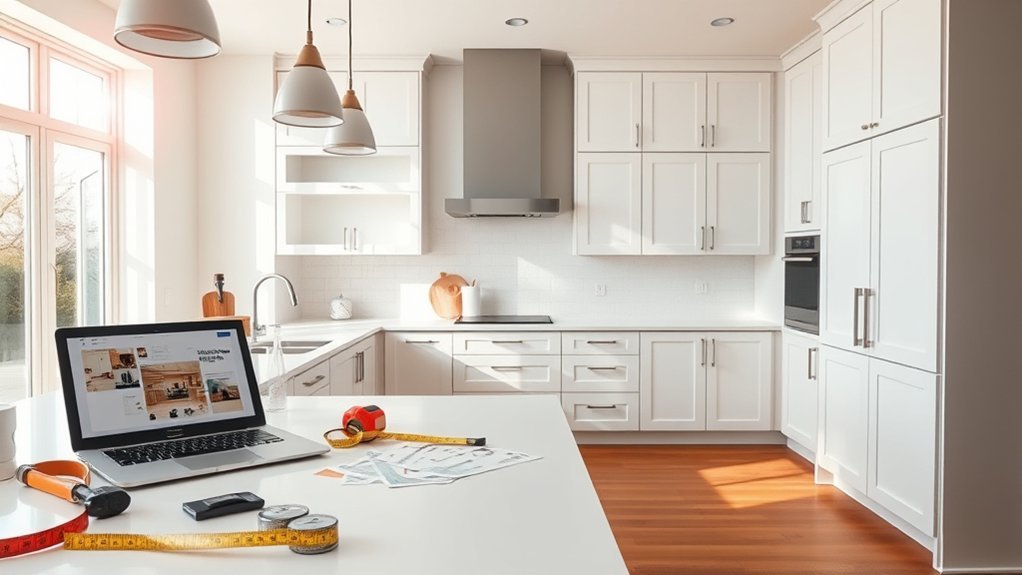
A kitchen update goes more smoothly when the decisions are made before demolition starts. Begin by defining whether the project is a cosmetic refresh or a full remodel, then set the budget, measure the room, finalize the layout, select appliances and finishes, check permit requirements, and order long-lead products. Construction can then move through protection, demolition, framing, rough-ins, inspections, wall repair, flooring, cabinets, countertops, fixtures, appliances, and final closeout.
Quick Answer
Update a kitchen in this order: set the scope and budget, measure and finalize the layout, choose appliances and finishes, check permits, order long-lead items, prepare the house, complete demolition and rough-ins, pass required inspections, close the walls, resolve flooring, install cabinets and counters, connect fixtures and appliances, then complete final inspections and punch-list work.
Key Takeaways
- Finalize the layout, appliance specifications, and major finish choices before demolition.
- Build the budget from written local estimates rather than relying on a single national cost figure.
- Check permit and inspection requirements before structural, electrical, plumbing, gas, or mechanical work begins.
- Complete framing and rough-in work before drywall closes the walls.
- Decide when flooring will be installed based on the flooring system and manufacturer instructions.
- Do not disturb suspected lead paint or asbestos-containing materials without the proper safety plan.
- Finish with testing, required inspections, touch-ups, warranty paperwork, and a final punch list.
At a Glance
| Time Required | A cosmetic refresh may take days or weeks; a full remodel can take several weeks or longer depending on scope, permits, inspections, fabrication, and product lead times. |
| Difficulty | Moderate for a cosmetic update; advanced for projects involving structural, electrical, plumbing, gas, or mechanical changes. |
| Tools Needed | Tape measure, level, basic hand tools, appropriate personal protective equipment, and project-specific tools. Specialized trade work may require licensed professionals. |
| Cost | Varies widely. The 2026 U.S. Houzz Kitchen Trends Study reported median spending of $20,000 for minor kitchen remodels and $55,000 for major remodels among surveyed homeowners. |
Set Your Kitchen Remodel Budget and Scope

A successful kitchen remodel begins with a realistic budget and a clearly defined scope. First decide whether you are planning a cosmetic update, such as paint, lighting, hardware, or backsplash work, or a larger remodel involving cabinets, appliances, plumbing, electrical work, walls, or a new layout.
National spending figures are useful for context, but they are not quotations for your house. In the 2026 U.S. Houzz Kitchen Trends Study, surveyed homeowners reported median spending of $20,000 for minor kitchen remodels and $55,000 for major remodels. Major remodel spending also differed significantly by kitchen size.
Build the actual budget from the project’s scope, product selections, labor rates, permit costs, disposal, delivery, and written contractor estimates. Keep a contingency for hidden conditions such as damaged subflooring, outdated wiring, plumbing problems, or wall repairs discovered after demolition. The appropriate reserve depends on the age and condition of the home and how much uncertainty remains.
Separate must-haves from nice-to-haves. Safety, code compliance, structural repairs, ventilation, durable work surfaces, storage, and reliable appliances normally deserve priority over decorative upgrades that can be changed later.
The Federal Trade Commission recommends getting multiple written estimates, checking contractor licensing and insurance where applicable, and reviewing a written contract carefully before work begins.
A kitchen budget is most useful when it is tied to a written scope, real product selections, and local labor estimates rather than a generic national percentage.
Measure the Space and Finalize the Layout
With the budget and scope defined, measure the kitchen carefully before cabinets, countertops, or appliances are ordered. Record wall lengths, ceiling height, door and window locations, plumbing, vents, electrical equipment, and any fixed structural elements.
- Record the length of every wall and the ceiling height.
- Mark doors, windows, trim, vents, radiators, soffits, and other obstructions.
- Locate the existing sink drain, water lines, gas connection if present, electrical panel capacity, outlets, and exhaust route.
- Record appliance widths, depths, required clearances, door swings, and ventilation requirements from the exact model specifications.
- Turn the measurements into a scaled floor plan before finalizing cabinet dimensions.
The traditional sink-stove-refrigerator work triangle can still be useful, but it is not the only way to plan a modern kitchen. Preparation, cooking, cleanup, food storage, small-appliance, and serving zones may better reflect how several people use the room.
Check aisle clearances, appliance-door conflicts, landing space beside cooking and refrigeration areas, seating clearance, storage access, lighting, and everyday traffic through the room. A design that looks attractive on paper should also be comfortable when the refrigerator, dishwasher, oven, and cabinet doors are open.
Pro Tip: Choose exact appliance models before cabinet drawings are released for production. Manufacturer specification sheets provide the opening sizes, clearances, electrical requirements, plumbing connections, and ventilation details that the cabinet and trade plans depend on.
Order Cabinets and Appliances, Then Secure Permits
Once the layout and appliance specifications are confirmed, order products with long or unpredictable lead times early enough that delivery delays do not leave the kitchen unusable. Cabinets, specialty appliances, custom doors, windows, plumbing fixtures, lighting, and some finish materials may affect the construction schedule.
Energy use can also be considered during appliance selection. ENERGY STAR provides current efficiency information for refrigerators, dishwashers, electric cooking products, and other household equipment.
Before demolition, check with the local building department about permits and inspections. Requirements depend on the jurisdiction and scope. Cabinet replacement or painting may require little or no permitting in some places, while structural changes and new electrical, plumbing, gas, or mechanical work commonly trigger permits or trade inspections.
Do not assume the contractor has handled permitting unless responsibility is clearly stated in the contract. Confirm who will apply, who will schedule inspections, and which approvals are required before walls are closed.
When products arrive, compare model numbers, quantities, dimensions, finishes, and visible condition with the order. Store materials in a dry, secure location and follow manufacturer instructions for temperature, moisture, stacking, and acclimation where applicable.
Prepare a Temporary Kitchen and Pre-Demolition Plan
A kitchen can be unusable for part of a remodel, so prepare for that before demolition. Move food, dishes, cookware, cleaning products, and small appliances out of the work area. Set up a temporary food-preparation area elsewhere in the home if it can be done safely.
- Create a safe location for basic food preparation and cleanup.
- Plan how refrigerated food will be stored if the refrigerator must be moved.
- Confirm waste and demolition-debris removal.
- Photograph existing rooms and nearby surfaces before construction begins.
- Confirm product deliveries and critical measurements before removing a functioning kitchen.
- Discuss daily access, dust control, pets, children, parking, and working hours with the contractor.
Protect Your Home Before Demolition
Before demolition begins, protect adjacent rooms and travel paths from dust, debris, impact, and construction traffic. Remove fragile belongings, cover floors, isolate the work area, and establish a plan for ventilation and cleanup.
Warning: Renovation can expose hazardous materials. In a pre-1978 U.S. home, disturbing painted surfaces can create dangerous lead dust. The EPA recommends lead-safe renovation practices and certified contractors for covered work. Do not disturb material suspected of containing asbestos; seek appropriate professional guidance before demolition.
Seal Adjacent Rooms
For ordinary remodeling dust, physical barriers can help keep contaminants from spreading through the house. The EPA’s remodeling indoor-air guidance recommends separating work areas and using appropriate exhaust ventilation to reduce the movement of dust and pollutants.
- Use durable plastic sheeting or a purpose-made temporary barrier at openings.
- Seal gaps and seams as appropriate for the work.
- Protect thresholds and high-traffic routes.
- Keep children and pets away from the construction zone.
Lead-related work requires specific containment and cleanup procedures that go beyond ordinary dust-control measures, so general plastic-sheeting advice should not be treated as a substitute for lead-safe practices.
Cover Floors Thoroughly
Protect every exposed floor along the work route, not just the kitchen floor. Heavy-duty floor protection, plywood where appropriate, or other impact-resistant coverings can reduce scratches, dents, stains, and damage from tools and debris.
Secure coverings so they do not slide or create tripping hazards. Extend protection through hallways and doorways used for material delivery and debris removal.
Shut Off Utilities
Before cabinets, sinks, ranges, dishwashers, wiring, or walls are removed, affected utilities must be safely isolated. Depending on the project, that may involve shutting off and capping specific water, electrical, or gas services rather than turning off every utility in the house.
- Identify every water, electrical, gas, and mechanical connection affected by demolition.
- Have the appropriate service switched off, isolated, disconnected, or capped before work reaches it.
- Label breakers, valves, and disconnected lines clearly.
- Use qualified or licensed trades when required by local law or when the work is outside safe DIY limits.
Gas work, service-panel work, new electrical circuits, structural alterations, and substantial plumbing changes are not appropriate places to guess. Follow local code and permit requirements.
Demolish, Frame, and Complete Rough-In Work
Once the site is protected and utilities are safely handled, demolition can remove the materials included in the approved scope. Avoid removing walls until their structural role and any concealed utilities are understood.
After demolition exposes the structure, repair damaged framing or subflooring and complete approved framing changes. New doorways, wall openings, soffit changes, blocking for cabinets, and structural reinforcement should be resolved before the mechanical systems are finalized.
The rough-in phase comes next. Plumbing supply and drain lines, electrical circuits and boxes, lighting wiring, gas piping where applicable, ventilation ducting, and other concealed systems are positioned while walls remain open.
Kitchen ventilation deserves early planning. The EPA recommends properly sized kitchen exhaust ventilation and notes that range hoods should exhaust cooking pollutants outdoors. Larger exhaust systems may require attention to make-up air and pressure balance, so the hood, duct route, appliance type, and local code should be coordinated before walls are closed.
Complete Rough-In Inspections, Drywall, and Paint
Before insulation or drywall covers new work, complete any required rough inspections. This is the easiest point to correct plumbing, wiring, framing, gas, ventilation, or blocking because the systems are still visible.
Once the required work is approved, install insulation where needed and close the walls with the appropriate board and finish. Patch, tape, sand, and prime repaired surfaces before cabinet installation.
Much of the painting can be completed before cabinets and appliances fill the room, which improves access and reduces cutting-in work later. Final touch-ups can be saved until construction is nearly complete.
Allow joint compound, primer, paint, adhesives, and other products to dry or cure according to their manufacturer instructions before covering or loading the surfaces.
Decide When to Install Kitchen Flooring
Flooring must be planned before cabinets are installed even though the actual installation point varies. There is no universal rule that every kitchen floor should go before or after cabinetry.
Some tile, hardwood, and other continuous floor systems may be designed to extend beneath cabinetry. Many floating floors, however, require expansion space and should not be trapped beneath permanently fixed cabinets. Existing floors, appliance clearances, finished floor height, transitions, waterproofing, and future replacement plans can also affect the decision.
Note: Resolve the flooring strategy with the installer before cabinets are set, and follow the flooring manufacturer’s installation instructions. The correct sequence depends on the flooring system and project details.
Install Cabinets, Countertops, and Final Finishes
Cabinets must be installed level, plumb, aligned, and securely fastened according to the cabinet system and wall conditions. The exact order of wall and base cabinet installation can vary by installer and project, so accuracy matters more than declaring one universal sequence.
- Install and verify the cabinet boxes, panels, fillers, and island components.
- Confirm appliance openings and clearances before countertop templating.
- Template countertops only after the supporting cabinets are fixed in their final positions.
- Fabricate and install the countertops according to the selected material.
- Install the sink, faucet, backsplash, trim, cabinet hardware, and other finish components in the appropriate sequence.
- Complete final plumbing, electrical, ventilation, and appliance connections.
Choose countertop material according to maintenance, heat and stain resistance, repairability, appearance, and budget. Laminate can provide an economical surface; engineered and natural stone offer different combinations of durability and maintenance. Stone remnants may sometimes reduce material cost for smaller areas such as a vanity-like cabinet, bar, or compact island when a suitable piece is available.
After the range hood, refrigerator, dishwasher, range, sink, disposal if used, lighting, receptacles, and other equipment are connected, test them before the project is considered complete. Check for leaks, drainage problems, appliance-door conflicts, loose hardware, damaged finishes, lighting issues, and ventilation operation.
Complete the Final Inspection and Punch List
Schedule any required final inspections after permitted work is complete. Do not cover up an unresolved code issue simply because the kitchen appears finished.
Then walk through the kitchen carefully and create a punch list. Open every cabinet and drawer, run the faucet and dishwasher, test lights and switches, check appliance operation, inspect caulk and grout, look for paint defects, and confirm that trim and hardware are secure.
Before final payment, collect applicable warranties, appliance manuals, permit or inspection records, paint information, cabinet-care instructions, countertop-care guidance, and spare finish materials such as tile or flooring that may be useful for future repairs.
Frequently Asked Questions
In What Order Should I Update My Kitchen?
Start with the scope, budget, measurements, layout, appliance specifications, permits, and product orders. Then prepare the space, isolate utilities, demolish, complete framing and rough-ins, pass required inspections, repair and paint walls, resolve flooring, install cabinets, template and install countertops, complete the backsplash and finish work, connect fixtures and appliances, and finish with inspections and a punch list. Flooring placement can vary by material, so follow the flooring manufacturer’s requirements.
What Is the New Kitchen Trend for 2026?
There is no single 2026 kitchen trend. The NKBA 2026 Kitchen Trends Report highlights storage maximization, multi-purpose kitchen hubs, smart technology, organic and earthy aesthetics, health and wellness, seamless design, and personalized style. Neutrals remain important, with greens and blues also prominent. Houzz’s 2026 U.S. research also points to stronger interest in function, storage, wood cabinetry, and planning kitchens for long-term use.
How Do You Update an Outdated Kitchen?
Start by identifying what is actually failing: layout, storage, lighting, worn finishes, appliances, ventilation, or all of them. A lower-cost refresh may include paint, hardware, lighting, backsplash, faucet upgrades, and cabinet refinishing. A larger remodel can improve storage, counters, appliances, flooring, lighting, ventilation, cabinetry, and workflow. Prioritize functional problems before decorative changes.
Is $10,000 Enough for a Kitchen Remodel?
It can be enough for a focused kitchen update, especially when the existing layout and cabinets remain, but it is below the median spending reported for minor remodels in Houzz’s 2026 U.S. study. A $10,000 budget may cover a combination of paint, hardware, lighting, a backsplash, selected appliances, cabinet refinishing, or limited flooring work. A full layout change with new cabinetry, countertops, plumbing, electrical work, and appliances will usually require a larger budget. Local labor and material prices matter more than a national rule.
Conclusion
A successful kitchen update depends more on planning and sequencing than speed. Define the scope and budget first, verify measurements and appliance specifications, check permits, order critical products, and protect the house before demolition. Framing, rough-ins, inspections, walls, flooring, cabinets, countertops, fixtures, and appliances can then follow in a logical order. Finish by testing everything, completing required inspections, and resolving the punch list before closing the project.
Sources
- Federal Trade Commission — How To Avoid a Home Improvement Scam — contractor estimates, licensing, insurance, contracts, and payment guidance.
- U.S. EPA — Renovation, Repair and Painting Program for Consumers — lead-safe renovation guidance for pre-1978 housing.
- U.S. EPA — Remodeling Your Home and Indoor Air Quality — kitchen ventilation and remodeling indoor-air guidance.
- ENERGY STAR — Energy Efficient Products — current efficiency information for household appliances.
- National Kitchen & Bath Association — 2026 Kitchen Trends Report — current kitchen design, storage, technology, color, wellness, and material trends.
- 2026 U.S. Houzz Kitchen Trends Study — current U.S. kitchen remodeling spending and homeowner renovation findings.
