
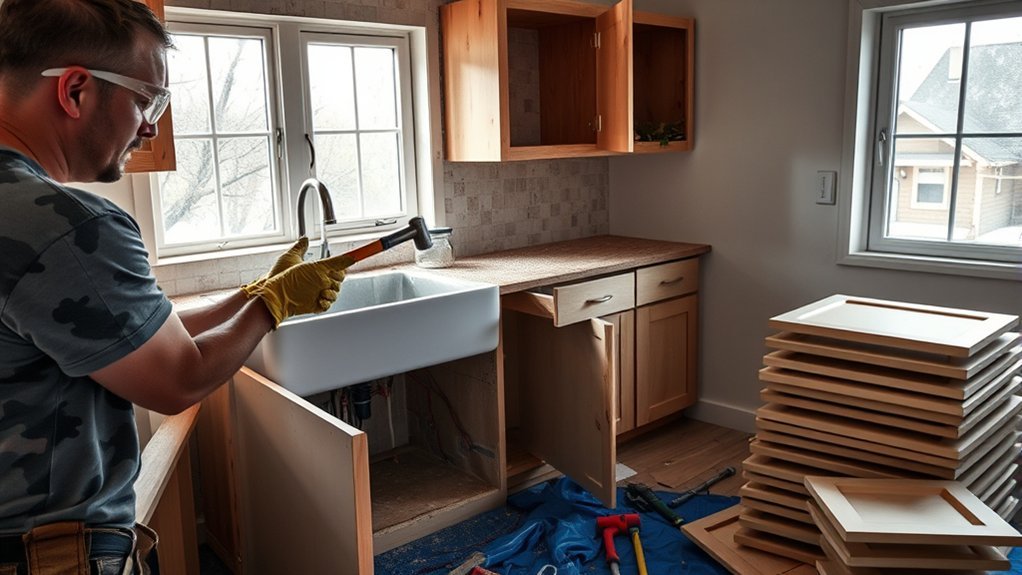
A kitchen demolition project requires methodical planning, personal protective equipment, and a strict sequence of operations to prevent structural damage, plumbing leaks, and electrical hazards. Before swinging a sledgehammer, you must seal the work zone, isolate electrical circuits, cap plumbing supplies, and strip the space down component by component—starting with appliances and upper wall cabinets before moving to base cabinetry and flooring. Demolishing your kitchen in the correct order minimizes property damage, keeps airborne contaminants contained, and delivers a clean, level canvas for your remodel.
Quick Answer
To demo a kitchen, shut off the gas, water, and power at their main sources, then clear out all loose items. Next, remove appliances, disconnect the sink plumbing, and pull off countertops. Take down upper wall cabinets before detaching base cabinets, tear out drywall and backsplashes, and cut flooring into manageable strips. Finally, control dust with negative pressure and haul debris directly to a rented dumpster.
Key Takeaways
- Always de-energize and test: Shut off circuit breakers and verify lines are dead using a reliable non-contact voltage tester before touching outlets, fixtures, or switches.
- Remove uppers before lowers: Taking down wall cabinets before removing base cabinets prevents awkward leaning, reduces back strain, and eliminates overhead crush hazards.
- Test for hazardous materials: Test resilient flooring, adhesives, and drywall joint compound for asbestos if installed before 1986, and test painted surfaces for lead if your home was built before 1978.
- Establish dust containment early: Hang 6-mil plastic sheeting across doorways and seal HVAC supply and return registers to prevent fine particulate matter from migrating into living areas.
At a Glance
| Time Required | 1 to 3 days (12 to 24 active work hours for a DIY team) |
| Difficulty | Intermediate (demands physical stamina, tool fluency, and strict safety adherence) |
| Tools Needed | Pry bar, flat pry bar (wonder bar), cordless drill/driver, reciprocating saw, hammer, utility knife, non-contact voltage tester, pipe wrench, furniture dolly, N95/P100 respirator, safety glasses, heavy work gloves |
| Cost | $400 to $1,000 DIY (dumpster rental, PPE, protection supplies) vs. $1,000 to $3,000+ for professional demolition crews |
How to Prep for Kitchen Demo
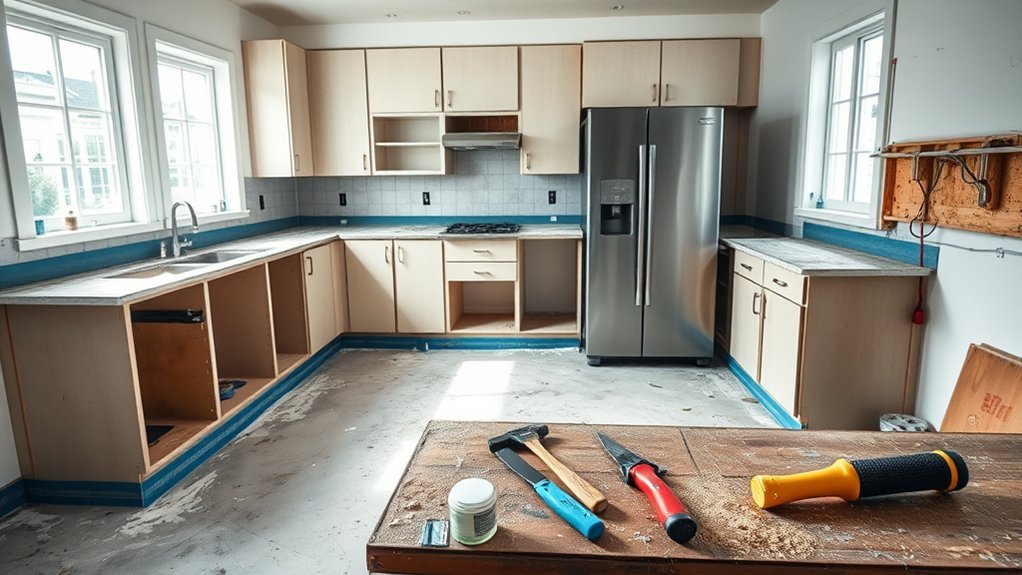
Safe, efficient kitchen demolition begins long before picking up a sledgehammer. Rushing straight into physical destruction without proper staging and environmental controls damages structural framing, ruptures hidden plumbing lines, and spreads silica dust across the home.
Begin by emptying every cabinet, pantry shelf, and drawer. Pack dishes, cookware, and pantry items into labeled moving boxes, and relocate them completely outside the renovation zone. Once the kitchen is bare, clear a wide egress route through your home leading to the exterior door or driveway where your waste container will sit. Measure exterior doorways and hallways to ensure heavy refrigerators and cabinet boxes pass through without gouging trim or finished drywall.
Set up an organized staging area outside the demolition perimeter. Keep a sturdy folding table for battery chargers, drill bits, hand tools, and safety gear. Having a designated station prevents tools from getting buried under demolition debris and ensures safety equipment remains within arm’s reach.
Pro Tip: Set up a functional temporary kitchenette in an adjacent dining room or basement before dismantling your primary kitchen. Equip it with a microwave, electric kettle, toaster oven, mini-fridge, and plastic dish tubs to maintain daily meal routines throughout the project.
Protect Adjacent Rooms and Surfaces
Demolition generates large amounts of airborne debris, sharp fasteners, and fine grit. Protecting adjoining spaces and any architectural elements you plan to preserve is essential to prevent costly repair bills later.
If you plan to salvage your existing hardwood or tile subfloor, cover it with heavy-duty protective board, such as Ram Board or heavy corrugated cardboard. Lay the sheets edge-to-edge and seal all joints using vapor-permeable seaming tape. Do not use standard duct tape directly on finished wood floors, as the aggressive adhesive can strip the polyurethane finish when pulled.
Isolate the kitchen from the rest of the house by hanging 6-mil plastic sheeting across all entryways and archways. Use heavy-duty spring-loaded poles to press the plastic firmly against the ceiling and walls, and install peel-and-stick commercial zippers to create airtight access doors. Turn off the central HVAC system during active demo, and seal off every return and supply duct in the kitchen with plastic and painter’s tape to prevent dust from cycling through your furnace and ductwork.
Warning: If your home was constructed before 1978, painted walls, trim, and cabinetry may contain lead. Disturbing lead paint creates toxic dust that requires specific containment methods under the EPA Renovation, Repair, and Painting (RRP) Rule. Use EPA-recognized test kits before dry-cutting or scraping older surfaces.
Shut Off Utilities and Disconnect Fixtures
Every utility feeding the kitchen—electricity, domestic water, and natural gas or propane—must be isolated before any mechanical teardown begins. Never rely solely on an appliance’s local control switch.
Head to the main electrical service panel and switch off the dedicated circuit breakers powering the kitchen circuits. Modern kitchens often feature multiple dedicated circuits: separate 20-amp circuits for small appliance countertop outlets, independent 120V lines for the dishwasher, refrigerator, and microwave, and dedicated 240V lines for electric ranges or cooktops. After tripping the breakers, use an OSHA-compliant non-contact voltage tester directly at every receptacle, switch, and hardwired appliance lead to confirm all power is completely dead.
Next, shut off the water. Close the local angle-stop shut-off valves under the kitchen sink. If the local valves are corroded or stuck, close the home’s main water shut-off valve. Open the kitchen sink faucet to bleed off residual line pressure, drain standing water into a bucket, and disconnect the flexible braided supply lines from the valve stops.
If you have gas appliances, shut off the gas valve located behind the range or at the dedicated gas meter shut-off. Once closed, disconnect the flexible stainless steel gas connector and immediately install an appropriate threaded black iron or brass cap on the supply stub using Teflon tape approved for gas (yellow tape) or pipe dope. Check the connection with a commercial gas-leak detection fluid or soapy water to ensure a leak-free seal.
“Workplace demolition standards require that all electric, gas, water, and other service lines be shut off, capped, or otherwise controlled at or outside the building before work starts.” — OSHA Standard 1926.850(c)
Remove Appliances First
Clear out the large appliances before attacking any fixed casework. Removing the refrigerator, range, and dishwasher opens up critical floor space, expands work pathways, and prevents cosmetic damage to valuable machinery.
Begin with the dishwasher, which is fastened directly into the cabinetry structure:
- Unscrew the lower toe-kick access panel to expose the electrical junction box, water inlet solenoid, and drain hose.
- Verify power is off, unscrew the wire nuts inside the electrical box, and detach the ground wire.
- Disconnect the copper or braided water supply line from the water inlet valve, catching residual water in a shallow tray.
- Unclamp the ribbed drain hose where it ties into the sink P-trap or garbage disposal, pulling the hose through the cabinet side wall.
- Remove the mounting screws holding the top or sides of the dishwasher frame to the underside of the countertop, lower the front leveling legs, and slide the appliance forward onto a moving blanket.
For freestanding ranges, slide the unit forward, disconnect the anti-tip bracket mounted to the floor or wall, and unplug the heavy-duty 240V cord or detached gas flex line. Use an appliance hand truck with pneumatic tires to wheel the stove and refrigerator out of the room. Moving appliances on dedicated dollies protects finished subfloors from gouges and prevents heavy lifting injuries.
Remove the Sink and Countertops
With the appliances removed, the countertops and kitchen sink come out next. Removing the countertop exposes the cabinet fasteners holding the base units to the wall, making cabinet removal straightforward.
Disconnecting the Sink and Disposal
Position a 5-gallon bucket directly beneath the sink trap. Loosen the slip nuts on the PVC P-trap using tongue-and-groove pliers, drop the trap, and let residual water drain out. Disconnect the drain pipes from the sink strainer baskets. If a garbage disposal is present, disconnect the electrical whip, support the disposal housing with one hand, insert a screwdriver into the mounting ring lug, and turn it counterclockwise to drop the unit free.
For top-mount (drop-in) sinks, crawl underneath to loosen the metal retaining clips clamped against the underside of the countertop. Slice through the silicone bead sealing the sink rim to the counter with a sharp utility knife, then push up from underneath to free the sink. For undermount sinks attached to stone countertops, support the sink basin from below using temporary 2×4 blocking before removing the epoxy clips or support rails.
Remove Countertop Fasteners and Surfaces
Countertops are secured to base cabinets with screws driven upward through the corner gussets or top stretchers of the cabinet boxes. Open all base cabinet doors, locate these screws, and back them out with a cordless drill and bit extension.
Score the caulk line along the wall or backsplash with a utility knife to prevent the countertop from tearing the drywall paper when lifted. For laminate countertops, pry upward along the front edge using a wide stiff putty knife and a flat pry bar. If you are dealing with stone, quartz, or granite, understand that natural stone slabs can weigh between 15 and 25 pounds per square foot. Do not attempt to lift large stone counters alone; hire professional stone fabricators to salvage slabs, or break damaged material into manageable 2-foot chunks using a controlled blow with a mini-sledge over heavy drop cloths.
Note: If you plan to donate or resell your existing cabinets, take care when removing the countertop. Excessive prying against the delicate face frames or thin plywood top stretchers can crack the cabinet boxes, rendering them unusable for reuse.
Pull Off Wall Cabinets and Backsplash First
In standard construction practice, upper wall cabinets should be removed before base cabinets. Removing wall cabinets first gives you a flat, stable platform (the base cabinets) to work over, keeps you off tall, unstable stepladders against open stud bays, and eliminates the risk of an upper cabinet dropping onto your legs or an open floor.
Removing Wall Cabinets
Begin by removing all cabinet doors, interior shelving, and shelf support pegs. Removing the doors reduces the unit’s weight by roughly 30% and gives you direct access to the interior frame.
Next, back out the joining screws running through the face frames that connect adjacent cabinet boxes to each other. Wall cabinets are hung on the wall using heavy 2.5- or 3-inch cabinet screws driven through the rear hanging rail into the wall studs.
Have a helper support the weight of the cabinet box from below. While the helper holds the box firmly against the wall, back out the lower wall screws first, followed by the upper screws. Once all fasteners are removed, ease the cabinet away from the wall and lower it directly to the floor. Move each cabinet box directly to your disposal staging area or dumpster before starting on the next one.
Tearing Off Backsplash Tile
Backsplash removal varies depending on how the tile was installed. If the tile was bonded directly to drywall using organic mastic, the easiest and cleanest approach is often cutting out the entire section of drywall rather than scraping individual tiles.
Shut off power to all countertop backsplash outlets. Remove the plastic outlet faceplates. Score a straight boundary line above the tile using a utility knife. Use a reciprocating saw with a short, bi-metal blade—set to a shallow depth to avoid slicing hidden wiring or plumbing pipes—to cut horizontally through the drywall just above the tile field. Use a flat pry bar to pull the drywall panels away from the wall studs in large sheets with the tile still attached. This technique saves hours of scraping and produces cleaner framing for your future backer board.
Detach and Remove Base Cabinets
Now that the upper cabinets, countertops, and backsplash have been removed, the base cabinets can come out without obstruction or overhead hazards.
Inspect the inside of the base cabinets and remove any screws binding the individual face frames together. Next, locate the structural installation screws driven through the top and bottom rear mounting rails into the wall studs. Back these screws out completely using a drill.
If the base cabinets were installed before the finished flooring, they may be recessed or pinned in place by flooring material. Slice any perimeter caulk along the baseboards or flooring edges. Work a flat pry bar behind the cabinet back near a stud location and push gently forward to pop the box away from the wall. Slide the units out into the open room, load them onto a furniture dolly, and wheel them directly to your waste container.
Tear Out the Kitchen Floor
Flooring removal depends directly on the material installed: sheet vinyl, ceramic tile, laminate, or solid hardwood. Always remove baseboards and shoe moulding first using a trim pry bar and a wood block to avoid denting the drywall.
For resilient sheet vinyl or luxury vinyl tile (LVT), use a utility knife to cut the material into narrow 6- to 8-inch strips. Pull the strips upward by hand or with a heavy-duty floor scraper. If the floor is glued down with stubborn adhesive, use a motorized floor scraper or a dedicated heat gun to soften the glue backing.
For ceramic or porcelain tile, gear up with heavy leather gloves, knee pads, and shatterproof safety goggles. Use a 2-pound sledgehammer and a wide cold chisel to fracture the initial tiles along an uncoupled edge or doorway. Once an opening is established, insert the blade of a heavy-duty floor scraper under the mortar bed and pry upward. For large areas, renting an SDS-max rotary demolition hammer equipped with a wide tile-scaling chisel cuts project time significantly.
Warning: Vinyl sheet flooring, 9″x9″ floor tiles, and black cutback adhesive installed prior to 1986 frequently contain regulated levels of asbestos. The EPA Asbestos Regulations prohibit dry sanding, grinding, or mechanical pulverization of asbestos-containing flooring. If you suspect your subfloor contains asbestos materials, pause demolition immediately and have a sample tested by an accredited laboratory.
Control Dust and Haul Debris
Dust management and continuous waste removal are what separate clean, controlled remodels from messy, hazardous ones. Demolition debris should never be allowed to pile up inside the work area.
Rent a 10- to 20-yard roll-off dumpster and position it as close to your load-out door as municipal permits allow. Carry debris directly from the kitchen to the dumpster in heavy-duty rubberized tubs or commercial wheeled tilt trucks rather than using thin trash bags that tear on sharp metal lath, tile shards, and cabinet screws.
Set up active dust filtration by placing a commercial air scrubber or placing an exhaust fan in an exterior kitchen window blowing outward to establish continuous negative air pressure. This setup draws fresh air into the kitchen from adjoining rooms and forces airborne dust outside. Vacuum horizontal framing, subfloors, and window ledges twice daily using a commercial HEPA-filtered vacuum. Standard shop vacuums without true HEPA filtration simply exhaust fine crystalline silica and drywall dust back into the room.
Avoid Common Demo Mistakes
Steer clear of these frequent pitfalls to keep your kitchen demolition on schedule and on budget:
- Assuming a wall is non-load-bearing: Never knock down partition walls, pass-through openings, or ceiling soffits without verifying their structural role. Soffits frequently house hidden plumbing vents, main HVAC supply trunks, or load-bearing beams.
- Ripping out drywall with reckless force: Wild swings with a sledgehammer can shatter hidden plumbing vents, sever electrical conduit, or damage the drywall in adjacent rooms. Always use controlled cuts with a utility knife or reciprocating saw set to shallow depths.
- Skipping dumpster weight limits: Dense demolition waste like ceramic tile, plaster, and mortar beds adds up quickly. A 10-yard dumpster can reach its road-weight limit with just 500 square feet of tile and mud bed. Monitor tonnages closely to avoid overage fees.
- Neglecting personal protective equipment: Never work without ANSI Z87.1 safety glasses, puncture-resistant work boots with steel shanks, heavy leather gloves, and NIOSH-approved respirators (N95 minimum; P100 for heavy dust or old insulation).
Frequently Asked Questions
Can you demo a kitchen yourself?
Yes, a homeowner can demo a kitchen themselves to save on labor costs, provided they possess standard hand tools, follow proper safety protocols, and methodically shut off and test all utilities. However, operations involving licensed gas line relocations, structural load-bearing wall modifications, or certified asbestos abatement should always be reserved for licensed trade contractors.
What is the average cost to demo a kitchen?
The average cost to hire a professional crew to demolish a standard kitchen ranges between $1,000 and $3,000, depending on room dimensions, geographic location, and whether structural walls are being removed. Tackling the demolition as a DIY project typically costs between $400 and $1,000, which covers a 10- or 20-yard roll-off dumpster rental, protective floor sheeting, heavy-duty disposal bags, and personal protective gear.
How long should it take to demo a kitchen?
A complete kitchen demolition takes 12 to 24 active work hours for a capable two-person DIY team, typically spread over two to three days. Experienced professional demolition contractors equipped with motorized scrapers and dedicated haulers often strip a standard kitchen down to the bare framing and subfloor in a single 8-hour workday.
In what order should a kitchen remodel be done?
A complete kitchen remodel should follow this sequential order: design and permit approval, demolition, rough-in mechanicals (electrical, plumbing, and HVAC), rough-in framing inspections, insulation, drywall installation and finishing, prime and ceiling painting, flooring installation, cabinet installation, countertop templating and fabrication, countertop setting, backsplash tiling, appliance hookups, finish plumbing and electrical trim, and final punch-list inspections.
Conclusion
Tackling a kitchen demolition project yourself cuts your renovation budget down and gives you full control over how cleanly your home is prepped for new casework and finishes. The secret to a safe, damage-free teardown lies in disciplined sequence: isolate utilities completely, remove fragile appliances and heavy plumbing fixtures, pull upper cabinets before tackling base units, and maintain negative air pressure to keep toxic dust out of your living space. By clearing debris as you go and respecting structural and environmental hazards, you establish an organized, level foundation ready for the rebuild.
Sources
- OSHA 1926 Subpart T: Demolition Standards — Federal safety regulations governing utility shutoffs, environmental hazards, and preparatory structural surveys.
- EPA Renovation, Repair, and Painting (RRP) Program — Federal containment and certified testing mandates for lead-based paint in pre-1978 residential structures.
- EPA Asbestos National Emission Standards for Hazardous Air Pollutants — Guidelines on identifying, testing, and managing asbestos in resilient flooring, mastic, and acoustic materials.

3 thoughts on “How to Demo a Kitchen: Step-by-Step Guide”