
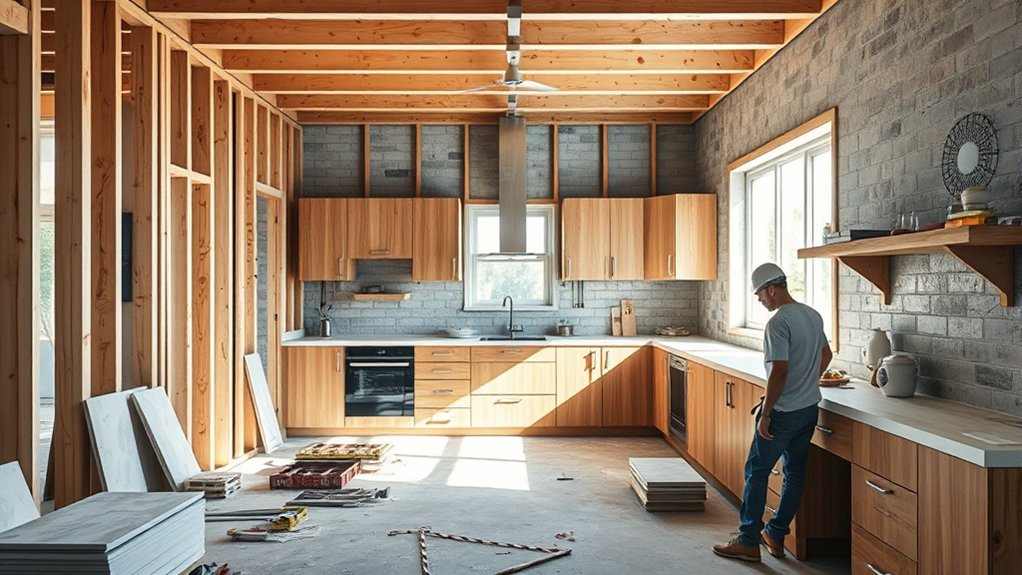
Building or remodeling a kitchen is easiest when the work follows a deliberate sequence: measure and plan the layout, set the budget, confirm permits and appliance specifications, complete demolition and utility rough-ins, repair the room, install cabinets and the appropriate flooring in the correct order, then add countertops, fixtures, appliances, backsplash, trim, and final adjustments. The exact sequence can change with the flooring system, cabinet type, local code requirements, and the appliances selected.
Quick Answer
To build a kitchen step by step, plan the layout and budget first, confirm permits and appliance specifications, demolish safely, complete structural and utility rough-ins, finish the walls, install cabinets and flooring in the correct material-specific order, then add countertops, fixtures, appliances, backsplash, trim, and a final punch-list inspection.
Key Takeaways
- Measure the room and verify appliance specifications before ordering cabinets or countertops.
- Check permits, inspections, structural changes, plumbing, electrical, gas, and ventilation requirements before demolition.
- Do not assume flooring always goes under cabinets. Floating floors commonly require permanent cabinets and islands to be installed first.
- Cabinet dimensions vary by manufacturer; use the actual cabinet schedule rather than relying on one universal size.
- Complete a final test of doors, drawers, plumbing, appliances, lighting, ventilation, caulk, trim, and finishes before closing the project.
At a Glance
| Time Required | Several weeks to several months for a full remodel; cosmetic projects may take less time. |
| Difficulty | Advanced for a full remodel because structural work and electrical, plumbing, gas, and ventilation systems may be involved. |
| Tools Needed | Tape measure, level, straightedge, stud finder, drill/driver, appropriate saws, pry tools, PPE, and trade-specific tools where permitted. |
| Cost | Varies widely with kitchen size, cabinet type, appliances, materials, structural changes, local labor rates, and how much work is professionally contracted. |
Plan Your Kitchen Layout

Before finalizing the kitchen design, measure the room carefully. Record wall lengths, ceiling height, door and window locations, finished floor height, plumbing, gas lines, electrical outlets, ventilation routes, and any other fixed features that affect the layout.
Map the sink, cooking surface, refrigerator, dishwasher, pantry, preparation area, and primary storage zones. The traditional work triangle can still be useful, but it should not override practical traffic flow or modern zone-based layouts. Published NKBA kitchen planning guidance recommends work-triangle legs of about 4 to 9 feet, with the three traveled distances totaling no more than 26 feet.
Use the work triangle as a planning aid, not a rigid rule. Safe clearances, landing space, appliance doors, traffic, and the way people actually cook matter just as much.
Distinct zones for preparation, cooking, cleanup, food storage, and dishes can reduce unnecessary movement. Check what happens when the dishwasher, oven, refrigerator, drawers, and cabinet doors are open at the same time.
Storage requirements should also be calculated early. Plan drawer stacks, pantry storage, trash and recycling, cookware storage, small-appliance locations, and everyday dishes before ordering cabinets.
A scaled drawing or kitchen-design program can help test proportions and clearances. The current NKBA Kitchen & Bath Planning Guidelines also cover clearances, equipment locations, accessibility, flooring, indoor air quality, and other planning considerations.
Set Your Kitchen Remodel Budget
A kitchen remodel budget should begin with clearly defined project goals and a maximum spend. Separate work that is necessary for safety or function from finishes that can be changed later.
Estimate major expenses such as cabinetry, countertops, appliances, flooring, plumbing, electrical work, ventilation, demolition, waste removal, permits, labor, wall repair, paint, backsplash, trim, and temporary kitchen arrangements.
A contingency reserve is useful because demolition can expose water damage, outdated wiring, uneven framing, plumbing problems, subfloor damage, or other work that was not visible during planning. Many remodelers reserve roughly 10–20% for uncertainty, but the appropriate amount depends on the age and condition of the house and the scope of work.
Define Remodel Goals
Begin by listing the problems the new kitchen must solve. Examples include limited countertop space, poor storage, inadequate lighting, awkward traffic flow, insufficient ventilation, inaccessible outlets, or appliances that no longer meet household needs.
| Priority | Item | Budget Role |
|---|---|---|
| 1 | Safety, structure, utilities | Essential |
| 2 | Countertop and work space | Essential |
| 3 | Storage and cabinetry | Major |
| 4 | Appliances and ventilation | Major |
| 5 | Decorative upgrades | Flexible |
Rank these goals before selecting finishes. If the budget tightens later, decorative upgrades can be reduced without sacrificing essential structural, utility, storage, or workflow improvements.
Estimate Project Costs
Set a realistic maximum spend and compare detailed quotations rather than relying only on broad national averages. Cabinet style, countertop material, appliance package, labor rates, structural changes, electrical upgrades, plumbing relocation, flooring choice, and geographic location can change the total substantially.
Compare quotations using the same scope. One bid may include demolition, disposal, permits, trim, paint, or appliance hookups while another does not. Make sure exclusions are written down before choosing a contractor or supplier.
Add Contingency Funds
Set contingency money aside before materials are ordered so hidden conditions do not force rushed compromises later.
- Track committed costs as well as bills already paid.
- Keep permit fees, delivery charges, disposal, and taxes in the budget.
- Fund safety, structure, plumbing, electrical work, cabinets, and required appliances before cosmetic upgrades.
- Reduce optional finishes if unforeseen repairs consume the reserve.
Check Permits, Trades, and the Project Sequence
Before demolition, determine which permits and inspections apply in your city or county. Moving plumbing, changing electrical circuits, installing gas piping, altering ventilation, removing walls, or making structural changes may require permits or licensed professionals depending on local rules.
Warning: Do not treat electrical, gas, structural, or major plumbing work as ordinary cabinet installation. Use qualified professionals where required and follow the permits, inspections, and codes that apply in your jurisdiction.
Create the construction schedule before placing all material orders. Long-lead cabinets, appliances, windows, custom countertops, plumbing fixtures, and specialty finishes can affect the sequence. Confirm delivery dates and provide secure storage that will not expose materials to moisture or damage.
Decide on Cabinets, Appliances, and Flooring
Select cabinets, appliances, and flooring together because their dimensions and installation requirements affect one another. Start with the actual appliance specifications, not assumed refrigerator, range, dishwasher, or microwave sizes.
Common stock base cabinets are often about 34½ inches high before the countertop and around 24 inches deep, but cabinet dimensions vary by manufacturer and product line. KraftMaid, for example, lists multiple heights, widths, and depths rather than one universal cabinet size. Check the specifications for the exact products being ordered.
| Element | Planning Reference | What to Verify |
|---|---|---|
| Base cabinets | Commonly about 34½ in. high | Actual manufacturer height, width, depth and toe kick |
| Wall cabinets | Common stock depths often start around 12 in. | Actual depth, height, door swing and appliance conflicts |
| Appliances | Model-specific | Cutout, ventilation, door swing and utility requirements |
| Flooring | Material-specific | Whether permanent cabinets may be installed over it |
Do not assume the finished flooring always goes under the cabinetry. The correct sequence depends on the floor system. Floating products often need room to expand and should not be trapped beneath permanent cabinets or islands.
Measure and Order Cabinet Materials
Measure the cabinet installation area at several points because walls and floors are rarely perfectly straight. Record wall lengths, ceiling heights, window and door trim, plumbing, electrical outlets, vents, gas connections, and appliance openings.
Compare the field measurements with the cabinet plan and appliance installation sheets before ordering. Fillers, finished end panels, moldings, toe kicks, scribes, support panels, and countertop overhangs can all affect the final fit.
Measure Cabinet Spaces
Measure each wall and cabinet run separately instead of assuming the room is square. Check floor level and wall plumb with a long level or laser.
- Verify the finished floor height.
- Locate wall studs and blocking where possible.
- Measure every appliance from its installation specification.
- Allow required fillers beside walls, corners, door casings, and appliances.
- Confirm drawer, door, refrigerator, dishwasher, and oven clearances.
- Use the cabinet manufacturer’s actual width schedule rather than an assumed universal increment.
Accurate measurements reduce field modifications, filler problems, misaligned doors, and appliance-fit issues.
Order Plywood Materials
If the cabinets are being built rather than purchased, create a complete cut list before ordering sheet goods. Three-quarter-inch plywood is commonly used for cabinet boxes, but the species, veneer grade, thickness, joinery, edge treatment, and finish should be chosen for the specific design.
Birch plywood can be suitable for cabinet boxes, while decorative hardwood plywood may be selected for visible doors or panels. The exact material is a design choice rather than a requirement.
Calculate the number of sheets from the cut list and account for saw kerfs, grain direction, damaged edges, mistakes, test cuts, and matching visible panels. Also order the required edge banding, fasteners, hinges, drawer slides, shelf pins, mounting rails, finishes, and other hardware.
Demolish the Old Kitchen Safely
Demolition should begin only after the project sequence, utility shutoffs, permits, and disposal plan are confirmed. Remove reusable appliances and fixtures first, then work from easily detached finishes toward fixed cabinetry and wall materials.
Electricity, gas, water, and other affected services must be shut off or otherwise safely controlled before related demolition. OSHA’s demolition safety requirements specifically address control of electric, gas, water, sewer, and other service lines before demolition work.
- Wear appropriate eye, hand, hearing, respiratory, and foot protection.
- Confirm that hidden wiring, plumbing, or gas lines are not in the cutting path.
- Use controlled removal instead of unnecessarily breaking materials into small pieces.
- Separate reusable or recyclable materials where practical.
- Keep sharp debris and heavy materials out of walking paths.
- Inspect exposed framing and subfloors for leaks, rot, mold, pests, or structural damage.
Warning: If the home was built before 1978, disturbing painted surfaces may create hazardous lead dust. Review the EPA Renovation, Repair and Painting guidance and use applicable lead-safe practices before sanding, cutting, or demolishing painted materials.
Repair Framing and Complete Utility Rough-Ins
Once the old kitchen is open, repair water damage, damaged framing, uneven subflooring, or other hidden problems before new finishes cover them. Structural wall changes should be designed and completed correctly before cabinetry measurements are treated as final.
Next, complete the rough plumbing, electrical, gas, HVAC, and ventilation work required by the new plan. This is the stage for moving sink supplies and drains, adding appliance circuits, relocating receptacles, preparing lighting, routing range-hood ductwork, and completing other work that must remain behind walls or cabinets.
Schedule any required rough inspections before closing walls. Photograph concealed plumbing, wiring, blocking, studs, and utility routes before drywall goes back on; those photos can be useful when cabinets, shelves, or accessories are installed later.
Pro Tip: Add wall blocking for heavy wall cabinets, range hoods, shelves, grab points, or other planned loads while the framing is exposed. It is far easier to reinforce the wall now than after the finish surface is installed.
Repair Walls, Ceilings, and Paint
After approved rough-in work is complete, patch or replace drywall and repair the ceiling as needed. Finish the joints, sand carefully, clean the dust, and prime repaired surfaces.
Painting most walls and ceilings before the cabinets arrive reduces cutting-in around finished cabinetry. Final touch-ups can be completed later after trim, backsplash, and appliance installation.
Choose the Correct Flooring and Cabinet Installation Order
The original idea that every kitchen floor should be installed before the cabinets is too broad. The correct sequence depends on the flooring product and its installation method.
Tile, some hardwood systems, and some fully adhered resilient flooring may be installed wall-to-wall before cabinetry when the manufacturer permits it. Floating LVP, laminate, and similar products often need to expand and contract freely and therefore should normally be installed around permanent cabinets and islands.
For example, Shaw’s floating vinyl instructions state that cabinets or fixed objects should not be installed on top of the floating floor.
When Flooring Can Go First
A continuous finished floor can simplify cabinet positioning and may make later cabinet-layout changes easier, but only use this approach when the flooring manufacturer approves permanent cabinetry over the flooring.
- Follow the flooring manufacturer’s installation instructions and warranty requirements.
- Confirm the finished floor height before setting cabinet and appliance elevations.
- Protect a finished floor with a suitable temporary covering during later work.
- Avoid trapping floating products beneath fixed cabinets, islands, or other permanent objects.
Protect Finished Floors
If finished flooring is installed before cabinets or appliances, protect it from dropped tools, cabinet corners, grit, adhesive, paint, and appliance wheels. Use a protection product that is compatible with the floor finish and does not trap moisture or leave adhesive residue.
If floating flooring is installed after cabinets, maintain the expansion space required by the flooring manufacturer and cover the perimeter neatly with approved trim or molding without pinning the floating floor in place.
Cabinet Layout Considerations
Regardless of installation order, establish the final floor height before setting cabinet elevations. Use the highest point of the floor as the reference when leveling the base cabinets so the countertop remains level across the entire run.
- Mark cabinet lines accurately.
- Locate studs or structural blocking.
- Check corner clearances and fillers.
- Confirm appliance openings before fastening cabinets.
- Recheck plumbing and electrical locations.
Install Base Cabinets and Wall Cabinets
Mark a level reference line for the cabinet installation. Wall-cabinet position is commonly planned in relation to the finished countertop and appliance requirements, but the exact height should follow the design, cabinet dimensions, accessibility needs, and appliance instructions rather than one fixed number.
Base cabinets should be positioned, leveled, shimmed, joined, and securely anchored to appropriate framing or blocking. Check the entire run for level and plumb before final fastening because even small errors can create problems when countertops are templated.
Wall cabinets are then supported safely, aligned with the layout, joined to adjacent units where appropriate, and anchored into structural framing or approved blocking. Recheck level, plumb, reveals, door operation, and alignment as the installation progresses.
Cabinet installation is successful when the entire run is level, plumb, securely anchored, correctly spaced for appliances, and ready for an accurate countertop template.
Note: Large wall cabinets are heavy and awkward. Use appropriate lifting/support methods and enough people to control the cabinet safely while it is being fastened.
Add Countertops, Sink, and Appliances
After the base cabinets are permanently leveled and secured, verify the dimensions for the countertop. Fabricated stone and similar tops are commonly templated after cabinet installation because the fabricator needs the finished cabinet positions.
Dry-fit or position countertop sections according to the material and manufacturer’s installation method. Confirm seams, overhangs, support, wall fit, sink opening, faucet clearance, and appliance relationships before final attachment.
Install the sink using the sink and countertop manufacturers’ approved clips, adhesive, sealant, or support method. Connect the drain, water supply, disposal, dishwasher connection, and other plumbing only after confirming that the installation is properly supported.
Place each appliance in its designated opening and follow its specific installation instructions for cutout dimensions, air space, anti-tip devices, electrical supply, gas connections, water connections, ventilation, and door clearance.
- Check cabinet alignment before countertop installation.
- Confirm that the sink is securely supported and sealed.
- Verify dishwasher and refrigerator removal paths for future service.
- Test hot and cold water and inspect every new connection for leaks.
- Test appliance, lighting, receptacle, and ventilation operation after installation.
Install the Backsplash and Finish Trim
With countertops installed, measure the backsplash area and plan the tile layout before applying adhesive. Account for outlets, switches, windows, range areas, cabinet bottoms, exposed edges, and pattern alignment.
Ceramic, porcelain, glass, natural stone, and other backsplash materials have different requirements for adhesives, grout, sealing, cutting, and movement joints, so follow the material manufacturer’s instructions.
| Step | Action | Purpose |
|---|---|---|
| 1 | Measure and dry-plan | Avoid narrow or awkward cuts |
| 2 | Prepare the wall | Create a sound bonding surface |
| 3 | Set the material | Maintain alignment and spacing |
| 4 | Grout where applicable | Finish the joints |
| 5 | Caulk movement edges | Finish transitions and perimeter joints |
Install toe kicks, fillers, crown molding, scribes, light rails, baseboards, shoe molding, appliance panels, and other trim after the major components are positioned. Finish with paint or stain touch-ups and neat sealant joints where appropriate.
Do a Final Walkthrough and Punch List
A final walkthrough should verify both appearance and operation. Work methodically around the room instead of relying on a quick visual inspection.
Open and close every cabinet door and drawer. Check reveals, hinges, drawer slides, handles, fillers, toe kicks, countertop seams, backsplash joints, caulk lines, paint, trim, and flooring transitions.
Run water at the sink, fill and drain the basin, and inspect supply, drain, disposal, and dishwasher connections for leaks. Test appliances according to their instructions. Confirm lighting, receptacles, switches, ventilation, and other installed systems operate correctly.
Proceed section by section and test every door, drawer, fixture, appliance, connection, and finish instead of assuming that an installed component is complete.
- Record paint and trim touch-ups.
- Note missing hardware or damaged parts.
- Check countertop, cabinet, and appliance clearances.
- Inspect plumbing connections for leaks.
- Confirm the range hood or other kitchen ventilation operates correctly.
- Collect appliance manuals, warranties, paint information, cabinet touch-up materials, and contractor records.
- Assign responsibility and a completion date to every remaining punch-list item.
Close the project only after required inspections are complete and all significant punch-list items have been corrected.
Frequently Asked Questions
How to Design a Kitchen Step by Step?
Measure the room and fixed utilities first. Then define the cooking, preparation, cleanup, food-storage, and dish-storage zones; choose appliances; verify door swings and clearances; plan cabinets and countertop landing areas; check lighting and ventilation; confirm the budget; and review permits or code requirements before ordering materials. A scaled plan or 3D design can expose conflicts before construction begins.
Is It Cheaper to Buy or Build a Kitchen?
There is no universal answer. Stock or ready-to-assemble cabinets are often less expensive than fully custom cabinets, while building cabinets yourself may reduce labor cost only if you already have the tools, time, skill, and workspace. Material waste, hardware, finishing supplies, mistakes, and the value of your time should be included when comparing DIY construction with purchased cabinetry.
What Is the 3×4 Kitchen Rule?
“3×4 kitchen rule” is not the standard name for a recognized kitchen-planning rule. The phrase is sometimes used when people are referring to the traditional work triangle. NKBA planning guidance has recommended keeping each traveled leg between the primary sink, cooking, and refrigeration work centers at about 4 to 9 feet, with the three legs totaling no more than 26 feet.
What Are the 5 Basic Kitchen Layouts?
Lists vary because islands and peninsulas may be treated as separate layouts or additions to another layout. Common kitchen forms include one-wall, galley, L-shaped, U-shaped, peninsula, and island kitchens. The best choice depends on room shape, traffic, appliance locations, storage, work surfaces, and required clearances rather than the number of layout categories.
Should Kitchen Flooring Go Under the Cabinets?
It depends on the flooring. Some tile, hardwood, and fully adhered floors can run beneath cabinets when their manufacturers permit it. Floating LVP, laminate, and similar floors usually should not be trapped beneath permanent cabinets or islands because they need expansion space. Always follow the flooring manufacturer’s installation instructions and warranty requirements.
Do You Need a Permit to Remodel a Kitchen?
Permit requirements are local. Cosmetic work may require little or no permitting, while electrical changes, plumbing relocation, gas work, new ventilation, structural changes, or moving walls may require permits and inspections. Check with the authority having jurisdiction before demolition begins.
Conclusion
A successful kitchen build depends on getting the sequence right as much as choosing attractive finishes. Measure carefully, verify appliance and cabinet specifications, address permits and utilities before demolition, complete hidden repairs and rough-ins before closing the walls, and follow each flooring manufacturer’s installation requirements instead of relying on one universal flooring sequence.
The familiar advice to measure twice and cut once still applies, but a kitchen also rewards another habit: verify before fastening. Check dimensions, level, clearances, utility locations, and manufacturer instructions at every stage. That approach prevents expensive rework and produces a kitchen that is safer, easier to maintain, and more functional for daily use.
Sources
- National Kitchen & Bath Association — Kitchen & Bath Planning Guidelines — current professional kitchen-planning guidance and fifth-edition information.
- NKBA Kitchen Planning Guidelines PDF — work-triangle distances, landing areas, clearances, and related planning recommendations.
- KraftMaid — Standard Kitchen Cabinet Sizes — common cabinet heights, widths, and depths and examples of manufacturer-specific sizing.
- Shaw — VersaLock Floating Vinyl Installation Instructions — floating-floor expansion requirements and cabinet installation restrictions.
- U.S. Environmental Protection Agency — Renovation, Repair and Painting Program — lead-safe renovation guidance for pre-1978 housing.
- Occupational Safety and Health Administration — 29 CFR 1926.850 — preparatory demolition requirements, including control of electric, gas, water, sewer, and other services.
