
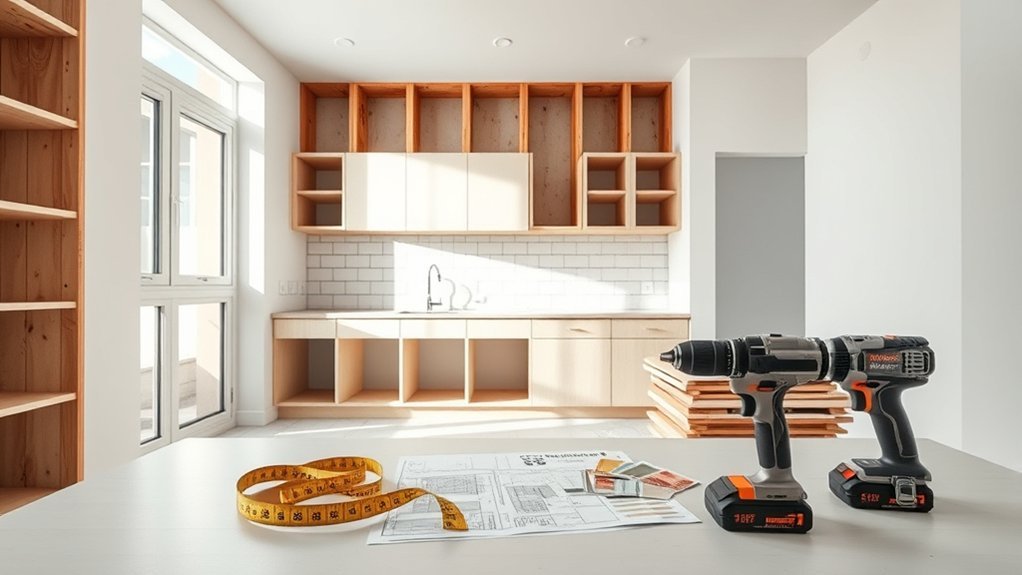
A kitchen remodel works best when the major decisions are settled before demolition starts. Define the scope, measure the room, build an itemized budget, choose the layout, confirm appliance sizes, check permit requirements, and order long-lead materials first. During construction, follow a controlled sequence from protection and demolition through rough-ins, inspections, cabinets, countertops, fixtures, appliances, and final cleanup.
Quick Answer
A kitchen remodel should start with scope, measurements, budget, layout, permits, and product selections—not demolition. Order long-lead cabinets and appliances early, then follow a controlled build sequence: protection and demo, structural and rough-in work, inspections, walls and flooring, cabinets, countertops, fixtures and appliances, backsplash and trim, and a final punch list.
Key Takeaways
- Finalize the kitchen layout, measurements, appliance models, ventilation plan, and utility locations before demolition.
- Build the budget from real local quotes and product prices, then keep a contingency for hidden conditions and approved changes.
- Get multiple contractor estimates and verify licensing where required, insurance, references, scope, payment terms, and change-order procedures.
- Complete structural work and plumbing, electrical, gas, and HVAC rough-ins before walls are closed, with inspections when required.
- Install and level cabinets before final countertop templating, then complete fixtures, appliances, backsplash, trim, testing, and the punch list.
At a Glance
| Time Required | Planning may take several weeks or longer; construction time varies widely with scope, permits, trade scheduling, and material availability. |
| Difficulty | High for a full remodel because cabinetry, plumbing, electrical, ventilation, structural work, inspections, and finish trades must be coordinated. |
| Tools Needed | Accurate tape or laser measure, floor plan, product specifications, budget tracker, project schedule, camera or phone for documentation, and suitable protective equipment for any work you are qualified to perform. |
| Cost | Highly variable. Build the budget from local labor quotes, permits, cabinets, countertops, appliances, flooring, fixtures, finishes, disposal, and a contingency for unforeseen work. |
Why Kitchen Remodel Planning Matters
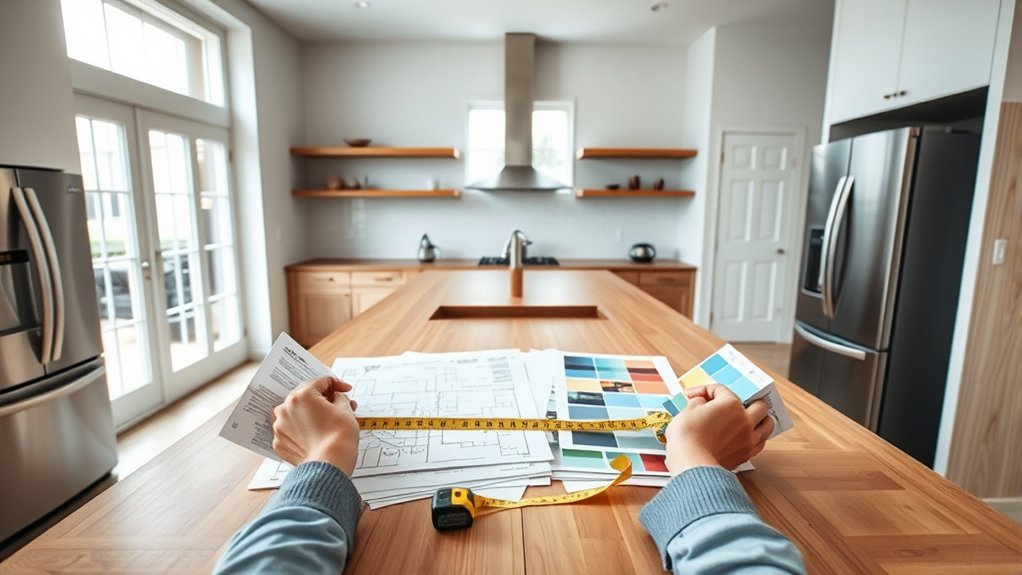
Careful planning is the foundation of a successful kitchen remodel because nearly every construction decision depends on something that should already have been decided on paper. Cabinet dimensions affect appliance openings, appliance locations affect electrical and plumbing rough-ins, and the final cabinet position affects countertop measurements.
Start by defining the problems the remodel must solve. That may mean adding storage, improving prep space, correcting poor traffic flow, replacing worn finishes, improving ventilation, making the room easier to use, or changing the overall layout.
Measure the room carefully, including wall lengths, ceiling height, doors, windows, soffits, plumbing, gas connections, electrical outlets, switches, HVAC registers, and any structural elements that cannot easily move. Then identify the exact appliances, sink, faucet, hood, and other products that affect cabinet or utility dimensions.
The planning stage should also establish the budget, contractor scope, permit path, material schedule, temporary-kitchen plan, and construction sequence. Making these decisions before demolition reduces expensive mid-project changes.
The safest time to change a kitchen layout is on the plan. Once plumbing, wiring, cabinets, and countertops are installed, the same change becomes slower and more expensive.
Set Your Kitchen Remodel Budget
A kitchen remodel budget should be built from the actual scope rather than a single national average. Labor rates, cabinet quality, countertop material, appliance choices, structural changes, permit fees, and regional prices can move the total dramatically.
Start with the maximum amount you are comfortable spending, then divide that amount among the work that must happen. Include demolition and disposal, framing, electrical work, plumbing, HVAC or ventilation work, cabinets, countertops, flooring, appliances, fixtures, lighting, backsplash, paint, permits, design services, and final repairs.
A contingency is also sensible because demolition can expose damaged subfloors, leaking plumbing, outdated wiring, moisture problems, framing defects, or other conditions that were hidden during planning. A planning buffer of roughly 10% to 20% is commonly used as a starting point, but it is not a universal requirement. Older homes, structural work, and projects with more unknown conditions may justify a larger cushion.
Budget Categories
Organize the remodel into categories before approving individual finishes. This makes it easier to see whether an upgrade in one area forces a compromise somewhere else.
- Planning and permits: design services, engineering when needed, drawings, permit fees, and required inspections.
- Construction labor: demolition, framing, drywall, plumbing, electrical, HVAC, flooring, cabinetry, tile, painting, and finish carpentry.
- Cabinetry and storage: cabinet boxes, doors, panels, hardware, organizers, trim, fillers, and installation.
- Surfaces: countertops, backsplash, flooring, wall finishes, and paint.
- Fixtures and appliances: sink, faucet, disposal, refrigerator, range or cooktop, oven, dishwasher, hood, microwave, and lighting.
- Project support: debris removal, delivery charges, temporary kitchen supplies, storage, cleaning, and contingency.
A cosmetic refresh can cost far less than a remodel that relocates plumbing, removes walls, changes electrical service, or uses fully custom cabinetry. For that reason, local written estimates are more useful than a broad national price range.
Contingency Reserve
A contingency reserve is money that remains uncommitted until an unforeseen condition or necessary change appears. It should not become a second decorating budget before construction begins.
Examples of legitimate contingency expenses include damaged subfloor discovered after cabinet removal, plumbing leaks behind a wall, electrical deficiencies uncovered during rough-in, concealed water damage, or framing that must be repaired before new finishes can be installed.
Keep the contingency separate from optional upgrades. If construction finishes without using it, that remaining money stays with you rather than being absorbed by unplanned feature creep.
Cost Priorities
Set priorities before shopping. First protect the parts that affect safety, structure, function, and future access. A reliable electrical system, sound plumbing, proper ventilation, level cabinets, durable work surfaces, and enough usable storage generally matter more than decorative upgrades.
- Identify must-have functional changes.
- Price necessary structural, plumbing, electrical, HVAC, and permit work.
- Obtain cabinet and countertop pricing early because these choices affect many later decisions.
- Choose appliances by exact model number before finalizing cabinet openings and utility locations.
- Separate optional finishes from work that would be difficult to add later.
- Approve upgrades only after the base project and contingency remain affordable.
Choose the Best Kitchen Layout
The best kitchen layout matches the room, the number of cooks, the way food is prepared, and normal household traffic. It should also leave enough clearance for appliance doors, cabinet doors, drawers, seating, and people to move without blocking one another.
The National Kitchen & Bath Association maintains current kitchen planning guidance for circulation, work areas, accessibility, and code-aware design. Its planning recommendations should be used alongside the building and accessibility rules that apply where the home is located. See the NKBA Kitchen & Bath Planning Guidelines update.
Layouts That Fit Space
Common layouts include:
- U-shape: three connected work sides with substantial counter and storage potential. It can work well for one or more cooks when the center aisle is wide enough.
- L-shape: two adjoining cabinet runs that keep one side of the kitchen open to another room or dining area.
- Galley: two parallel runs that can be efficient in narrow rooms when door swings and traffic are controlled.
- Island layout: adds work surface, storage, seating, appliances, or a sink when the room is large enough to maintain proper clearances.
- Single-wall layout: useful where space is limited, with storage, preparation, cooking, and cleanup arranged along one run.
For a traditional three-center kitchen, NKBA planning guidance has long used the sink, cooking surface, and refrigerator as the basic work triangle. Each leg is commonly planned between 4 and 9 feet, with major household traffic kept out of the triangle where practical. Modern kitchens with multiple cooks or additional work centers may work better when planned as task zones rather than forcing every activity into one triangle.
Workflow and Traffic Flow
A work aisle is different from a simple walkway. NKBA planning guidance recommends approximately 42 inches for a one-cook work aisle and 48 inches for multiple cooks. Exact needs can increase when appliance doors, accessibility requirements, seating, or unusual traffic patterns are involved.
Place frequently used items close to the task they support. Store knives and prep tools near the main preparation surface, pots near the cooking area, dishes near the dishwasher, and waste or recycling close to cleanup and prep zones.
Do not let an island solve one problem while creating another. Confirm that the refrigerator, oven, dishwasher, cabinet drawers, and doors can open fully without trapping the cook or blocking the primary passage.
Note: NKBA dimensions are planning recommendations, not a substitute for applicable building, electrical, plumbing, fire, accessibility, or local zoning requirements. Confirm the rules for the actual project location.
Hire a Kitchen Remodeler
Compare multiple kitchen remodelers before signing a contract. Three written estimates can be a practical target, but the important point is having enough comparable proposals to understand the scope, exclusions, material allowances, schedule, and price differences.
The U.S. Federal Trade Commission recommends considering contractors who are properly licensed and insured, checking references and complaints, obtaining multiple written estimates, and using a clear written contract. See the FTC’s home-improvement contractor guidance.
- Verify any license required by the state, county, or city.
- Ask for proof of appropriate insurance.
- Request recent references for comparable kitchen projects.
- Compare detailed written estimates rather than only bottom-line prices.
- Confirm what is included, excluded, owner-supplied, or carried as an allowance.
- Put the start window, estimated completion, payment schedule, cleanup responsibilities, warranties, and change-order process in writing.
- Agree on who obtains permits and schedules required inspections.
- Establish how questions and decisions will be documented during construction.
Do not treat an online star rating as proof of qualifications. Reviews can provide useful background, but a specific rating such as 4.8 or 4.9 is not an industry requirement.
Payment terms should follow the contract and applicable law. Avoid paying the full project price upfront. Some jurisdictions limit contractor deposits, so confirm local consumer-protection requirements before agreeing to a down payment.
Plan Cabinets, Counters, and Storage
Cabinets and countertops shape both the kitchen layout and the final cost, so they should be selected early. Cabinet pricing can vary greatly with construction method, finish, hardware, accessories, modifications, and installation complexity.
| Choice | Practical effect |
|---|---|
| Stock cabinets | Standard sizes and finishes; usually faster and less customizable |
| Semi-custom cabinets | More size, finish, and storage choices without fully custom fabrication |
| Custom cabinets | Built for the project; highest design flexibility and often higher cost |
Map storage by what will actually live in each zone. Wide drawers can make pots easier to reach, pull-outs can improve access to deep cabinets, vertical dividers can organize sheet pans and cutting boards, and corner organizers can make awkward spaces more useful.
Countertops should be chosen for durability, maintenance, appearance, heat and stain resistance, edge options, and budget. Laminate can control cost; natural stone offers distinctive appearance but may require material-specific care; engineered products have their own heat, cleaning, and fabrication requirements. Follow the manufacturer’s instructions for the selected material.
Before cabinets are ordered, verify the room measurements and the exact specifications for the refrigerator, range, oven, cooktop, dishwasher, microwave, hood, sink, and other built-in products. Small dimension errors can become expensive once cabinets are manufactured.
Order Materials Before Demo
Do not demolish a usable kitchen simply because the design looks finished on paper. Confirm the availability and expected delivery of the products that can stop construction if they are late.
Cabinets, appliances, specialty fixtures, flooring, tile, hardware, and other products can have changing lead times. Order timing should be based on the actual supplier’s current estimate rather than an assumed number of weeks.
Material Lead Times
Before demolition, confirm:
- Final cabinet drawings and finish selections.
- Exact appliance model numbers and manufacturer dimensions.
- Sink, faucet, disposal, cooktop, and hood specifications.
- Flooring, backsplash, lighting, and hardware availability.
- Whether products are in stock, made to order, or backordered.
- Where deliveries will be stored safely and under suitable conditions.
- Which items must be physically on site before rough-in or installation can proceed.
Countertop material can be selected early, but final countertop measurements are normally taken only after base cabinets and other supporting structures are installed, secured, and accurately leveled.
Inspect Materials When They Arrive
Inspect major materials when they arrive, not weeks later when an installer opens the package. Compare each shipment with the purchase order and approved specifications.
| Checkpoint | Action | Why It Matters |
|---|---|---|
| Cabinets | Verify quantity, size, finish, door style, and visible damage | Replacement parts can be ordered before installation stalls |
| Appliances | Confirm model numbers and inspect packaging or visible damage | Prevents cabinet and utility conflicts |
| Countertops | Review selected slab or material and final fabrication details | Reduces finish, seam, and cutout surprises |
| Fixtures | Match sink, faucet, lighting, and hardware to order sheets | Wrong finishes or sizes are caught early |
| Storage | Follow supplier instructions for temperature, moisture, stacking, and protection | Reduces damage before installation |
Photograph damaged boxes or products and report shortages or defects promptly according to the seller’s delivery and return policy.
Protect Your Home Before Work Starts
A kitchen remodel can spread dust and debris far beyond the room if containment is not planned. The U.S. Environmental Protection Agency recommends controlling dust, isolating work areas, protecting occupants, and using appropriate ventilation during remodeling. See the EPA’s indoor-air-quality remodeling guidance.
- Remove food, cookware, small appliances, artwork, and nearby furnishings before demolition.
- Protect floors and traffic paths with materials suitable for the finished surface.
- Use durable barriers to separate the work zone from occupied parts of the home.
- Seal or protect HVAC supply and return registers in the work area when dusty work is performed, while maintaining an appropriate ventilation strategy.
- Control debris at the source and clean the work area regularly instead of allowing dust to accumulate.
- Keep children, pets, and other occupants away from the active construction zone.
- Have water, electrical, gas, and other utilities isolated by qualified people when the work requires it.
Warning: Renovation in a pre-1978 U.S. home can disturb lead-based paint and create hazardous lead dust. EPA recommends lead-safe work practices, and contractors performing covered work generally must comply with the Renovation, Repair and Painting Rule. Before disturbing older painted surfaces, review EPA lead-safe renovation guidance. Suspected asbestos-containing material should also be evaluated appropriately before disturbance.
Be careful with exhaust fans used for dust control. Strong exhaust can depressurize a house and may contribute to combustion-appliance backdrafting. The ventilation plan should account for furnaces, boilers, fireplaces, gas water heaters, range hoods, and other combustion equipment.
Pro Tip: Set up a temporary kitchen before demolition. A safe location with a refrigerator or mini-fridge, microwave or other permitted countertop appliance, basic dishes, drinking water, trash supplies, and a simple food-prep surface can make the construction period much easier.
Follow the Kitchen Remodel Order
The exact schedule changes with the project, but the work should follow the dependencies between trades. The central rule is simple: complete and inspect the work that will be hidden before covering it with finished surfaces.
- Finalize design and specifications. Lock the layout, measurements, appliance models, ventilation plan, cabinet drawings, major finishes, and utility locations.
- Confirm permits and inspections. Determine what the local building department requires and who is responsible for applications and inspection scheduling.
- Order critical materials. Confirm major items before taking the old kitchen out of service.
- Protect the home and establish containment. Cover floors, isolate dusty areas, protect occupants, and prepare disposal routes.
- Demolish carefully. Remove only what the approved scope calls for while watching for hidden utilities, moisture damage, structural problems, lead hazards, and other concealed conditions.
- Complete framing and structural work. Make approved wall, opening, blocking, or framing changes before finishes return.
- Complete rough plumbing, electrical, gas, and HVAC work. Place supplies, drains, circuits, boxes, ducts, and ventilation components according to the final layout.
- Complete required rough inspections. Do not bury work that must be inspected first.
- Close and finish walls. Install insulation where required, drywall or wallboard, patching, primer, and appropriate early paint coats.
- Resolve flooring timing. Install the floor at the stage required by its manufacturer and the cabinet plan.
- Install and level cabinets. Secure cabinets accurately because countertops, panels, trim, and appliance openings depend on their final position.
- Template and install countertops. Final field measurements should reflect the installed cabinets, walls, sinks, cooktops, and other relevant components.
- Complete finish plumbing, electrical, lighting, and appliances. Install sinks, faucets, switches, fixtures, appliances, and connections as the project sequence allows.
- Install backsplash, hardware, trim, and final finishes. Complete visible details after the major components are secure.
- Inspect, test, clean, and complete the punch list. Confirm every door, drawer, light, receptacle, fixture, appliance, fan, and finish works as intended.
Note: Flooring does not have one universal position in the remodel sequence. Tile, hardwood, engineered products, resilient flooring, and floating floors can have different requirements. Follow the flooring manufacturer’s installation instructions and coordinate the choice with the cabinet installer before construction starts.
Install Fixtures, Appliances, and Finishes
Once cabinets and countertops are secure, the kitchen moves into finish work. This stage brings together plumbing fixtures, lighting, switches and receptacles, appliances, backsplash, cabinet hardware, trim, and touch-up work.
Install sinks, faucets, disposals, dishwashers, cooking appliances, refrigerators, and other products according to their manufacturer instructions and applicable codes. Appliances that require plumbing, gas, or hardwired electrical connections should be connected by qualified trades where required.
- Confirm cabinet and countertop openings before moving appliances into position.
- Protect new flooring, cabinet faces, and countertop edges during installation.
- Level appliances according to their instructions.
- Verify doors, drawers, shelves, appliance panels, and adjacent cabinets have enough operating clearance.
- Test hot and cold water, drains, shutoff valves, electrical controls, lighting, ventilation, and appliance functions.
- Complete backsplash, caulk, trim, hardware, and paint touch-ups.
Kitchen ventilation deserves special attention because cooking produces moisture, odors, particles, and—depending on the appliance—combustion pollutants. Plan the range hood and its duct route before cabinets and ceilings are closed. EPA recommends exhausting kitchen ventilation directly outdoors and properly sizing the system for the application.
If appliances are being replaced, energy use can be part of the selection process. For example, ENERGY STAR provides current buying guidance for certified refrigerators and other household appliances.
Manage Permits, Timelines, and Cleanup
Permit requirements depend on the jurisdiction and the work being performed. Structural alterations, new or relocated electrical circuits, plumbing changes, gas work, and ventilation changes may trigger permits or inspections even when cosmetic work would not.
Confirm the permit path with the local building department before demolition. Do not rely on a contractor, neighbor, or internet forum to tell you that a permit is unnecessary without checking the authority that actually has jurisdiction.
The project schedule should identify dependencies rather than simply assigning dates. Cabinet installation cannot begin before cabinets arrive. Required rough-in inspections normally must occur before walls are closed. Countertop templating depends on installed cabinets. Appliance hookup depends on finished utility locations.
Use written change orders whenever the approved scope changes. The change order should describe the new work, added or reduced price, and schedule effect before the work proceeds whenever possible.
Cleanup should happen throughout construction. Remove debris, control dust, keep exits and paths safe, and protect newly installed finishes from later trades.
At the end of the project, complete a detailed final walkthrough. Open every cabinet and drawer, test lighting and receptacles, run water, check drains for leaks, operate the hood, test appliances, inspect caulk and grout, review paint and trim, and document anything that still needs correction.
Collect appliance manuals, warranty information, paint colors, cabinet and countertop care instructions, spare tile or flooring, permit records, inspection approvals, and final invoices before closing the project file.
Frequently Asked Questions
In What Order Should You Do a Kitchen Remodel?
Finalize the scope, layout, measurements, appliance specifications, permits, and major orders first. Then protect the house, demolish the old kitchen, complete structural and utility rough-ins, obtain required inspections, close the walls, resolve flooring, install and level cabinets, template and install countertops, connect fixtures and appliances, complete backsplash and trim, and finish with testing, cleanup, and a punch list.
What Are Some Common Mistakes to Avoid During a Kitchen Renovation?
Common mistakes include demolishing before products are available, changing the layout after rough-in, relying on incomplete estimates, ignoring ventilation, underplanning storage, ordering appliances after cabinets, forgetting permits or inspections, using the contingency for optional upgrades, and failing to document change orders. Safety mistakes include disturbing lead or suspected asbestos without the proper precautions.
How Do You Decide Where to Put Things in Your Kitchen?
Start with the major work centers—refrigeration, preparation, cooking, and cleanup—then place storage around the tasks performed in each zone. Keep frequently used tools within easy reach, heavy cookware in strong lower storage, dishes near the dishwasher, and waste or recycling close to prep and cleanup. Check appliance-door clearance and traffic flow before approving the layout.
What Is the Most Expensive Part of Redoing a Kitchen?
There is no single category that is most expensive on every kitchen remodel. Cabinetry is often a major expense, but custom cabinets, structural changes, premium appliances, plumbing and electrical relocation, countertops, and regional labor costs can change the ranking. The best way to identify the biggest cost on a specific project is to compare itemized local estimates.
How Long Does a Kitchen Remodel Take?
There is no reliable universal duration. Planning, permit review, custom products, cabinet production, inspections, countertop fabrication, project size, structural changes, and trade availability all affect the schedule. Ask the contractor for a phase-by-phase schedule and identify which materials or inspections are on the critical path before demolition begins.
Should Flooring Go Before or After Kitchen Cabinets?
It depends on the flooring system, cabinet plan, appliance clearances, and manufacturer instructions. Some finished floors may run beneath cabinets, while many floating floors require room to expand and should not be trapped under fixed cabinetry. Decide the sequence before installation and coordinate it with both the flooring and cabinet installers.
Conclusion
A well-planned kitchen remodel is a chain of dependent decisions. Finalize the layout and product specifications before rough-in, confirm permits before work begins, order critical materials before taking the kitchen apart, and protect the home during demolition. From there, structural and utility work can be completed and inspected before cabinets, countertops, fixtures, appliances, and finishes are installed.
The most reliable remodel is not necessarily the one with the largest budget. It is the one in which measurements are accurate, responsibilities are written down, hidden work is completed correctly before it is covered, products arrive when they are needed, and the finished kitchen is tested carefully before the project closes.
Sources
- National Kitchen & Bath Association — Updated Kitchen & Bath Planning Guidelines — kitchen planning, circulation, accessibility, and current guideline context.
- Federal Trade Commission — How To Avoid a Home Improvement Scam — contractor estimates, licensing, insurance, contracts, and payment precautions.
- U.S. Environmental Protection Agency — Best Practices for Indoor Air Quality When Remodeling — dust containment, ventilation, occupant protection, and combustion-safety considerations.
- U.S. Environmental Protection Agency — Steps to Lead-Safe Renovation, Repair and Painting — lead hazards and lead-safe renovation practices for older homes.
- ENERGY STAR — Refrigerators — current appliance-efficiency and refrigerator-selection guidance.

1 thought on “How to Remodel a Kitchen: Step-by-Step Planning Guide”