
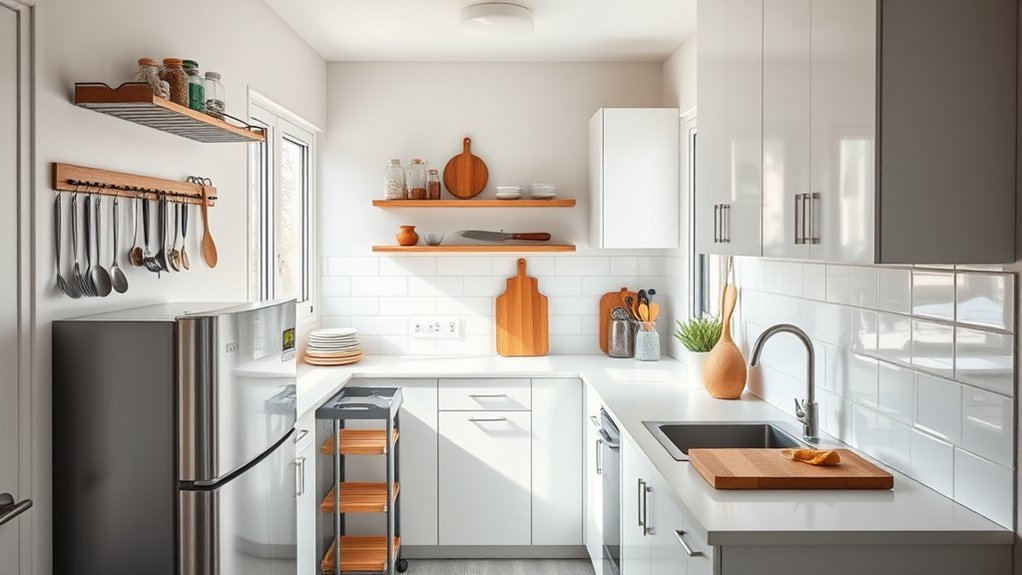
A small kitchen can gain useful counter and storage space without a full remodel. The most effective approach is to clear permanent clutter first, then use overlooked areas such as the sink, walls, cabinet interiors, drawers, and a carefully placed rolling cart. Measure before buying anything so each addition improves the workflow instead of making the room harder to move through.
Quick Answer
To create more counter space in a small kitchen, move storage upward and turn unused surfaces into temporary work zones. Use a fitted over-sink board, a correctly sized rolling cart, wall rails or shelves, drawer organizers, shelf risers, and collapsible tools. Keep the stovetop clear during cooking and use any cover only on fully cool, switched-off burners.
Key Takeaways
- Use temporary prep surfaces over the sink or on a movable cart instead of permanently filling the counter.
- Move frequently used tools to securely mounted rails, shelves, pegboards, or magnetic storage where appropriate.
- Use drawer dividers, shelf risers, under-shelf baskets, and stackable containers to use existing cabinet space more efficiently.
- Measure every organizer, cart, shelf, and work surface before buying it.
- Treat stovetop covers as temporary surfaces only when the cooking area is switched off and completely cool.
At a Glance
| Time Required | About 15 minutes for simple reorganizing; longer if shelves, rails, or other mounted storage must be installed. |
| Difficulty | Easy for organizers and movable accessories; moderate for securely mounted wall storage. |
| Tools Needed | Tape measure; optional drill, level, and wall-appropriate fasteners for mounted shelves or rails. |
| Cost | Potentially $0 when reorganizing what you already own; otherwise it varies with the cart, shelving, rails, organizers, or compact tools selected. |
Create Prep Space Over the Sink
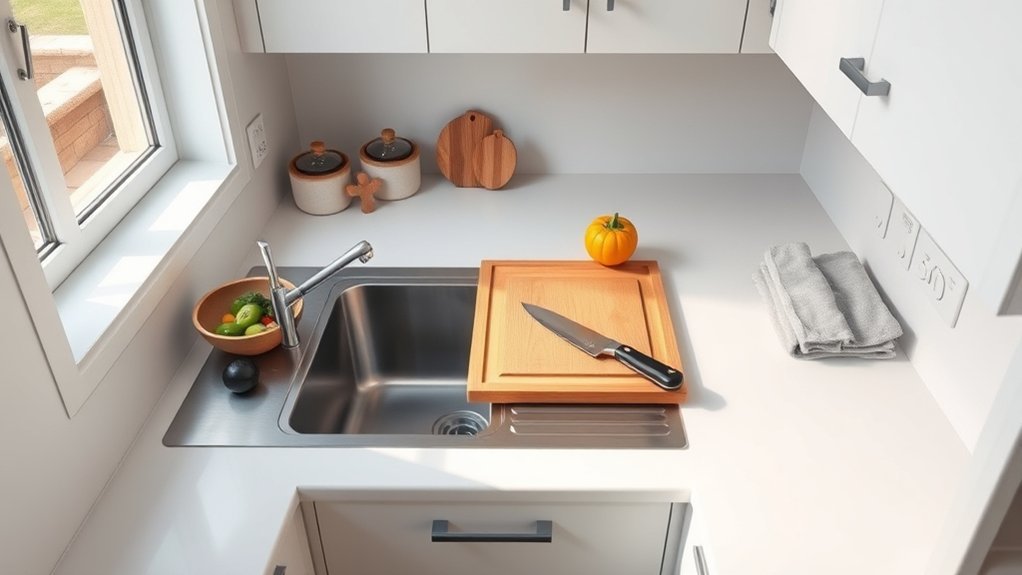
A large cutting board that fits securely over the sink can add valuable prep space without permanently changing the kitchen. It works especially well when the existing countertop leaves little room beside the sink.
Measure the inside and outside dimensions of the sink before choosing a board. The board should sit level, resist sliding, and leave enough clearance for the faucet. Avoid a board that rocks, flexes excessively, or can drop into the basin while a knife is in use.
A well-fitted board allows rinsing, trimming, and chopping to happen in one compact work zone. Keeping a small scrap bowl nearby can also reduce trips between the board and trash can.
A stable over-sink board turns otherwise unused sink space into temporary prep room while keeping the main counter available for other tasks.
Food safety still matters. Wash the cutting board with hot, soapy water after use, especially after handling raw meat, poultry, or seafood. When possible, use a separate board for ready-to-eat foods such as produce and bread. Replace boards that develop deep, difficult-to-clean grooves.
Pro Tip: Store the over-sink board vertically when it is dry. That keeps the sink available and prevents a temporary workspace from becoming permanent counter clutter.
Put Walls and Backsplashes to Work
Walls and backsplashes can hold tools, cookware, spices, and dishes that would otherwise occupy the counter. The goal is not to cover every wall with storage; it is to move frequently used items upward while keeping the work area easy to clean and visually manageable.
Before installing anything, check the available width, the location of electrical outlets and switches, and the clearance needed around the cooktop and sink. Follow the storage manufacturer’s mounting instructions and load limits.
Wall-Mounted Storage
Wall-mounted storage turns unused vertical space into an organization zone. Shelves, hooks, wall grids, and pegboards can keep dishes, pans, utensils, and spices within easy reach while freeing the counter below.
Current modular systems such as IKEA’s KUNGSFORS range combine shelves, rails, hooks, and containers for customizable kitchen storage. Whatever system is used, secure anchoring matters. Use fasteners suitable for the wall construction and the expected load, and seek professional installation help if the wall material or anchoring method is uncertain.
Reserve open wall storage for items that are used often enough to stay clean. Less frequently used tools usually belong behind a cabinet door, where they collect less grease and dust.
Note: A shelf’s usable capacity depends on the shelf, brackets, fasteners, wall material, and installation. Do not assume that a strong shelf is safe if the wall anchors are inadequate.
Backsplash Tool Rails
Backsplash tool rails can keep frequently used utensils off the worktop while leaving them visible and easy to grab. Hooks can hold lightweight tools such as spatulas, ladles, measuring spoons, or small strainers.
Place rails where hanging tools will not interfere with faucets, outlets, cabinet doors, or cooking. Keep combustible items away from active burners and other high-heat areas.
A wall grid or stainless steel pegboard can provide similar storage for compatible hooks and accessories. The best layout keeps the tools used for a particular task close to that task—for example, prep utensils near the main cutting area rather than across the room.
Open Shelf Solutions
Open shelving creates practical storage for everyday dishes, mugs, jars, or frequently used ingredients while keeping the counter below available.
To prevent an open shelf from becoming visual clutter, group similar items and leave some empty space rather than filling every inch.
- Use shelves above prep areas for lightweight items used every day.
- Add tiered storage for short spice jars and small containers.
- Use compatible clip-on baskets beneath sturdy shelves when the shelf can support the added weight.
- Keep the heaviest pieces on lower, well-supported shelves.
A backsplash rail, wall grid, or securely installed pegboard can complement open shelving. The result should make frequently used items easier to reach without creating another crowded surface.
Add a Cart for Extra Counter Space
A kitchen cart can provide flexible rolling workspace when permanent counter space is limited. Unlike a fixed island, a compact cart can be moved for prep, serving, or storage and parked elsewhere afterward.
Measure the cart’s width, depth, and handle clearance before buying it. Also measure the path it must travel through so the cart does not block cabinet doors, appliances, or the main walking route.
Flexible Rolling Workspace
A rolling kitchen cart works best when its top is close to normal counter height and large enough for the tasks you actually perform. A huge cart in a tiny kitchen can create more frustration than usable space.
- Choose locking casters so the cart stays steady during normal prep.
- Use hooks or side racks only if they do not snag clothing or narrow the walkway.
- Keep the top mostly clear so it remains useful as a work surface.
A cart can shift from a coffee station to a chopping area or serving surface as needed, making it one of the more adaptable additions to a compact kitchen.
Shelf Storage Below
Lower shelves let a cart provide both work space and storage. Store items by function instead of filling the shelves randomly.
For example, a prep cart might hold mixing bowls, cutting boards, measuring tools, and frequently used dry ingredients. A coffee cart could hold mugs, filters, beans, and related accessories. Keeping each cart focused prevents it from turning into another catch-all area.
Shelf risers or shallow bins can help organize the lower levels, but avoid stacking items so high that they become unstable when the cart moves.
Tuck Away Easily
The biggest advantage of a mobile cart is that it can leave the main work area when it is not needed. Plan its parking spot before buying it.
- Park it against an unused wall.
- Use a shallow cart in a narrow gap when the dimensions allow safe access.
- Move it temporarily beside the prep area during cooking.
A cart should never block an exit, create a trip hazard, or prevent an appliance door from opening fully. If there is no practical place to park it, wall or drawer storage may be a better choice.
Maximize Drawer Storage
Drawers can hold far more than loose utensils when their interiors are divided according to use. Drawer organizers and adjustable dividers stop tools from spreading across the entire drawer and make frequently used items easier to find.
A slim in-drawer knife block can store knives without using countertop space. Shallow inserts are useful for peelers, clips, measuring spoons, thermometers, and other small tools that otherwise disappear under larger utensils.
A dedicated spice drawer can free cabinet shelves while keeping labels visible. If bottles are stored on an angle or on their sides, make sure their caps seal properly.
Deep drawers can use stackable organizers, upright pan dividers, or bins for lids and food-storage containers. Before adding organizers, remove duplicates, broken tools, and items that are rarely used. Creating more compartments does not help if the drawer still contains more equipment than the kitchen needs.
Use Shelf Risers and Cake Stands
Shelf risers create a second level inside cabinets or on sturdy open shelves, making better use of vertical space above short items such as mugs, bowls, cans, and jars.
A small cake stand or raised tray can perform a similar job on a counter or inside a large cabinet, especially for lightweight items that need to stay visible. Use it selectively; adding too many display pieces can make a small counter feel busier rather than larger.
Use vertical organizers to separate layers of storage, not simply to stack more clutter into the same cabinet.
- Stack frequently used dishes vertically with shelf risers.
- Use a raised tray for a small group of everyday items.
- Keep heavy pieces on the lowest stable surface.
Measure cabinet height before buying a riser so there is enough room to lift items in and out comfortably.
Turn the Stovetop and Windowsill Into Space
A small kitchen can sometimes gain temporary room from areas that are unused between cooking sessions, but heat and fire safety must come first.
A fitted stovetop cover may provide temporary space for lightweight tasks only when every burner is switched off and the cooking surface is completely cool. The cover must be removed before any burner or oven operation that could heat the cooktop. It should never hide active controls or be treated as permanent countertop space.
Warning: Keep paper towels, wooden utensils, cloths, packaging, and other combustible objects away from an active stovetop. Never place a wooden or combustible cover over burners that are on, warm, or capable of being accidentally switched on.
A deep windowsill can hold a few lightweight, nonperishable items such as a cookbook stand or decorative container if doing so does not prevent the window from opening, interfere with ventilation, or expose food to excessive heat or direct sunlight.
Use both areas as occasional support space rather than permanent storage. The main goal is to keep the primary worktop open and safe.
Clear Counter Clutter With Smart Storage
Before buying more organizers, remove everything from the counter and decide what genuinely needs to stay there. An appliance used several times a day may deserve permanent space; one used once a month probably does not.
Next, create storage zones based on the kitchen’s workflow. Keep prep tools near the main cutting area, pots near the cooking zone when practical, dishes near the dishwasher or drying area, and coffee supplies together.
A wall-mounted system can hold frequently used utensils, while a shelf riser can create a second storage level for small containers. Clip-on baskets may work below compatible shelves, and an over-the-sink cutting board can provide temporary prep room when needed.
- Keep only true daily-use items on the counter.
- Use wall-mounted storage for frequently reached tools.
- Add shelf risers where unused vertical cabinet space exists.
- Use adjustable drawer inserts for small utensils.
- Group equipment according to where it is used.
This approach reduces visual clutter while also cutting down the number of steps needed during everyday cooking.
Use Cabinet Tops and Under-Shelf Storage
When cabinets stop below the ceiling, their tops can provide occasional storage for lightweight, infrequently used items. Lidded or stackable containers help protect contents from kitchen dust and grease.
Do not overload cabinet tops or place unstable stacks overhead. Heavy appliances and cookware are usually better stored lower, where they can be lifted safely.
The best vertical storage uses empty height without creating unstable stacks or making everyday items difficult to reach.
Inside cabinets, under-shelf storage can create an additional layer for lightweight items. Wire racks, compatible hanging baskets, shallow bins, and adjustable dividers can separate spices, lids, wraps, or small kitchen tools.
Cabinet doors may also hold slim organizers for lightweight flat items when the hinges and organizer are designed for the added load. Check that anything mounted inside still clears shelves and stored contents when the door closes.
Pick Space-Saving Kitchen Tools
Space-saving kitchen tools are most useful when they replace bulky equipment rather than adding one more gadget to an already full cabinet.
Stackable containers can use vertical cabinet space efficiently. Foldable cutting boards provide temporary prep room and store thinly afterward. Nesting bowls and measuring cups reduce the footprint of items that would otherwise occupy separate shelves.
A magnetic knife strip can free drawer or counter space, but it must be mounted securely and positioned where children cannot easily reach the blades. Make sure the magnet holds each knife firmly and that handles do not overlap in a way that makes removal awkward.
Multi-functional pieces can also reduce the total number of tools stored in the kitchen. Collapsible dish racks are useful when drying space is needed only temporarily because they can be folded or stored once dishes are dry.
- Use stackable or nesting containers for vertical cabinet storage.
- Choose foldable boards when full-size boards are difficult to store.
- Use collapsible drying racks when the counter must serve several purposes.
- Prefer one versatile tool over several rarely used single-purpose gadgets.
Frequently Asked Questions
How to Make Extra Counter Space?
Start with temporary work surfaces rather than permanent additions. A stable over-the-sink cutting board can create prep space, while a correctly sized rolling cart can add movable workspace. Wall rails, shelves, hanging baskets, and drawer organizers can then move tools off the main counter. A stovetop cover should be used only when the cooking surface is switched off and completely cool.
How to Create More Cabinet Space in a Small Kitchen?
Remove duplicates and rarely used items first, then use shelf risers, adjustable dividers, stackable containers, under-shelf baskets, door-mounted organizers, and vertical dividers for pans or lids. Store the heaviest items low and keep frequently used items where they can be reached without moving several other things first.
How to Maximize Space in a Tiny Kitchen?
Use vertical storage, compact furniture, and temporary work surfaces. Wall shelves, rails, magnetic storage, an over-sink board, a narrow rolling cart, drawer dividers, shelf risers, and collapsible tools can all help. Measure first and choose only additions that leave cabinets, appliances, and walking paths easy to use.
What Are Common Mistakes to Avoid in a Small Kitchen?
Common mistakes include covering the counter with rarely used appliances, buying organizers before measuring, overloading open shelving, ignoring unused vertical space, and storing everyday tools far from where they are used. Another mistake is adding carts or shelves that reduce walking space instead of improving it.
Is It Safe to Use a Stovetop Cover for Extra Counter Space?
Only use a stovetop cover as temporary space when every burner is switched off and the entire cooking surface is completely cool. Remove the cover before cooking and keep combustible materials away from active burners. Do not use a cover that can hide controls or make accidental burner activation more likely.
What Should Stay on a Small Kitchen Counter?
Keep items on the counter only when they are used frequently enough to justify the space. That may include a coffee maker, utensil container, or another daily-use appliance. Store occasional appliances, duplicate tools, extra serving pieces, and bulk supplies in cabinets, drawers, or another storage area.
Conclusion
In a small kitchen, useful space often comes from reorganizing the surfaces and storage you already have. An over-sink board can add temporary prep room, secure wall storage can clear the counter, a slim cart can create movable workspace, and drawer organizers or shelf risers can make cabinets easier to use. Keep safety in the plan: mount storage correctly, clean food-prep surfaces thoroughly, keep combustible items away from active burners, and measure every addition before it enters the room. The result is a kitchen that feels less crowded because each area has a clear purpose.
Sources
- USDA Food Safety and Inspection Service — Cutting Boards — cleaning, cross-contamination prevention, and replacement guidance for cutting boards.
- U.S. Fire Administration — Keep Anything That Can Catch Fire Away From Your Stove Top — backs the stovetop fire-safety warning.
- U.S. Fire Administration — Cooking Fire Safety — additional guidance on keeping combustible materials away from cooking equipment.
- IKEA — KUNGSFORS Series — current manufacturer information on modular wall-mounted kitchen storage.

1 thought on “How to Make More Counter Space in a Small Kitchen: Easy Guide”