
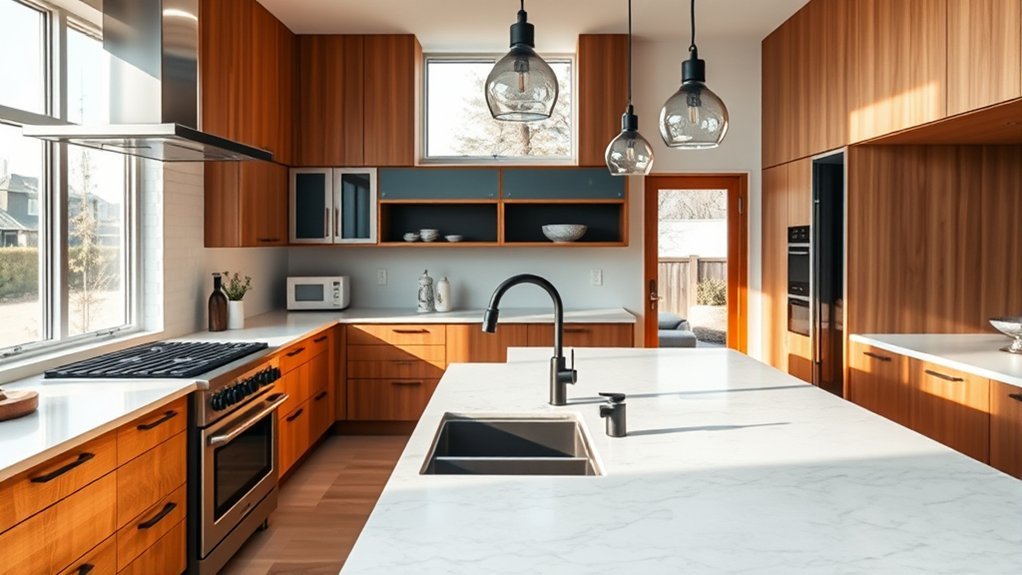
A functional kitchen layout starts with the room you actually have, not a cabinet style or a showroom photo. Measure the space, mark the doors, windows and utilities, then place the refrigerator, sink, cooking appliances and storage around the way your household cooks and moves. The best plan leaves room to work, lets every appliance open without collisions and keeps the busiest tasks close together.
Quick Answer
To design a good kitchen layout, measure the room and mark doors, windows and utilities first. Then place the refrigerator, sink and cooking area around your workflow, keep work aisles about 42 inches wide (48 inches for multiple cooks), check every door swing, and skip an island if it squeezes circulation below those clearances.
Last checked: October 9, 2026. Dates and figures were verified against official sources.
At a Glance
| Time Required | A few hours for measuring and a first plan; longer for a full renovation design |
| Difficulty | Moderate; get professional review when moving utilities, walls or major appliances |
| Tools Needed | Tape measure, pencil, graph paper or layout software, appliance specification sheets and painter’s tape |
| Cost | Planning it yourself can be free; professional design and renovation costs vary widely by scope and location |
Measure Your Kitchen Before Choosing a Layout
Every good layout starts with a to-scale drawing of the room. Measure each wall and record the ceiling height, doors, windows, openings, columns, radiators and any change in floor level. Mark which way each door swings and how much wall remains beside every opening.
Doors matter more than most people expect. NKBA guidance calls for a kitchen doorway with at least a 32-inch clear opening, and no entry door should swing into an appliance or stop it from opening safely.
Next, locate the services that are fixed or costly to move: the sink drain and water supply, any gas line, electrical circuits, outlets and the route available for a ducted range hood. A layout that ignores these limits can look great on paper but turn expensive or impractical during construction.
Write down the exact dimensions of every appliance you plan to use. Don’t rely only on nominal widths such as “30-inch range.” Manufacturer specification sheets also list required clearances, door depth, handle projection, ventilation space and installation conditions.
Warning: Moving gas piping, electrical circuits, plumbing, structural walls or exhaust ducts may require permits and qualified trades. Follow the appliance manufacturer’s installation instructions and the building, electrical, plumbing and mechanical codes that apply where you live.
Pick the Best Kitchen Layout for Your Space
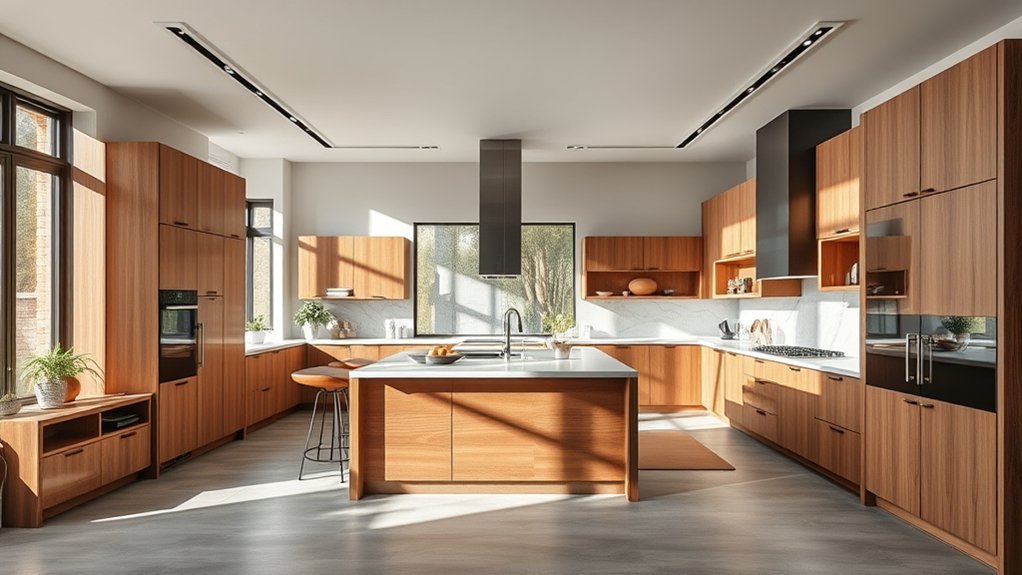
The best kitchen layout depends on your room’s shape, doors, traffic patterns, number of cooks and available wall length. U-shaped designs give generous storage and counter space when the room is wide enough, while L-shaped, galley and one-wall layouts use smaller footprints efficiently.
| Layout | Best Fit | Main Tradeoff |
|---|---|---|
| One-wall | Studios, small homes and open rooms | Limited counter and storage space; workflow becomes linear |
| Galley | Narrow rooms and efficient cooking zones | Becomes a traffic corridor if both ends connect busy rooms |
| L-shaped | Small to medium kitchens and open plans | Long legs can spread work centers too far apart |
| U-shaped | Rooms with enough width for three cabinet runs | Feels enclosed or crowded if aisles are too tight |
| Peninsula | Rooms needing extra prep space without a freestanding island | The attached end can create a pinch point |
| Island | Rooms with enough clear floor area on every side | A too-large island blocks traffic and appliance access |
A traditional work triangle helps keep the sink, cooking surface and refrigerator within practical reach, but it’s only one planning tool. Modern kitchens often have multiple cooks, islands, beverage centers, wall ovens and separate cleanup areas, so task-based zones may describe your workflow more accurately.
The National Kitchen & Bath Association’s 2026 fifth-edition planning guidance, prompted by the 2024 International Residential Code, formally builds kitchen planning around work centers and activity zones, alongside accessibility, lighting, power and ventilation.
Plan Walkways, Work Aisles, and Door Clearances
Plan at least 36 inches for walkways, 42 inches for a work aisle used by one cook and 48 inches where two or more people cook at once. Measure aisles between counter fronts, tall cabinets and appliances, not between walls.
The difference matters. A walkway mainly carries people through the room. A work aisle sits between counters or appliances where someone is preparing food, cooking or cleaning, bending down to drawers and pulling hot pans from the oven, so it needs more room.
These figures come from NKBA’s published kitchen planning guidelines, which also set clearances for seating and crossing paths. They’re design recommendations rather than building-code rules, but they’re the standard most kitchen designers work from.
| Space | Recommended Minimum |
|---|---|
| Walkway (passing through only) | 36 inches |
| Work aisle, one cook | 42 inches |
| Work aisle, multiple cooks | 48 inches |
| Two walkways meeting at a right angle | One of them at least 42 inches |
| Seating with no traffic behind | 32 inches from counter edge to wall or obstruction |
| Edging past a seated diner | 36 inches |
| Walking past a seated diner | 44 inches |
Clear floor width alone isn’t enough. Draw every refrigerator door, oven door, dishwasher door and large drawer in its fully open position. Then check whether someone can still move through the room and whether opposing doors collide.
A kitchen can have plenty of square footage and still work badly if an open dishwasher, refrigerator or island seat blocks the only useful path.
Choose Appliances and Sink Locations First
Once you know the room’s limits, place the largest and least flexible pieces: the refrigerator, cooking appliances, sink and dishwasher. Their exact sizes and door movements decide how much useful counter and cabinet space is left.
If the kitchen has only one sink, NKBA suggests placing it next to or across from both the cooking surface and the refrigerator, since it serves prep and cleanup. Put the dishwasher’s nearest edge within 36 inches of the sink, and leave at least 21 inches of standing space between the dishwasher and any cabinet or appliance set at a right angle to it. Trash and recycling work best near the sink or main prep surface.
The cooking area needs safe landing space for utensils, ingredients and hot cookware. Don’t place a cooktop under an operable window. If a cooktop sits in an island, keep at least 9 inches of counter behind it at the same height, and plan the ventilation and seating before treating it as a centerpiece.
Gas cooking adds an air-quality factor. The U.S. Environmental Protection Agency lists gas stoves among the main indoor sources of nitrogen dioxide and advises installing and using an exhaust fan vented to the outdoors. See the EPA’s guidance on nitrogen dioxide and indoor air quality.
Pro Tip: Put the refrigerator where household members can grab drinks and snacks without walking through the cook’s main prep area. This one decision removes a surprising amount of cross-traffic.
Map the Kitchen Work Triangle
The classic kitchen work triangle connects the sink, cooking surface and refrigerator. NKBA guidance keeps each leg between 4 and 9 feet and the three legs together at 26 feet or less, measured from the center front of each appliance or sink.
Two more rules keep the triangle usable. No leg should cut through an island or peninsula by more than 12 inches, and no full-height, full-depth obstacle, such as a tall pantry cabinet or a refrigerator, should separate two primary work centers. Major traffic routes shouldn’t cross the triangle at all.
| Element | Planning Goal |
|---|---|
| Sink | Convenient to prep and cleanup |
| Cooking area | Close to the prep surface and cookware |
| Refrigerator | Easy to reach without crossing the active cook zone |
| Triangle | Legs of 4 to 9 feet, totaling 26 feet or less |
Don’t force a perfect triangle into a kitchen that works better another way. A one-wall kitchen is naturally linear, while a large island kitchen may have several overlapping centers. In those rooms, judge the plan by real tasks and collisions rather than geometry.
Set Up Prep, Cooking, and Clean-Up Zones
With the main appliances placed, organize the kitchen into activity zones. The classic three-zone model of prep, cooking and cleanup is useful, but most kitchens also benefit from dedicated food-storage and serving or beverage areas.
- Food-storage zone: refrigerator, freezer, pantry and frequently used dry ingredients.
- Prep zone: the largest uninterrupted counter, cutting boards, knives, mixing bowls and a waste bin.
- Cooking zone: range, cooktop or oven, plus pans, utensils, oils and heat-safe landing space.
- Clean-up zone: sink, dishwasher, cleaning supplies and waste or recycling.
- Serving/beverage zone: glasses, dishes, coffee equipment or snacks that others can reach without entering the main cooking area.
The prep zone should feel open enough for chopping, mixing and plating. The cooking zone needs clear counter and quick access to cookware. The cleanup zone works best when dirty dishes reach the sink and dishwasher without crossing the main prep surface.
These zones don’t all have to sit inside a triangle. What matters is that each one has the storage, work surface and equipment its tasks need, and that the busiest routes don’t collide.
Plan Counter Landing and Prep Space
Every appliance needs a landing area, a stretch of counter where you can set things down right next to it. The NKBA guidelines give specific minimums, and the 2026 edition’s summary of changes and errata confirms the sink landing at 24 by 18 inches.
| Area | Recommended Landing or Work Space |
|---|---|
| Refrigerator | 15 inches on the handle side, or 15 inches no more than 48 inches across from it |
| Cooktop or range | 12 inches on one side and 15 inches on the other |
| Sink | 24 inches on one side and 18 inches on the other |
| Main prep area | 36 inches wide by 24 inches deep of continuous counter next to a sink |
| Wall oven | 15 inches beside or above it, or across within 48 inches if it doesn’t open into a walkway |
| Microwave | 15 inches above, below or beside the handle side |
When two landing areas sit side by side, take the longer requirement and add 12 inches to get the shared minimum. Across the whole kitchen, the same guidelines suggest about 158 inches of 24-inch-deep counter to cover landing, prep and small-appliance needs.
The most valuable counter is the main prep surface. Ideally it’s one continuous stretch near both the sink and the cooking zone, not a series of narrow scraps broken up by tall cabinets or appliances.
Before you approve the plan, walk through a normal meal: take food from storage, wash it, chop it, cook it, plate it and clean up. If you keep crossing the room or have nowhere to set a hot pan, revise the plan before construction begins.
Plan Cabinet Storage by Zone
Cabinet storage works best when each zone holds the items used there. The prep zone keeps cutting boards, mixing bowls and common ingredients within reach of the main work surface.
Near the range, cook-zone cabinets hold pots, pans, lids and utensils, so meals move from prep to cooking without extra trips.
Keep everyday dishes near the dishwasher when possible, and food containers near the refrigerator or cleanup zone, depending on how your household handles leftovers. Store frequently used items roughly 15 to 48 inches above the floor, the comfortable reach range in NKBA’s accessibility guidance, and keep heavy items off high shelves. If your layout has a corner, fit at least one corner cabinet with a pull-out or carousel so that space stays usable.
Prep Zone Storage
A well-planned prep-zone storage layout keeps your most-used tools beside the main counter. Knives, cutting boards, measuring tools and mixing bowls should be reachable without leaving the prep area.
- Shallow drawers hold peelers, measuring spoons, thermometers and shears.
- Vertical dividers organize cutting boards, trays and sheet pans.
- Pull-outs make pantry ingredients easier to see, so fewer items get lost at the back of deep cabinets.
- A waste or compost pull-out near the chopping surface shortens cleanup steps.
The goal isn’t maximum cabinet volume. It’s the right storage in the right place, while keeping enough clear counter for real food prep.
Cook Zone Cabinets
Cook-zone cabinets should put cookware, utensils and everyday seasonings within easy reach of the range or cooktop without crowding the hot surface.
Deep drawers work well for pots, pans and lids because you can see everything from above. Fitted dividers keep utensils in order, and a nearby drawer or shelf holds the ingredients you cook with most.
Size cabinets to the cookware you actually own. Measure tall stockpots, large skillets and specialty appliances before you finalize drawer heights or pull-out widths.
Decide Whether an Island Really Fits
An island fits only when you can keep a full work aisle on every side of it, at least 42 inches for one cook or 48 inches for multiple cooks. If it can’t, it will make the kitchen work worse, not better.
Islands are popular: the 2026 U.S. Houzz Kitchen Trends Study found that 58% of renovating homeowners add or update one. Do the math for your own room before you commit. With 24-inch-deep cabinets on both walls, a 36-inch-deep island and 42-inch aisles on each side, you need 24 + 42 + 36 + 42 + 24 = 168 inches, or about 14 feet, of room width.
Draw the island at its proposed size, then add the refrigerator, oven, dishwasher and drawer swings around it. If you plan stools, add the space seated people take up, using the seating clearances in the table above.
If the remaining circulation feels tight, shrink the island, use a movable worktable or consider a peninsula. More countertop isn’t better if it creates bottlenecks.
Plan Lighting, Ventilation, and Power Early
Lighting, power and ventilation belong in the layout, not in decisions made after cabinets are ordered. The 2026 NKBA planning-guideline update expanded its guidance on illumination, power for kitchen islands, home automation and ventilation.
Use general lighting for safe movement and focused task lighting over the main work surfaces, the sink and the cooking area. Under-cabinet lights cut shadows on perimeter counters.
For ventilation, plan a range hood that’s ducted to the outdoors and sized to the cooking surface. NKBA recommends at least 150 cubic feet per minute (cfm), while the International Residential Code sets 100 cfm as the minimum for a ducted kitchen hood. Hoods that can exhaust more than 400 cfm may also need a makeup-air system, so check that before you choose a high-powered hood.
Plan outlets and circuits around the appliances and countertop equipment you’ll actually use. Model codes require GFCI protection for countertop receptacles and don’t allow outlets installed face-up in a countertop work surface. Rules for island outlets and dedicated appliance circuits vary by jurisdiction, so have the final electrical plan checked against your local code.
Note: A beautiful layout can still fail if the hood can’t be ducted outdoors, an appliance lacks its required circuit, or a tall cabinet blocks the only duct route. Coordinate cabinets, appliances and building systems before ordering materials.
Design for Accessibility and Future Use
A kitchen planned with accessibility in mind is easier for children, older adults and people with limited mobility, and it’s usually more comfortable for everyone else too. The key ideas are wider circulation, clear floor space at appliances, easy controls and storage within comfortable reach.
The National Association of Home Builders’ aging-in-place remodeling checklist gives concrete targets:
- A clear turning space of at least 5 by 5 feet in the kitchen.
- A 30-by-48-inch clear floor space in front of each appliance.
- Upper wall cabinets set 3 inches lower than conventional height, plus roll-out trays in base cabinets.
- A microwave at counter height or in the wall, a raised dishwasher and a side-by-side refrigerator.
- Loop handles, lever faucets and task lighting at work areas.
NKBA also recommends at least two counter heights in the kitchen, one between 28 and 36 inches and another between 36 and 45 inches, so both seated and standing users can work comfortably.
Not every kitchen needs full wheelchair access, but ask who may use the room over the life of the renovation. Moving an island or changing cabinet heights later costs far more than leaving room during planning.
Test the Layout Before Ordering Cabinets
Before you commit to cabinets, walk through the plan on paper and, when you can, mark the main cabinet and island edges on the floor with painter’s tape.
- Open every appliance and cabinet door on the drawing.
- Check that two people can work without blocking each other.
- Trace the route from refrigerator to prep surface to cooking area.
- Trace the route from the dining area to the sink and dishwasher.
- Check that someone can get a drink or snack without crossing the active cook zone.
- Confirm that stools, open drawers and appliance handles don’t narrow important paths.
- Compare the plan with each appliance’s installation specifications one final time.
This simple collision test often reveals problems a clean 3D rendering hides.
Layout Mistakes This Test Catches
- Dishwasher in a corner: with less than 21 inches of standing space, the open door traps you against the adjoining cabinets.
- No landing beside the fridge: groceries end up on the floor or across the room when the handle side has no counter.
- Drawers that collide: drawers on either side of an inside corner can hit each other or the handles of nearby appliances.
- Stools in the work aisle: island seating that backs into the cook’s aisle shrinks a 42-inch aisle to a squeeze.
Know When to Bend Kitchen Design Rules
Strong kitchen designs start from basic planning principles, such as work centers, circulation, clearances, cabinet dimensions and appliance requirements, and then adapt them to a particular household.
An open-plan kitchen with two cooks may work better with several task-specific zones than with one textbook triangle. A narrow room may function better without an island. A household that rarely cooks elaborate meals may value a generous beverage or serving zone more than an oversized range.
In an open plan, the kitchen also has to sit comfortably beside the living area. Simple, uncluttered furnishing and a calm palette help the two spaces read as one room, an approach Nordic Design Blog covers in its Scandinavian-inspired home guides.
High ceilings don’t automatically call for cabinets that reach the ceiling either. The right cabinet height depends on accessible storage, proportions, dust, budget and the overall design.
- A peninsula can redirect traffic while keeping prep space close at hand.
- Concealed pull-outs add storage without crowding countertops.
- Mixed cabinet heights can respond to appliances, windows and reach needs.
- A second prep or beverage center can reduce collisions in a busy family kitchen.
The best rule to bend is one that conflicts with your actual room or the people using it. The goal isn’t a perfect diagram; it’s a kitchen that works on an ordinary Tuesday night.
Key Takeaways
- Measure walls, openings, utilities and appliance specs before you choose cabinets or an island.
- Plan 36-inch walkways, 42-inch work aisles for one cook and 48-inch aisles for multiple cooks.
- When a triangle suits your room, keep each leg 4 to 9 feet and the total at 26 feet or less.
- Give each appliance landing space: 15 inches by the fridge handle, 12 and 15 inches at the cooktop, 24 and 18 inches at the sink.
- An island with 42-inch aisles on both sides typically needs a room about 14 feet wide.
- Vent the hood outdoors, and check makeup-air rules for hoods above 400 cfm.
Frequently Asked Questions
How Can I Design My Own Kitchen Layout?
Start by measuring the room and marking doors, windows, utilities and structural limits on a to-scale plan. Then place the refrigerator, sink and cooking appliances, group storage into prep, cooking and cleanup zones, and check aisles and door swings. Sketch at least two layout options before you choose cabinets.
What Is the 3 Kitchen Rule?
The 3 kitchen rule usually means the kitchen work triangle linking the sink, refrigerator and cooking surface. NKBA guidance keeps each leg between 4 and 9 feet, the total at 26 feet or less, and major traffic out of the triangle. It is a planning aid, not a building-code rule.
What Is the New Kitchen Trend for 2026?
Function-first storage and warmer wood finishes lead in 2026. The 2026 U.S. Houzz Kitchen Trends Study found wood was the most popular cabinet color in renovated kitchens at 29%, just ahead of white at 28%. About 76% of homeowners added specialty built-ins, led by pantry cabinets at 47% and beverage stations at 24%.
How Do You Decide Where to Put Things in Your Kitchen?
Store items where you use them. Keep pantry staples near the prep area, cookware near the range, cleaning supplies near the sink and everyday dishes near the dishwasher. Put frequently used items between about 15 and 48 inches above the floor, and save high or deep shelves for rarely used equipment.
How Wide Should Kitchen Aisles Be?
Plan at least 42 inches for a work aisle used by one cook and 48 inches when two or more people cook at once. A walkway used only for passing through needs at least 36 inches. Measure between counter fronts, tall cabinets and appliances, not between walls.
Is the Kitchen Work Triangle Outdated?
No, but it is no longer the only way to plan a kitchen. The triangle still works well in compact kitchens with one main cook. Larger kitchens, islands and multi-cook households often work better when storage, prep, cooking, cleanup and serving are treated as separate work centers, which is how NKBA’s 2026 guidelines frame kitchen planning.
How Much Space Do You Need for a Kitchen Island?
Allow at least 42 inches of work aisle on every side of an island, or 48 inches for multiple cooks. With 24-inch-deep cabinets on both walls and a 36-inch-deep island, that adds up to about 168 inches, or roughly 14 feet of room width. Narrower rooms usually work better with a peninsula.
Conclusion
A well-designed kitchen is a practical answer to your room, your household and the way you actually cook. Start with accurate measurements and fixed constraints, then arrange appliances, zones, storage, counters and circulation around daily routines, using the work triangle only where it helps.
Your next step: draw the plan to scale, mark every open door and landing area, and tape the outline on the floor. If every appliance opens, every task has counter and storage nearby, and people can pass without crossing the cook’s path, the layout is ready for cabinet quotes.
Sources
- National Kitchen & Bath Association: 5th Edition Kitchen & Bath Planning Guidelines update: 2026 planning methodology, work centers, island power, lighting and ventilation guidance.
- National Kitchen & Bath Association: Kitchen Planning Guidelines with Access Standards: aisle, walkway, seating, work triangle, landing area, dishwasher, ventilation and counter-height recommendations.
- National Kitchen & Bath Association: Summary of Changes and Errata, 5th Edition: 2026 guideline structure and the corrected sink landing dimension.
- U.S. Environmental Protection Agency: Nitrogen Dioxide’s Impact on Indoor Air Quality: gas stoves as an indoor nitrogen dioxide source and outdoor-vented exhaust.
- National Association of Home Builders: Aging-in-Place Remodeling Checklist: turning space, appliance clear floor space, cabinet heights and appliance choices.
- 2026 U.S. Houzz Kitchen Trends Study: renovation data on cabinet colors, built-in storage and islands.

4 thoughts on “How to Design a Kitchen: Layout Ideas & Planning Tips”