
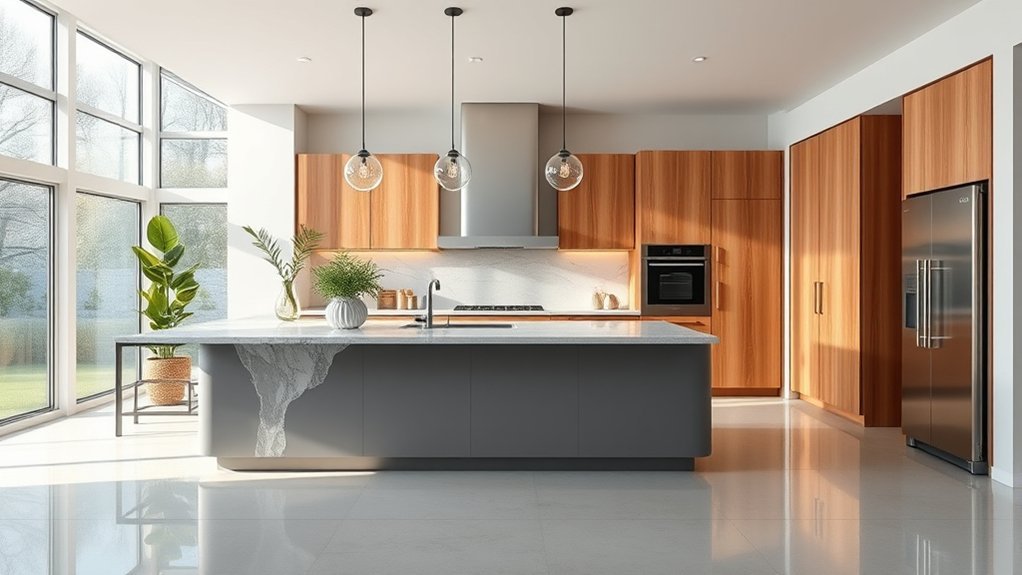
A well-designed kitchen starts with clear goals, accurate measurements, and an honest look at how the household cooks, cleans, stores food, and gathers. The best layout is the one that fits the room while keeping work areas, appliances, storage, lighting, ventilation, and traffic easy to use. Plan those functional details first; countertops, cabinet colors, hardware, and personal decor should follow.
Quick Answer
To design a functional kitchen, begin with your cooking habits and exact room measurements. Choose a layout that provides safe work aisles, group storage and appliances by task, plan ventilation and lighting early, select durable materials for your maintenance needs, and confirm appliance, plumbing, electrical, and door clearances before cabinets are ordered.
Key Takeaways
- Design around real cooking, storage, cleanup, and traffic patterns, not just the appearance of a showroom kitchen.
- Measure the room and major appliances before finalizing cabinets, islands, plumbing, electrical points, or ventilation.
- Use the traditional work triangle where it helps, but also create practical prep, cooking, cleanup, food-storage, and waste zones.
- Choose countertops and finishes according to maintenance, heat, stain, scratch, and repair requirements.
- Plan lighting, ventilation, appliance efficiency, and future accessibility early because they are harder to correct after installation.
Establish Your Kitchen Design Goals
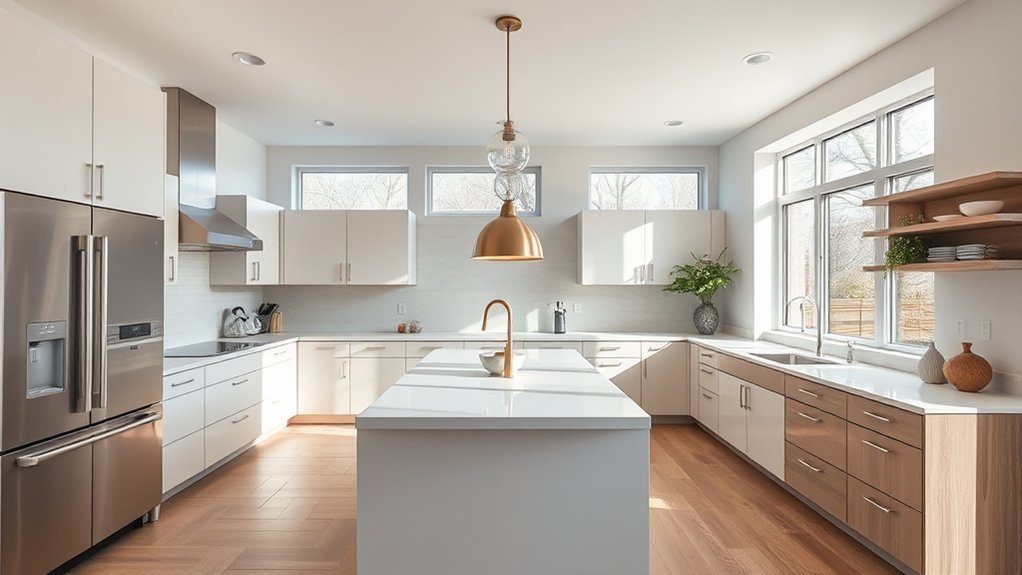
Establishing kitchen design goals begins with a clear assessment of cooking habits, family needs, storage habits, and daily lifestyle. A household that cooks several large meals each day needs different prep space, ventilation, and cookware storage than one that mostly reheats food or entertains occasionally.
Create a concise wish list and separate it into must-haves, useful upgrades, and purely decorative choices. This keeps the budget focused on features that affect daily use before money is committed to premium finishes.
Consider how many people cook at once, whether children or guests pass through the room, where groceries enter, where dishes are unloaded, and whether the kitchen also needs seating, homework, coffee, baking, or entertaining space.
Thoughtful kitchen layouts should support movement, conversation, cooking, cleanup, and storage without forcing those activities to compete for the same space.
Personal touches, from color palettes to carefully chosen decor, bring warmth without sacrificing practicality. Efficient storage deserves equal attention; cabinetry, drawers, pantry space, and appliance placement should reduce clutter and put frequently used items close to where they are needed.
For households with specialized cooking interests, a non-traditional arrangement may work better than a textbook layout. A dedicated baking station, beverage center, secondary prep sink, large pantry, or separate wet-cooking zone can be more useful than following a standard plan without considering actual routines.
The goal is a kitchen that feels personal while remaining easy to cook in, clean, maintain, and move through every day.
Set a Budget and Priorities
Set the project budget before choosing cabinets, countertops, or appliances. Include cabinetry, hardware, counters, backsplash, flooring, lighting, plumbing, electrical work, ventilation, appliances, labor, permits where required, and a reserve for unexpected work discovered during remodeling.
If the budget becomes tight, protect the items that are difficult or expensive to change later: the layout, cabinet construction, electrical capacity, plumbing positions, ventilation route, appliance openings, and durable work surfaces. Decorative lights, stools, paint, and accessories are easier to update later.
Measure the Kitchen Before Designing
Before drawing a layout, record the length of every wall, ceiling height, doors and their swing direction, windows and sill heights, soffits, beams, radiators, vents, plumbing points, gas connections where applicable, outlets, switches, and existing appliance openings.
Also record the exact dimensions and manufacturer-required clearances of any appliances you plan to keep or purchase. Refrigerator handles and doors, dishwasher doors, wall ovens, and range doors all need enough space to open without colliding with cabinets, islands, walls, or traffic routes.
Pro Tip: Before committing to an island or peninsula, mark its full footprint and proposed aisle edges on the floor with painter’s tape. Then open nearby appliance doors and walk through the space as if you were cooking and unloading the dishwasher.
Choose the Right Kitchen Layout
Choosing the right kitchen layout starts with the room’s dimensions, doors, windows, utilities, traffic paths, and the way the kitchen will be used. No single layout is best for every home.
An L-shaped plan uses two adjoining walls and works well in many small, medium, and open-plan rooms because it leaves a relatively open traffic area. A U-shaped arrangement can provide substantial counter and storage space, but opposing runs need enough clearance to avoid feeling cramped.
Galley kitchens use two parallel runs and can be highly efficient in narrow rooms when through-traffic is controlled. An island layout can add prep space, storage, seating, or an appliance zone, but only when the room is wide enough to preserve comfortable work aisles. A peninsula can provide many of the same benefits when a freestanding island will not fit.
NKBA planning guidance recommends a work aisle of at least 42 inches for one cook and 48 inches for multiple cooks, measured between counter fronts, tall cabinets, or appliances.
The traditional work triangle links the primary cooking surface, sink, and refrigeration area. NKBA planning guidance recommends that, in a three-center kitchen, the triangle total no more than 26 feet, with individual legs generally between 4 and 9 feet. See the NKBA Kitchen Planning Guidelines.
Note: The work triangle is a design guideline, not a requirement for every kitchen. Large kitchens, multiple-cook households, and rooms with several appliances often work better when planned as overlapping prep, cooking, cleanup, food-storage, and serving zones.
Plan Work Zones and Traffic
Keep everyday tools near the task that uses them. Store knives, cutting boards, mixing bowls, and frequently used ingredients near the main prep surface. Keep pots, pans, cooking utensils, and oils near the cooking zone. Place everyday dishes and flatware where they can move easily between the dishwasher and dining area.
Whenever possible, keep major household traffic from cutting directly through the primary cooking area. The refrigerator can often sit near the perimeter of the work zone so family members can reach drinks and snacks without walking between the cooktop and sink.
Plan for Accessibility and Future Needs
If the kitchen should support aging in place or people with limited mobility, make accessibility part of the initial plan rather than an afterthought. Useful features can include wider clear paths, full-extension drawers, pull-out shelves, lever-style handles, easy-to-reach controls, task lighting, and frequently used storage between knee and shoulder height.
Accessibility requirements vary by project and jurisdiction, so a designer or qualified professional should review the plan when specific mobility needs must be accommodated.
Plan Storage for Everyday Use
Effective kitchen storage begins with a clear assessment of daily needs. The goal is not simply to install the maximum number of cabinets; it is to place each category of item where it can be reached with the fewest unnecessary steps.
Vertical cabinet space can extend toward the ceiling to store seasonal cookware, bulk pantry goods, serving pieces, and seldom-used equipment. Lower-cabinet drawers and pull-out organizers improve access to deep storage and reduce the need to reach behind other items.
Assess Daily Storage Needs
Map the kitchen’s daily inventory before choosing cabinet accessories. List cookware, utensils, dishes, small appliances, pantry foods, baking supplies, cleaning products, recycling, and bulk items. Then distinguish what must remain immediately accessible from what can occupy higher or less convenient storage.
Deep full-extension drawers are useful for heavy pots and pans, while vertical divider slots can keep baking sheets, trays, lids, and cutting boards upright. Concealed recycling and trash pull-outs can keep waste close to the prep or cleanup zone without occupying floor space.
Tall cabinets can hold seldom-used goods, leaving prime drawers and shelves available for daily essentials. Good storage supports the cooking sequence rather than forcing users to cross the kitchen repeatedly.
Use Vertical Cabinet Space
Once daily storage needs are mapped, use the kitchen’s height intentionally. Tall cabinets that reach the ceiling can provide additional storage while avoiding the dust-catching gap often left above shorter cabinets.
Open shelves above countertops keep selected everyday essentials visible, although they require more frequent cleaning than closed cabinetry. Wall-mounted racks or pegboards can clear counters while keeping frequently used tools easy to reach.
- Tall cabinets for seasonal and overflow storage
- Open shelves for items used and cleaned frequently
- Racks or pegboards for appropriate cookware and tools
- Vertical dividers for trays, baking sheets, lids, and cutting boards
- Pull-down or pull-out fittings where high storage needs to remain accessible
A sliding ladder can provide access in some large kitchens, but it adds floor-space and safety considerations and should not obstruct working aisles.
Add Pull-Out Organizers
Pull-out organizers turn deep cabinets into more accessible storage by bringing items into view instead of forcing users to reach into the back.
Options include narrow spice pull-outs, pantry shelves, tray dividers, blind-corner mechanisms, utensil inserts, waste bins, and full-extension drawers. The right accessory depends on the cabinet dimensions and the items it needs to hold; there is no universal percentage by which a pull-out increases storage capacity.
Use specialized organizers where they solve a specific problem. Too many highly specialized fittings can reduce flexibility if storage needs change later.
Choose Durable Countertops and Materials
Countertops handle daily preparation, spills, appliances, dishes, and heat, so material choice should consider appearance, maintenance, stain resistance, heat exposure, repairability, and cost. Even durable counters should be protected with cutting boards and trivets rather than treated as indestructible work surfaces.
Granite, engineered quartz, and solid surface are three common choices, but they behave differently.
- Granite: Natural Stone Institute describes granite as a durable material well suited to heavily used surfaces. Some granite benefits from an impregnating sealer, while other slabs may not need one. Follow the stone supplier’s care guidance.
- Engineered quartz: It is nonporous and generally does not require sealing, but manufacturers such as Cambria and Cosentino recommend protecting it from hot cookware and concentrated heat with a trivet or hot pad.
- Solid surface: Materials such as Corian can create nearly seamless installations, and many scratches or damaged areas can be refinished or repaired. Deep damage may require professional repair.
Natural Stone Institute provides additional natural-stone care guidance, while engineered-surface owners should follow the care instructions for the specific brand installed.
Warning: Do not assume a countertop labeled “heat resistant” is safe for a hot pan. Engineered quartz and other materials can be damaged by direct or sustained heat. Use trivets, avoid cutting directly on the counter, and follow the manufacturer’s care instructions.
Plan Kitchen Lighting for Prep and Ambience
Thoughtful kitchen lighting combines task, ambient, and accent light. The objective is to illuminate work surfaces without creating strong shadows while giving the room enough softer general light for dining and conversation.
Lighting should be planned before cabinets and electrical work are finalized so under-cabinet wiring, pendants, switches, dimmers, and recessed fixtures can be positioned correctly.
Task Lighting Zones
Task lighting should cover the main prep counter, sink, cooking area, and other work surfaces. Under-cabinet fixtures are particularly useful because ceiling lights located behind a person can cast that person’s shadow onto the counter.
- Under-cabinet LEDs illuminate chopping and mixing zones.
- Pendant fixtures can provide focused light over an island when positioned to avoid glare.
- Dedicated sink and cooking-area lighting improves visibility.
- Separate switching lets bright task lighting operate without lighting the entire room at full output.
Choose fixtures rated for their location and confirm that LEDs, drivers, switches, and dimmers are compatible before installation.
Ambient Light Layers
Ambient lighting supplies the room’s general illumination. Recessed fixtures, surface-mounted ceiling lights, pendants, or other fixtures can provide this layer depending on ceiling height and architecture.
Accent lighting can then highlight glass cabinets, shelves, artwork, or architectural details. Avoid relying on decorative pendants alone for working light; attractive fixtures do not necessarily put enough light on the counter below.
Warm light around 2700K to 3000K can create a relaxed atmosphere, while somewhat more neutral light may make detailed prep easier. Many kitchens successfully combine warmer ambient light with brighter task lighting as long as the difference is visually comfortable.
Dimmable Fixture Choices
Dimmable fixtures allow a kitchen to shift from bright food preparation to softer dining or evening light without adding separate decorative systems.
- Use dimmable LEDs with compatible dimmers and drivers.
- Separate prep, island, dining, and accent fixtures into useful control zones.
- Smart controls can add schedules, scenes, or voice control when those features solve a real need.
- Choose color temperature and brightness based on the task instead of selecting lamps only by wattage.
Modern LEDs use far less electricity than traditional incandescent lighting. U.S. Department of Energy guidance has described LED energy use as roughly 75% lower or better than traditional incandescent lighting in comparable applications. See the U.S. Department of Energy LED guidance.
Select Appliances for Your Space
Appliance selection affects workflow, cabinetry, electrical or gas requirements, ventilation, operating cost, and available counter space. Choose major appliances early enough that the cabinet plan can use their actual dimensions rather than assumed “standard” sizes.
A smaller household may prefer compact refrigeration or cooking equipment, while frequent entertainers or bakers may need more oven capacity, refrigeration, or specialty appliances. Panel-ready appliances can visually blend into cabinetry, but their installation requirements must still be incorporated into the design.
The refrigerator should be accessible without forcing routine household traffic through the main cooking zone. A dishwasher usually works well beside the sink because dishes can move directly between the sink, machine, and nearby storage. Confirm door swings, handle projections, ventilation gaps, water connections, and electrical requirements from each appliance’s installation instructions.
| Choice | Benefit |
|---|---|
| Energy-efficient models | Can lower energy or water use compared with less-efficient comparable products |
| Right-sized oven and refrigerator | Matches capacity to actual household needs |
| Panel-ready appliances | Creates a more integrated cabinet appearance |
| Planned appliance placement | Reduces conflicts between cooking, cleanup, and traffic |
| Specialty appliances | Adds value when matched to a real habit such as baking, coffee preparation, or entertaining |
In the United States, current ENERGY STAR guidance says certified refrigerators are about 9% more energy efficient than models that only meet the federal minimum standard. ENERGY STAR also reports that certified electric cooking products average about 18% greater efficiency than standard electric models. Compare the yellow EnergyGuide label and operating-cost estimate when shopping for applicable appliances.
Plan Kitchen Ventilation and Safety
Ventilation deserves the same early attention as cabinetry and appliances because cooking creates heat, moisture, odors, grease, and airborne particles. The U.S. EPA recommends using a range hood whenever cooking and, where practical, choosing a hood that exhausts outdoors instead of only recirculating air.
EPA guidance also recommends leaving the hood on for 10 to 20 minutes after cooking and using back burners when practical because capture can be better beneath many hoods. See the EPA’s indoor particulate matter and cooking guidance.
Plan the hood and duct route before upper cabinets, ceilings, or soffits are finalized. Hood airflow should be appropriate for the appliance and home. Very high exhaust rates can require additional planning for replacement or makeup air, particularly in tightly sealed homes or homes with naturally drafting combustion appliances.
Warning: Structural changes and major electrical, gas, plumbing, or ventilation work can involve permits, local code requirements, fire risks, shock hazards, leaks, or combustion-safety issues. Use qualified professionals where required. Freestanding ranges should also be installed with the manufacturer-specified anti-tip device; the U.S. Consumer Product Safety Commission recommends anti-tip brackets to reduce range tip-over injuries.
Choose Finishes That Work Together
Once the layout, cabinetry, appliances, utilities, and work surfaces are resolved, the kitchen’s finishes determine whether the room feels coordinated or visually fragmented.
A cohesive color palette can connect cabinetry, counters, backsplash, flooring, hardware, and appliances. Warm wood cabinets can pair well with creamy or lightly patterned counters, while painted or lacquered cabinetry can work with either quiet or strongly contrasting surfaces.
- Matte surfaces tend to reduce reflections and can create a softer appearance.
- Glossy finishes reflect more light but may show fingerprints or surface marks more readily.
- Hardware does not need to match every appliance exactly; repeating a limited number of metal finishes usually creates better visual continuity.
- Consider grout lines, slip resistance, stain resistance, and cleaning requirements when choosing flooring and backsplash materials.
The most effective finishes balance contrast and continuity without compromising maintenance. Obtain physical samples and view them together in the kitchen’s actual daylight and evening lighting before approving major materials.
Add Personal Touches to Your Kitchen
Personal touches give a kitchen character after its functional decisions are settled. A thoughtful color palette can make the room calm, vibrant, traditional, or modern, while artwork and decorative objects add personality without consuming important work surfaces.
A kitchen feels personal when the details reflect the people who use it, but its work surfaces and traffic paths should remain easy to use.
Textiles such as washable runners, window treatments, and seat cushions can soften hard materials. Family photos, heirloom cookware, ceramics, or other meaningful objects add history without requiring permanent construction changes.
Custom cabinetry and hardware can also reflect personal preferences while improving function. A cook who uses large stockpots needs different drawers than a frequent baker; a coffee enthusiast may value a beverage station more than extra display shelving.
Open-plan, L-shaped, galley, U-shaped, island, peninsula, and one-wall arrangements can all support gathering when they are matched to the room rather than selected for appearance alone.
Design an Energy-Efficient Kitchen
An energy-efficient kitchen combines appropriate appliances, efficient lighting, sensible water use, and natural daylight where available. Avoid applying one savings percentage to every appliance because ENERGY STAR requirements differ by product category.
- Refrigerators: ENERGY STAR says certified refrigerators are about 9% more energy efficient than models meeting the federal minimum standard.
- Dishwashers: ENERGY STAR reports that certified models average about 20% greater energy efficiency and 30% greater water efficiency than standard models.
- Electric cooking: ENERGY STAR says certified electric cooking products average about 18% greater efficiency than standard electric models.
- Lighting: LEDs can use roughly 75% less energy or better than traditional incandescent lighting while providing far longer service life.
Use the appliance’s EnergyGuide information and ENERGY STAR certification where applicable rather than assuming that a larger or more feature-heavy product is automatically more efficient.
For water use, choose a dishwasher with efficient water consumption and run full loads when practical. In the United States, EPA WaterSense does not currently label kitchen faucets. EPA notes that federal standards limit kitchen faucets to 2.2 gallons per minute at 60 psi, while lower-flow models are also available. Compare the faucet’s listed flow rate and local requirements rather than looking for a WaterSense kitchen-faucet label.
Natural light from suitable windows or skylights can reduce the need for electric lighting during the day, but glazing, shading, heat gain, and glare should be considered as part of the overall building design.
Plan Waste, Recycling, and Cleanup
Waste handling belongs in the design plan rather than being added after the cabinets arrive. Position trash, recycling, or compost containers close to the main prep or cleanup area without blocking cabinet doors or circulation.
A pull-out bin beside the prep counter can make food-scrap disposal easier, while dish storage near the dishwasher reduces unloading steps. Keep household chemicals and other hazardous products appropriately stored according to their labels, particularly where children are present.
Frequently Asked Questions
What Is the Most Desirable Kitchen Layout?
There is no single most desirable kitchen layout. L-shaped, U-shaped, galley, one-wall, peninsula, and island plans can all work well when matched to the room’s dimensions, traffic, appliance locations, storage needs, and number of cooks. An island is useful only when enough aisle clearance remains around it.
What Are the Essential Features of a Kitchen?
Essential kitchen features include an efficient layout, adequate prep space, practical storage, durable work surfaces, effective task and ambient lighting, appropriate ventilation, safely installed appliances, waste and recycling space, and clear traffic paths. The exact combination should match how the household cooks and uses the room.
What Are the 5 Basic Kitchen Layouts?
A common five-layout list includes L-shaped, U-shaped, galley, island, and peninsula kitchens. Other guides count the one-wall kitchen as a sixth major type. The labels are less important than fitting cabinetry and appliances to the room while preserving useful work and traffic clearances.
What Are the Six Most Common Types of Kitchen Layouts?
The six commonly discussed kitchen layouts are L-shaped, U-shaped, galley, island, peninsula, and one-wall. L-shaped and one-wall plans can work well in open or compact spaces, galley layouts make efficient use of narrow rooms, U-shaped plans provide substantial perimeter workspace, and islands or peninsulas add work or gathering space when clearances allow.
How Much Space Should You Leave Around a Kitchen Island?
For a working aisle, NKBA planning guidance recommends at least 42 inches for one cook and 48 inches for multiple cooks, measured between counter fronts, tall cabinets, or appliances. Appliance doors, seating, and major traffic can require additional space, so check the full plan rather than using one dimension everywhere.
What Should You Plan First When Designing a Kitchen?
Start with household needs and exact room measurements. Next establish the layout, traffic paths, appliances, plumbing, electrical requirements, ventilation, storage, and lighting. Finalize countertops, backsplash, cabinet finishes, hardware, paint, and decorative details after the functional plan works.
Sources
- National Kitchen & Bath Association — Kitchen & Bath Planning Guidelines — layout, work-center, circulation, and kitchen-planning guidance.
- U.S. Environmental Protection Agency — Sources of Indoor Particulate Matter — cooking emissions and range-hood ventilation guidance.
- U.S. Consumer Product Safety Commission — Safety Education Materials — range and oven tip-over safety.
- ENERGY STAR — Refrigerators — current refrigerator efficiency guidance.
- ENERGY STAR — Dishwashers — dishwasher energy and water-efficiency guidance.
- U.S. Department of Energy — LED Basics — LED efficiency, controls, and lighting technology guidance.
Conclusion
A kitchen works best when its appearance grows from a sound functional plan. Start with accurate measurements, a realistic budget, and the household’s actual cooking and storage habits. Then resolve the layout, work aisles, storage, ventilation, lighting, utilities, appliances, and durable surfaces before committing to decorative finishes.
The traditional work triangle can still be useful, but modern kitchens often benefit from task-based zones and careful traffic planning as well. When appliance clearances, maintenance needs, energy use, safety, and future accessibility are considered early, the finished kitchen is easier to cook in, easier to maintain, and better prepared for years of daily use.
