
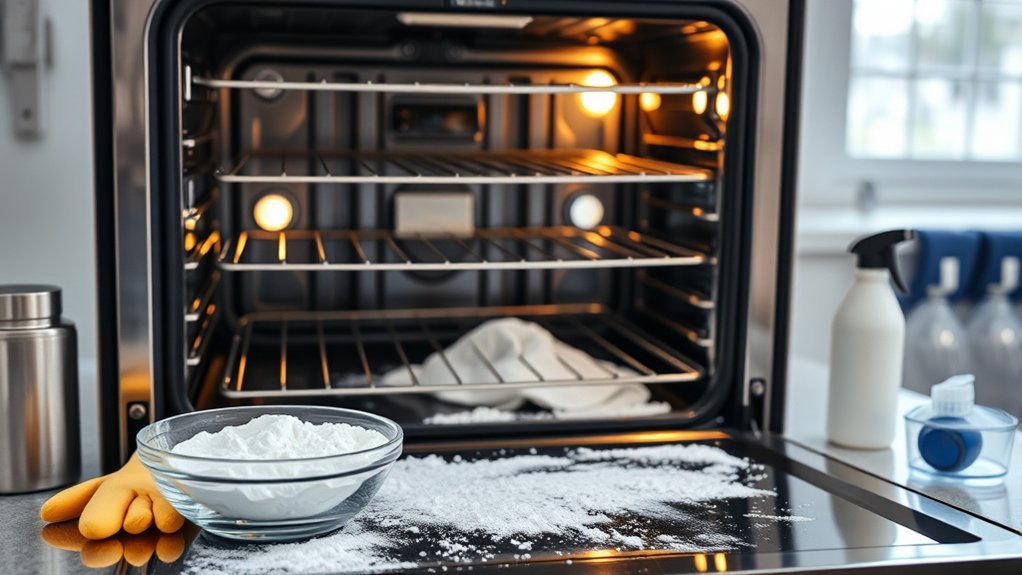
Baking soda is a practical way to clean many oven interiors because its mildly abrasive texture helps loosen dried food and greasy residue without relying on a strong commercial oven cleaner. For a typical manual clean, remove the racks, make a paste with baking soda and water, apply it to compatible interior surfaces, let it work, then wipe away the loosened soil. A small amount of white vinegar can help remove leftover baking soda during the final rinse. Always check your oven’s owner’s manual first because cleaning instructions vary by model, coating, rack type, and cleaning system.
Quick Answer
To clean a compatible oven with baking soda, make a spreadable paste from baking soda and water, coat the cool interior while avoiding sensitive components, and let it sit from about 20 minutes to overnight. Wipe away the paste, use a little white vinegar on remaining baking-soda residue, rinse with a damp cloth, and dry completely.
Key Takeaways
- Check the oven’s owner’s manual before using any homemade cleaner, especially on self-cleaning, steam-cleaning, catalytic, or specialty-coated interiors.
- Make the cleaning paste with baking soda and water; save the vinegar for removing leftover baking-soda residue afterward.
- Keep paste and excess liquid away from heating elements, gas openings, vents, door gaskets, sensors, fans, and electrical components unless your manual specifically allows cleaning them.
- Light soil may loosen in 20 to 30 minutes, while baked-on buildup can benefit from several hours or an overnight treatment.
- Rinse away all cleaner residue and let the oven and racks dry fully before cooking.
At a Glance
| Time Required | About 20–30 minutes of hands-on work, plus 20 minutes to overnight for the paste to sit |
| Difficulty | Easy |
| Tools Needed | Small bowl, soft cloths or sponges, silicone spatula or plastic scraper, spray bottle, sink or tub for removable racks |
| Cost | Low; the method uses common household cleaning supplies |
Warning: Turn the oven off and let it cool completely before manual cleaning. Read the owner’s manual first. Do not coat heating elements, gas openings, fans, vents, sensors, electrical parts, or the door gasket with baking-soda paste or vinegar unless the manufacturer specifically permits it. Some specialty oven liners and rack finishes require different care.
Why Baking Soda Cleans Ovens Well
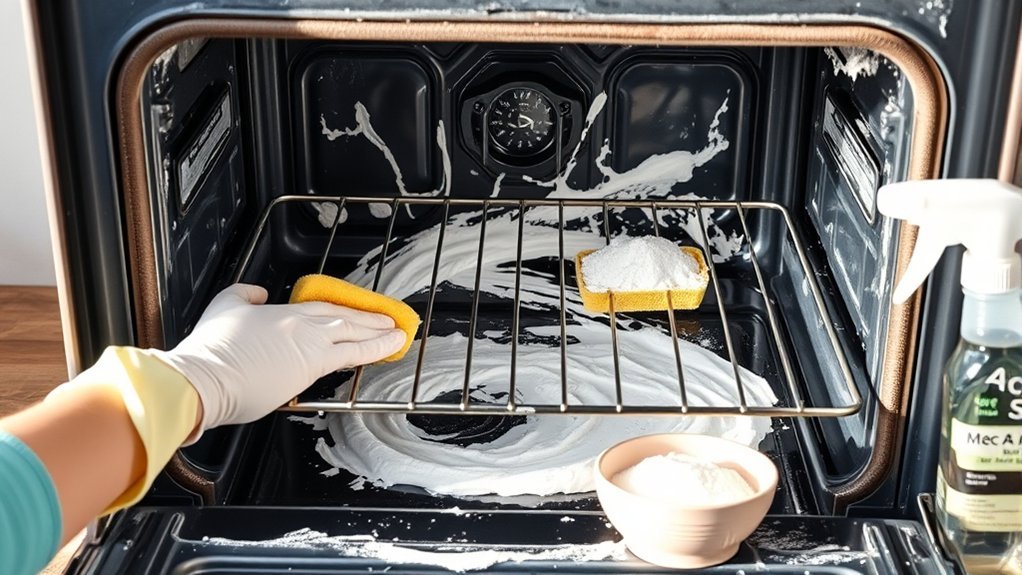
Baking soda works well for many manually cleaned oven surfaces because it combines mild abrasiveness with a paste-like consistency that stays in contact with dried spills. That makes it useful for loosening cooked-on food before wiping or gentle scrubbing.
The useful part of this method is not aggressive scrubbing. It is giving a compatible baking-soda paste enough contact time to soften residue before you wipe it away.
Baking soda, or sodium bicarbonate, is mildly alkaline. Its fine particles also provide gentle mechanical cleaning action. When mixed with a small amount of water, it forms a paste that can stay on oven walls and other vertical surfaces instead of immediately running off.
White vinegar is best kept for the cleanup stage rather than mixed into the original paste. Vinegar contains acetic acid, while baking soda is basic. When they meet, they react and produce carbon dioxide bubbles, water, and sodium acetate. The fizz can make remaining baking-soda residue easier to see and wipe away, but the bubbling itself should not be treated as a powerful grease-cutting reaction. A chemistry explanation of the reaction is available from UCSB ScienceLine.
For compatible ovens, this approach can reduce the need for strong commercial oven-cleaner sprays. However, the safest cleaning method is always the method approved for the specific appliance. Whirlpool’s oven-cleaning guidance, for example, describes baking soda and water for manual cleaning but also tells owners to follow their appliance instructions.
What You’ll Need
Gather everything before starting so the oven can stay off and cool throughout the manual-cleaning process.
| Item | Purpose |
|---|---|
| 3/4 cup baking soda | Forms the main cleaning paste |
| About 1/4 cup warm water | Adjusts the paste to a spreadable consistency |
| Mild dishwashing soap | Soaks removable racks and can help with greasy soil where permitted |
| White distilled vinegar | Helps remove remaining baking-soda residue during the final wipe |
| Microfiber cloths or soft sponges | Wipe, rinse, and dry the cavity |
| Silicone spatula or plastic scraper | Lifts softened residue without using a sharp metal edge |
| Spray bottle | Applies a small amount of vinegar during cleanup |
| Cleaning gloves | Keeps loosened grease and residue off your hands |
Note: Do not assume every rack or cavity coating can tolerate the same sponge, brush, cleaner, or soaking method. Racks with special finishes and ovens with specialty cleaning systems may have separate care instructions.
How to Clean Oven Racks
Remove the racks only after the oven is completely cool. If your owner’s manual allows the racks to be washed separately, place them in a large sink or tub lined with an old towel to protect the surface underneath.
Cover standard removable racks with hot or warm water and add mild dish soap. A 30-minute soak can soften light soil, but heavier buildup may need two hours or overnight. Whirlpool’s current manual-cleaning guidance recommends a longer soak for dirty racks and also advises following the owner’s manual for racks with special features or finishes.
After soaking, scrub gently with a suitable brush, sponge, or pad approved for the rack finish. For isolated stubborn areas, a small amount of baking-soda-and-water paste can be left on the soil for 15 to 30 minutes before another gentle scrub.
Rinse the racks thoroughly with clean water so no soap or baking-soda residue remains. Dry them completely before reinstalling them. If a rack has telescoping slides, ball bearings, a special coating, or manufacturer-applied lubricant, do not soak or scrub it until you have confirmed the approved procedure in its manual.
Rinse removable racks thoroughly and dry them completely before returning them to the oven.
Make the Baking Soda Paste
In a small bowl, combine about 3/4 cup baking soda with approximately 1/4 cup warm water. Add the water gradually until the mixture becomes thick and spreadable. It should cling to a vertical surface without immediately running down it.
Do not add vinegar to the initial paste. Vinegar and baking soda react as soon as they meet, so mixing them in advance uses up much of that acid-base reaction before the paste has had time to sit on the oven soil.
If the oven manufacturer permits mild dish soap inside the cavity, a very small drop can be added for greasy spots. Otherwise, keep the paste to baking soda and water.
Pro Tip: Make the paste slightly thicker for vertical oven walls and slightly softer for the flat door glass or oven floor. The goal is enough moisture to spread it without creating drips that can reach vents, seams, or electrical components.
Apply It to the Oven Interior
With the oven off and completely cool, remove loose crumbs first. Then spread a thin, even layer of baking-soda paste over the compatible areas of the cavity.
Concentrate on visible grease, splatters, and baked-on food rather than coating components that do not need cleaning. Keep the mixture away from heating elements, gas openings, fans, vents, temperature sensors, electrical connections, and the door gasket unless the manufacturer specifically instructs otherwise.
GE, for example, warns owners not to get water or cleaner on the oven-door gasket because doing so can damage the gasket. See GE Appliances’ oven-door cleaning guidance.
Spread the Paste Evenly
Use gloved fingers, a soft sponge, or a flexible silicone spatula to spread the paste. Work from the upper walls downward so loosened soil can be wiped toward the oven floor later.
- Apply a thin coat over general soil.
- Use a thicker layer only on heavily baked-on spots.
- Leave sensitive components and openings uncovered.
- Close the oven door without turning the appliance on.
A thick blanket of paste over the entire cavity is not necessary. Targeting dirty areas uses less cleaner and reduces the amount of dried residue you will have to remove later.
Focus on Stubborn Spots
For blackened drips or heavily baked-on grease, press a thicker layer of baking-soda paste directly onto the deposit. Give these areas more dwell time instead of immediately reaching for a hard scraper.
After soaking, use a damp non-scratch sponge or plastic scraper to work under the softened residue. Repeat the paste treatment if needed rather than using a knife, razor, or aggressive abrasive on an enamel surface unless the appliance manufacturer specifically approves that tool.
Whirlpool notes that particularly difficult deposits may be treated with baking-soda paste for 12 to 24 hours before wetting and scrubbing.
Let It Sit Overnight
The correct dwell time depends on how dirty the oven is. Light splatters may loosen after roughly 20 to 30 minutes. Moderate grime can be left for several hours, while heavily baked-on deposits often respond better to an overnight treatment of about 8 to 12 hours.
For especially stubborn spots, compatible surfaces can sometimes be treated for as long as 12 to 24 hours, consistent with Whirlpool’s manual-cleaning guidance. The oven must remain off throughout this soaking period.
Longer contact time lets moisture penetrate dried residue, so less force is needed during the wiping stage. There is no benefit to heating the oven while the baking-soda paste is sitting.
Wipe Away the Grime
Use a damp microfiber cloth or non-scratch sponge to remove the softened paste and grime. Work from the top down, rinsing the cloth frequently so you do not spread dirty residue over areas you have already cleaned.
| Area | Action |
|---|---|
| Walls and floor | Wipe repeatedly with a damp soft cloth or sponge |
| Stubborn deposits | Use a non-scratch sponge or plastic/silicone scraper |
| Door glass | Use only a method approved for your model and keep cleaner off the gasket |
| Removable racks | Clean separately, rinse thoroughly, and dry completely |
If a patch remains after the first pass, reapply baking-soda paste to that specific spot and give it additional time. This is usually safer for a compatible enamel surface than escalating immediately to aggressive scraping.
Use Vinegar for the Final Clean
After most of the baking-soda paste has been removed with water, lightly spray white distilled vinegar only where chalky baking-soda residue remains and where vinegar is permitted by the oven manufacturer.
The vinegar reacts with remaining sodium bicarbonate and creates carbon dioxide bubbles. The fizz is useful because it makes lingering baking-soda deposits easy to identify, but it should not be interpreted as proof that the mixture has become a stronger grease cleaner.
- Mist only areas where baking-soda residue remains.
- Allow the brief fizzing to subside.
- Wipe with a clean damp cloth.
- Repeat with plain water until the surface no longer feels gritty or chalky.
- Dry the cavity with a clean microfiber cloth and leave the door open until remaining moisture has evaporated.
Whirlpool similarly recommends wiping up baking soda with vinegar or lemon juice and repeating until the paste has been removed.
Note: If white powder keeps reappearing after the oven dries, baking-soda residue is still present. Wipe again with a clean damp cloth, using a small amount of vinegar only where the appliance instructions allow it, then finish with plain water.
Clean the Oven Door Glass
Door-glass instructions vary more than many people realize, so check the model manual before using an abrasive paste or scraper. For compatible glass, apply a small amount of baking-soda paste to the soiled glass without touching the gasket or forcing liquid into door vents and seams.
Allow the paste to soften baked-on splatters, wipe it away with a damp non-scratch cloth or sponge, then rinse and dry the glass. GE lists soap and water, diluted vinegar, baking-soda-and-water paste, and non-abrasive cleaner among options for appropriate oven-door interiors while specifically warning against wetting the gasket.
If soil is trapped between the glass panels, do not pour cleaner through the door vents or disassemble the door casually. Follow the service procedure for your exact model.
What to Do If Stains Remain
Not every dark mark is removable food residue. Repeated spills can discolor enamel, and some stains may remain even after the surface is hygienically clean.
If ordinary baking-soda treatment does not remove a deposit:
- Repeat the paste treatment on the spot and increase the dwell time.
- Use only non-scratch pads or scrapers approved for the oven surface.
- Check whether the oven has a manufacturer-approved steam-clean or self-clean cycle.
- Use a commercial oven cleaner only if the appliance manufacturer explicitly permits it for that oven type and surface.
- Stop if the coating appears scratched, chipped, blistered, or otherwise damaged.
GE notes that cleaning procedures differ between self-cleaning and manually cleaned ovens, reinforcing why the model-specific instructions should take priority over any universal cleaning recipe. See GE Appliances’ range-cleaning options.
Before Using the Oven Again
Inspect the cavity in good light before reinstalling the racks. There should be no loose baking soda, pools of vinegar or water, cloth fibers, or cleaner around vents and components.
Make sure the racks are completely dry, reinstall them according to the manual, and verify that nothing is resting directly on the oven floor that should not be there.
If you notice a heavy cleaner smell, obvious residue, unusual smoke, or another problem when the oven is next used, turn it off, let it cool, and recheck the cavity rather than continuing to heat leftover cleaning material.
How to Keep Your Oven Cleaner Longer
Cleaning small spills before they repeatedly bake onto the cavity can dramatically reduce the work required during a deep clean. Wait until the oven has cooled to a safe temperature, then wipe fresh splatters with the method approved for your appliance.
Cover foods when the recipe allows it and avoid overfilling casserole dishes or roasting pans. When a food is likely to bubble over, place a rimmed baking sheet or drip-catching pan on a lower rack where it will not interfere with airflow.
Warning: Do not automatically line the oven floor with aluminum foil or place a catch pan directly on the cavity floor. Whirlpool warns that foil used as an oven liner can alter heat distribution. Follow your model’s instructions for spill protection.
Cleaning frequency depends on use. An oven used for frequent roasting, broiling, or spill-prone dishes may need attention more often than one used occasionally. Whirlpool suggests that heavily used ovens may require deep cleaning more frequently than every three months. See Whirlpool’s oven-maintenance guidance.
Frequently Asked Questions
How long should you leave baking soda in an oven?
For light soil, about 20 to 30 minutes may be enough. Moderate grime can be treated for several hours, while baked-on grease often benefits from an overnight treatment of roughly 8 to 12 hours. Whirlpool notes that very stubborn deposits may be left under baking-soda paste for 12 to 24 hours before wetting and scrubbing.
How do you get black baked grease off the oven?
Apply a thick baking-soda-and-water paste directly to the baked-on deposit and give it several hours or overnight to soften. Wipe with a damp non-scratch sponge and use a plastic or silicone scraper if the oven manufacturer permits it. Repeat the treatment rather than reaching immediately for a sharp metal tool.
What is a good homemade oven cleaner?
For many compatible manually cleaned ovens, a simple paste of baking soda and water is a useful low-cost option for ordinary grease and cooked-on food. It is not universally appropriate for every oven coating or cleaning system, so the appliance manual should always take priority.
Can I clean my oven with Dawn, vinegar, and baking soda?
You can use mild dish soap, baking soda, and vinegar in different stages if your oven manufacturer permits them, but there is little reason to combine all three at once. Use mild dish soap for removable racks or approved greasy surfaces, make the oven paste from baking soda and water, and reserve vinegar for removing residual baking soda during the final wipe.
Can baking soda damage an oven?
Baking soda is commonly recommended for manual cleaning on compatible oven surfaces, but no cleaner is suitable for every appliance. Specialty coatings, catalytic liners, certain rack finishes, exposed components, and manufacturer-specific cleaning systems can require different care. Check the owner’s manual before applying the paste.
Why is there white residue after cleaning the oven with baking soda?
White or chalky marks usually mean some baking soda remains on the surface. Wipe repeatedly with a clean damp cloth. Where the manufacturer permits vinegar, a light mist can react with the remaining baking soda and make it easier to locate and remove. Finish with another plain-water wipe and dry the oven completely.
Conclusion
Cleaning an oven with baking soda works best as a slow, controlled process rather than an aggressive scrub. Use baking soda and water on compatible surfaces, give baked-on residue enough time to soften, wipe thoroughly, and use a little vinegar only during the final cleanup when appropriate. Just as important, follow the appliance manual, protect sensitive components and the door gasket, remove all residue, and let everything dry before cooking again. Regularly wiping cooled spills can make the next deep clean much easier.
Sources
- Whirlpool — How to Clean an Oven Inside and Out — baking-soda paste, dwell times, rack cleaning, vinegar cleanup, and manual-cleaning procedure.
- Whirlpool Oven Owner’s Manual — general cleaning safety and manufacturer-specific care guidance.
- GE Appliances — Cleaning Options for Ranges — differences among oven cleaning systems and manual-cleaning guidance.
- GE Appliances — Cleaning the Oven Door Interior — door-cleaning methods and warning about getting cleaner on the gasket.
- UCSB ScienceLine — Baking Soda and Vinegar Reaction — chemistry of sodium bicarbonate and acetic acid producing carbon dioxide, water, and sodium acetate.
