
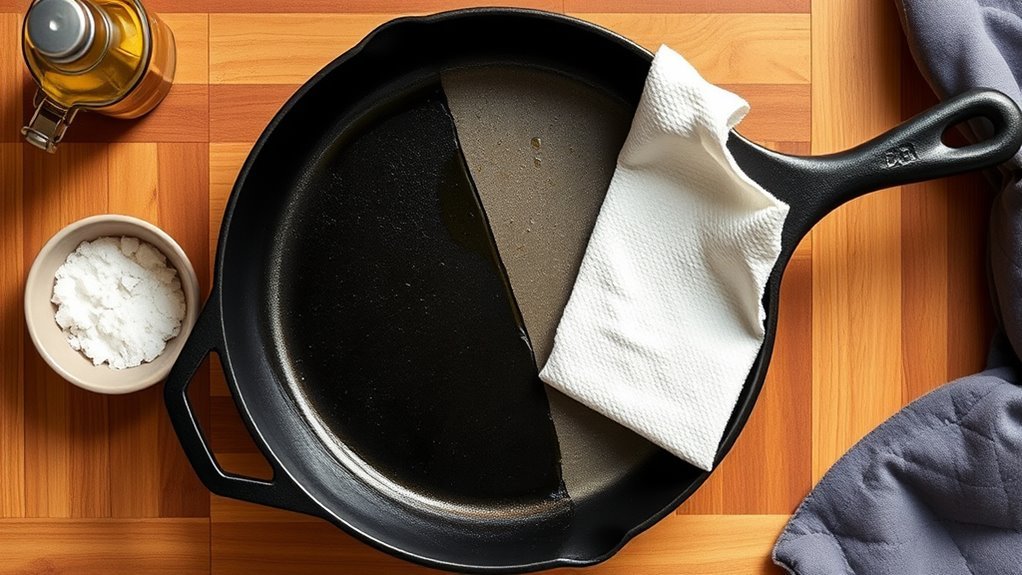
You might think your cast iron skillet is seasoned just because it looks good, but there’s more to it. A well-seasoned skillet not only boasts a rich color but also performs seamlessly in the kitchen. By understanding the signs of proper seasoning and following a step-by-step guide, you can guarantee your skillet remains a reliable cooking companion. Ready to reveal the secrets of maintaining that perfect non-stick surface? Let’s get started.
How to Season Your Cast Iron Skillet
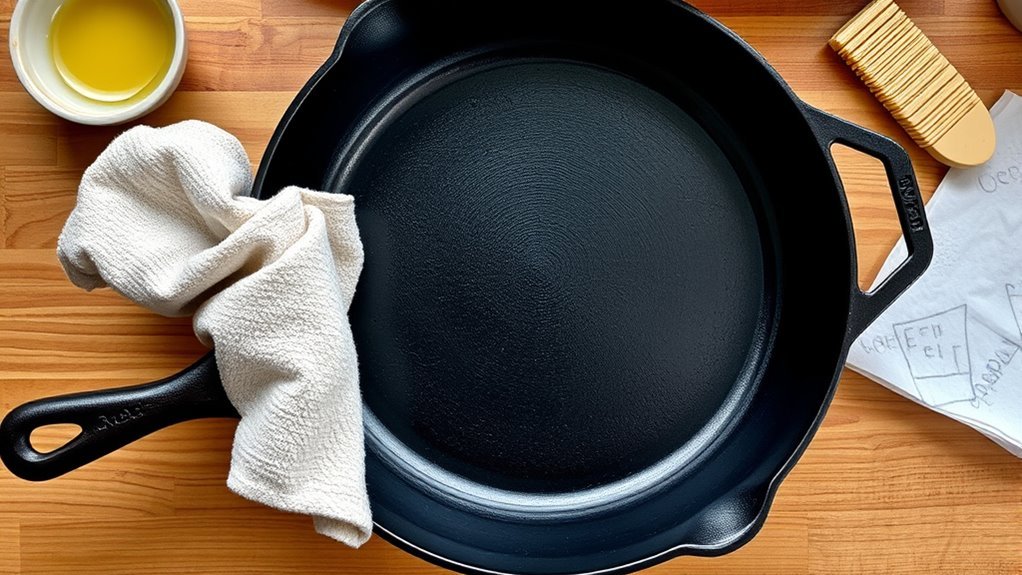
To get your cast iron skillet ready for cooking, you’ll want to season it properly. Start by thoroughly cleaning and drying your skillet to eliminate any residue left from manufacturing or previous uses. This step is vital for a successful seasoning process.
Next, grab the best oil—high-smoke point options like canola or avocado oil work wonders—and apply a thin, even layer over the entire surface, including the handle.
Preheat your oven to 450°F (230°C), then place the oiled skillet upside down on the middle rack. Use a baking sheet below to catch any drips and let it bake for 30 minutes.
Repeat this oiling and baking process 3 to 4 times to build those essential layers of seasoning, creating a stunning nonstick surface. After the final bake, let your skillet cool in the oven to solidify those layers for enhanced durability.
Enjoy liberating your culinary creations!
Signs of Proper Cast Iron Seasoning
When you check your cast iron skillet, look for a few key signs that indicate it’s properly seasoned.
You’ll notice a rich, dark color, a smooth surface, and excellent non-stick performance during cooking.
Visual Indicators of Seasoning
A well-seasoned cast iron skillet gleams with a rich, dark hue that invites you to cook. The cooking surface should be smooth and even, showcasing effective polymerization of the oil.
Look for a matte finish, which signals a well-maintained layer of seasoning. If you notice a shiny surface, it could mean excess oil or incomplete seasoning.
Properly seasoned pans exhibit non-stick properties, allowing your food to release easily without excessive sticking.
Importantly, there should be no visible rust or flaking; these are clear visual indicators that your seasoning has been compromised.
Regular use will enhance these features, deepening the color and improving performance, making your skillet a true kitchen companion.
Cooking Performance Tests
Understanding how your cast iron performs in the kitchen is just as important as recognizing its visual indicators. A well-seasoned cast iron skillet will exhibit excellent non-stick properties, allowing food to release easily without sticking. Below is a quick guide to evaluate your skillet’s performance:
| Test | Signs of Proper Seasoning |
|---|---|
| Cooking with Oil | Smooth release, no sticking |
| Color Consistency | Even, dark surface |
| Heat Resistance | Withstands high heat without smoke |
When you notice a subtle sheen instead of a glossy residue, it shows that the cooking oil has polymerized correctly. Together, these signs confirm that your seasoning is built to last, ensuring a seamless cooking experience.
Surface Texture Assessment
The surface texture of your cast iron skillet reveals a lot about its seasoning quality. A well-seasoned skillet should have a smooth, dark surface, showcasing effective oil polymerization that creates a non-stick layer.
Check for an even, glossy finish—no rough patches or imperfections allowed! This indicates the seasoning has properly filled the pan’s pores.
You’ll also want to inspect for rust or flaking; the absence of these issues is essential for maintaining that flawless seasoning layer.
When you cook, a seasoned skillet should let food release effortlessly, proving the seasoning’s effectiveness.
Regular use enhances this surface, leading to a progressively darker and more uniform appearance, inviting you to liberate your culinary creativity.
Step 1: Cleaning Your Cast Iron Skillet
Start by washing your cast iron skillet with warm, soapy water to eliminate any debris or residue, even if it’s pre-seasoned. Use a stiff brush or a non-abrasive scrubber to guarantee you’re cleaning your cast iron effectively. Avoid harsh chemicals that can damage the seasoning. Rinse it thoroughly under warm water, as soap can strip away the seasoning layer.
Next, dry it thoroughly with a clean towel or place it on low heat on the stovetop to evaporate any moisture. This step is essential for maintaining the integrity of your new cast iron pan.
Here’s a quick reference to guide you:
| Step | Action | Purpose |
|---|---|---|
| 1 | Wash with soapy water | Remove debris |
| 2 | Scrub with a stiff brush | Guarantee thorough cleaning |
| 3 | Rinse with warm water | Remove soap |
| 4 | Dry with a towel | Prevent rust |
| 5 | Heat on stovetop | Eliminate moisture |
Step 2: Applying Oil for Seasoning
Now that your skillet’s clean, it’s time to apply oil for seasoning.
Choose an oil with a high smoke point, like canola or avocado, and spread a thin, even layer all over the skillet—don’t forget the handle!
This careful application helps create that durable, nonstick surface you’re aiming for.
Choosing the Right Oil
Choosing the right oil for seasoning your cast iron skillet can make all the difference in achieving that coveted nonstick surface. Opt for oils with high smoke points, like canola, grapeseed, or avocado oil, as they promote effective polymerization during heating.
A thin layer of oil is essential; buff it to a non-greasy finish to avoid pooling and guarantee even coverage. Don’t forget to oil both the inside and outside of the skillet, including the handle, for thorough protection against rust.
After applying the oil, place the skillet upside down in a preheated oven at 450°F (230°C) for 30 minutes. Repeating this process three to four times builds robust layers, enhancing your skillet’s nonstick properties.
Applying Evenly and Thinly
Once you’ve selected your oil, the next step is applying it evenly and thinly to your cast iron skillet.
Begin by pouring a small amount of high-smoke-point oil, like canola or vegetable oil, onto the skillet. Use a clean paper towel to spread the oil across the entire surface—inside, outside, and even the handle—ensuring a uniform coat without any excess pooling.
After applying, buff the skillet with another paper towel until it looks non-greasy; you want to avoid any sticky residue that can ruin your seasoning. The goal is a smooth, even layer; it shouldn’t drip or have visible globs.
For optimal outcomes, consider repeating this process to enhance your skillet’s nonstick properties.
Step 3: Baking Your Skillet for Optimal Seasoning
To achieve the best seasoning for your cast iron skillet, it’s vital to bake it at the right temperature and for the right duration. Preheat your oven to 450°F (230°C). This heat guarantees the oil reaches its smoke point, essential for polymerization.
Place your oiled skillet upside down in the oven, using a baking sheet below to catch any excess oil that might drip. Bake it for 30 minutes, allowing the oil to bond to the metal and create a durable non-stick surface.
Place your oiled skillet upside down in the oven, using a baking sheet to catch any drips, and bake for 30 minutes for a lasting non-stick surface.
Keep an eye out for smoke during this process—it’s a good sign that the oil is polymerizing, forming that protective layer you seek.
Once the time’s up, let your skillet cool in the oven. This step solidifies the seasoning layers, making your skillet ready for anything, whether you’re frying veggies or looking to bake a pie.
Enjoy the liberation that comes with a well-seasoned cast iron!
How Often to Season Your Cast Iron?
Regularly seasoning your cast iron skillet is essential for maintaining its non-stick surface and preventing rust. To keep your skillet in top shape, follow these guidelines for seasoning and reseasoning:
- After Each Use: If you notice food sticking or wear, season right after cleaning.
- Every 3–6 Months: For regular maintenance, reseasoning during this timeframe is ideal, depending on how often you cook.
- Acidic Foods: If you frequently cook with acidic ingredients, consider reseasoning more often to protect the seasoning layer.
- Frequent Use: The more you cook, the better your skillet holds its seasoning, reducing the need for constant maintenance.
Always finish your cleaning routine by applying a light layer of oil. This small step helps maintain the seasoning and keeps rust at bay, ensuring your cast iron remains a trusted kitchen companion.
How to Maintain Your Seasoned Cast Iron
Maintaining your seasoned cast iron skillet is essential for preserving its non-stick surface and preventing rust. After each use, clean your cast iron cookware promptly with hot water and a stiff brush, steering clear of soapy water to protect those precious layers of oil.
Once it’s clean, dry your skillet immediately to thwart any rust, using stovetop heat if needed for that final touch.
To keep your skillet in top shape, apply a thin layer of cooking oil after cleaning, which helps maintain your seasoned cast iron and enhances its nonstick properties. Cooking fatty foods, like bacon, not only boosts the seasoning but also adds flavor to your meals.
Finally, store your cast iron in a dry place, maybe with a paper towel inside to absorb moisture. By following these simple steps, you’ll guarantee your skillet remains a reliable kitchen companion for years to come.
Top 5 Mistakes to Avoid When Seasoning Cast Iron
Seasoning your cast iron skillet might seem straightforward, but there are several common pitfalls that can compromise its performance. Avoid these mistakes to guarantee a strong, non-stick finish.
- Using Too Much Oil: Excess oil can create sticky spots that hinder proper polymerization and ruin your skillet’s surface.
- Skipping the Cleaning Step: Always wash and dry your skillet thoroughly. Trapped moisture can lead to rust and prevent good adhesion of the new seasoning.
- Incorrect Oven Temperature: Stick to 425-450°F. Too low a temperature means incomplete polymerization, leaving uneven seasoning.
- Insufficient Heating Time: Heat your skillet for at least 30 minutes. Short heating doesn’t allow the oil to fully bond, weakening the seasoning layer.
What to Do If Your Skillet Is Sticky?
If you’ve noticed sticky spots on your cast iron skillet, don’t panic; it’s a common issue that can be easily fixed. Sticky spots often arise from excess oil or incomplete polymerization during seasoning.
Start by heating your skillet on medium until the oil begins to bond. Then, wipe away any excess oil with a paper towel before it cools. If the stickiness lingers, you might need to contemplate reseasoning your pan.
Thoroughly clean it, apply a thin layer of oil, and bake it upside down in the oven at 450°F for 30 minutes to encourage proper polymerization.
Remember, avoid cooking acidic foods in a newly seasoned pan, as they can break down the seasoning and lead to stickiness.
Regularly using your skillet, especially with fatty foods, will help build a non-stick surface, reducing the chance of sticky spots in the future.
Best Cooking Practices for Seasoned Cast Iron
When you’re ready to cook with your seasoned cast iron skillet, the right practices can elevate your culinary experience. Here are some best practices to keep in mind:
- Use Fatty Foods: Start with bacon or chicken to enhance the seasoning and test the skillet’s non-stick qualities.
- Avoid Acidic Ingredients: Steer clear of tomatoes or citrus until the seasoning is well-set; they can damage the coating.
- Preheat the Skillet: Preheat your cast iron on medium-low heat for a few minutes before adding oil or food. This guarantees even cooking and prevents sticking.
- Monitor Temperature: Begin at a lower temperature and gradually increase it, as cast iron retains heat. This helps avoid overcooking.
Frequently Asked Questions
Can I Cook Immediately After Seasoning Cast Iron?
Yes, you can cook immediately after seasoning cast iron! Just make certain the cooking temperature is right.
Use oil types like vegetable or canola for best results. Cooking with fatty foods, like bacon, helps enhance the seasoning.
To maintain that nonstick surface, avoid acidic ingredients initially. Preheat your skillet to guarantee even cooking, and remember to oil it well before adding food.
Regular seasoning and proper maintenance keep your cast iron in prime shape!
What Are Common Cast Iron Seasoning Mistakes?
You’d think seasoning cast iron is a walk in the park, right? Yet, many folks trip over common mistakes.
Overheating oil can create a sticky mess, while improper cooling leads to uneven surfaces.
Applying too thick a layer? That’ll make your pan weep with regret.
And don’t even think about using soap too soon; it’ll strip your hard work away.
Embrace the art of seasoning, and your cast iron will thank you!
What Ruins Cast Iron Seasoning?
Excessive moisture exposure and food residues can ruin your cast iron seasoning.
If you use oils with low smoke points, you’re likely to end up with a sticky surface. Cooking acidic foods before your seasoning’s well-established can break it down too.
Should I Season Cast Iron at 350 or 450?
Think of your cast iron skillet as a canvas; the right seasoning temperature is essential for a masterpiece. You should season at 450°F, not 350°F, to bond the proper oil effectively.
Using the oven method, bake your oiled pan upside down for 30 minutes to prevent pooling. Regular seasoning at this higher temperature enhances your skillet’s performance and longevity, giving you that liberating cooking experience you crave.
Conclusion
In the kitchen, your seasoned cast iron skillet becomes more than just a tool; it’s a trusted companion. When you notice that rich, dark sheen glistening under the light, you’ll realize how effortlessly food slides off, almost as if the skillet knows you. With regular care, you’ll find that every meal cooked in it tastes just a bit better, as if the skillet itself adds a dash of magic. Embrace this culinary journey and let your skillet shine!