
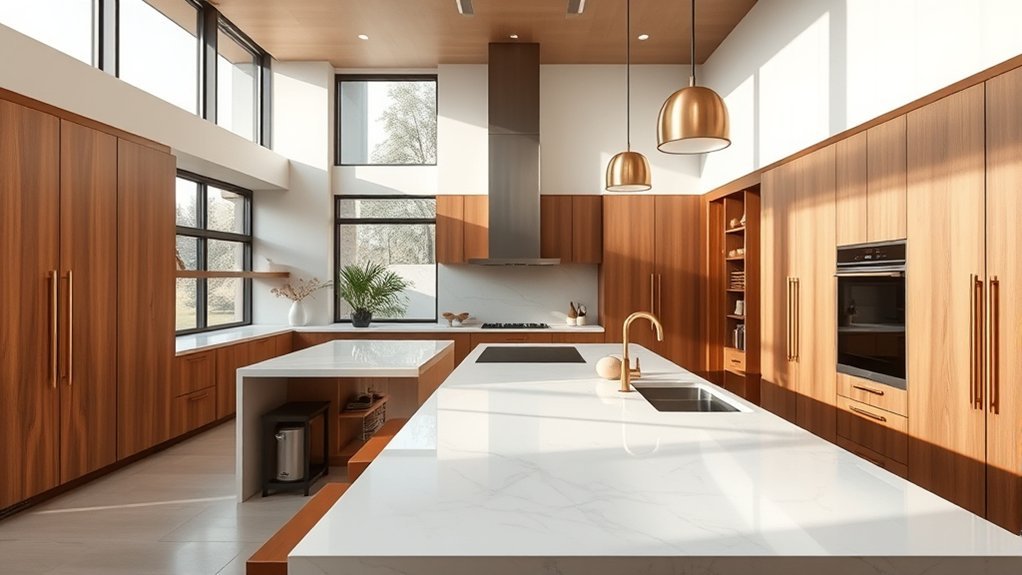
A kitchen redesign works best when layout decisions come before finishes. Start by measuring the room, doors, windows, utilities, appliances, and fixed obstacles, then decide whether the project is a surface refresh or a layout-changing renovation. Choose a galley, L-shaped, U-shaped, island, or peninsula plan based on the room and traffic pattern. From there, plan practical work centers, clear aisles, useful storage, lighting, ventilation, and appliances before selecting cabinets, countertops, hardware, and color.
Quick Answer
Start a kitchen redesign by measuring the room and fixed services, then choose a layout around work centers, traffic, and storage. Keep work aisles about 42 inches for one cook and 48 inches for multiple cooks, and treat the sink–cooktop–refrigerator triangle as a flexible planning tool—not a 42–48-inch spacing rule.
Key Takeaways
- Measure walls, ceiling height, doors, windows, plumbing, electrical points, vents, and appliance sizes before changing the layout.
- Do not confuse work-aisle width with work-triangle spacing; 42–48 inches refers to common aisle guidance.
- Plan around work centers and traffic flow instead of forcing every kitchen into a perfect triangle.
- Give storage, lighting, ventilation, appliance-door clearance, and electrical planning the same attention as finishes.
- Choose materials and appliances after the functional plan is settled so expensive selections do not dictate a poor layout.
At a Glance
| Time Required | One focused session for basic measurements; detailed layout comparisons may take several planning sessions. Construction time depends on project scope. |
| Difficulty | Moderate for layout planning; high when walls, electrical circuits, gas, plumbing, or ventilation systems are being moved. |
| Tools Needed | Tape or laser measure, level, graph paper or floor-planning software, pencil, phone or camera, and appliance specifications. |
| Cost | Basic planning can be done with paper or free software; professional design and construction costs vary widely with room size, location, materials, and structural or utility changes. |
Measure Your Kitchen Space

Begin by measuring the kitchen’s full dimensions, including wall lengths, ceiling height, recesses, soffits, corners, and any changes in wall depth. Do not rely on a single overall length. Measure individual wall sections so doors, windows, cabinets, and appliances can be positioned accurately.
Record every fixed condition that could affect the design: door swings, window locations, plumbing, drains, gas connections, vents, electrical outlets, switches, radiators, and structural columns. Also note the height of window sills and the location of trim because these details can limit countertop or cabinet placement.
Door swings, windows, plumbing, electrical points, and appliance dimensions anchor the plan. Measure them before choosing cabinets.
Measure existing appliances if they will stay, or obtain the installation dimensions for replacements before finalizing cabinetry. Refrigerator doors, ovens, dishwashers, and pullout drawers all need enough space to open without colliding with an island, wall, or another appliance.
Pro Tip: Measure each important dimension at least twice and mark plumbing, outlets, windows, and doors directly on a scaled floor-plan sketch. Small measurement errors can become expensive once cabinets are ordered.
A detailed floor plan should show dimensions, openings, utilities, appliance positions, and circulation paths. This turns the room into a usable planning document instead of a collection of rough estimates.
Define the Kitchen Redesign Scope
Before choosing a new layout, decide how much of the kitchen actually needs to change. A cosmetic update can keep the existing cabinet footprint and focus on paint, hardware, lighting, backsplash, countertops, or appliances. A full redesign may move cabinets, plumbing, electrical circuits, ventilation, doors, or walls.
Keeping major utilities in their existing locations can simplify a project, while moving them may open better layout options. The right choice depends on how poorly the current kitchen functions and whether the benefit of a new arrangement justifies the extra construction.
Make a short list of problems the redesign must solve. Common goals include more prep space, better pantry storage, safer traffic flow, improved lighting, room for two cooks, easier appliance access, or seating that does not block the work area.
Choose the Right Kitchen Layout
With measurements and priorities in hand, choose a kitchen layout that fits the room rather than forcing the room into a fashionable shape.
- Galley kitchen: Efficient in narrow rooms, with two parallel runs of cabinets and appliances. Careful aisle planning is especially important.
- L-shaped kitchen: Uses two adjoining walls and leaves the room more open to dining or living space.
- U-shaped kitchen: Provides extensive counter and storage space on three sides and works well when the center remains easy to move through.
- Island kitchen: Adds prep space, storage, seating, or appliances when the room is wide enough to preserve comfortable circulation.
- Peninsula kitchen: Provides some island benefits without requiring clearance on all four sides.
Think about where people enter the room, walk to other rooms, open the refrigerator, unload groceries, wash dishes, prepare ingredients, and cook. Major household traffic should not constantly cross the main cooking zone.
Note: The traditional work triangle is still a useful starting point, but it is not the only way to organize a kitchen. The NKBA’s 2026 planning-guideline update also emphasizes activity centers, work areas, accessibility, storage, power planning, lighting, automation, and ventilation.
Plan Work Aisles and Clearances
One of the most important corrections in kitchen planning is distinguishing a work aisle from the distance between the sink, refrigerator, and cooking surface.
Traditional NKBA-style planning guidance commonly uses a work aisle of about 42 inches for one cook and 48 inches for multiple cooks, measured between counter fronts, tall cabinets, or appliances. A general walkway outside the active work area is commonly planned at about 36 inches or more, although accessibility needs may require additional space.
The familiar 42- and 48-inch measurements describe work-aisle clearance—not the distance that should separate the sink, stove, and refrigerator.
For a traditional work triangle, a commonly used guideline keeps each leg between roughly 4 and 9 feet and the total of all three legs at no more than about 26 feet. These figures are a planning tool, not a requirement that fits every modern kitchen. Larger kitchens, multiple cooks, prep sinks, beverage stations, and separate cleanup zones often work better when planned as activity centers.
Check appliance clearances at the same time. An open dishwasher should not trap someone at the sink, a refrigerator door should not block a main passage, and an oven door should leave enough standing room to load and remove hot cookware safely.
Place the Sink, Stove, and Fridge
The sink does not have to be under a window, although many homeowners prefer that location for daylight and a view. Plumbing location, dishwasher placement, prep space, and overall workflow matter more than the window alone.
When there is one primary sink, try to keep it convenient to both food preparation and cleanup. Useful counter space beside the sink is often more valuable than placing the sink at a visually attractive location with little room to work.
The cooking surface should have practical landing and prep space nearby and should not sit where people must pass directly behind the cook every time they cross the room. Plan ventilation at the same stage because a range or cooktop location may determine where ductwork can run.
The refrigerator can work well near the kitchen entrance when that lets family members and guests reach food or drinks without crossing the main cooking zone. In other rooms, a different location may produce a better relationship between refrigeration, prep space, and the sink.
Instead of forcing these three elements to sit 42 to 48 inches apart, evaluate the walking route between them, the room’s traffic pattern, and the task zones around each appliance.
Plan Lighting, Electrical, and Ventilation
Lighting, power, and ventilation should be planned before cabinets and finished walls make changes difficult. The 2026 NKBA planning update specifically highlights power planning, illumination, home automation, and ventilation as important parts of kitchen design.
Use layered lighting rather than relying on one ceiling fixture. General lighting brightens the room, task lighting serves countertops and cooking areas, and accent or decorative lighting can add depth without sacrificing function. Under-cabinet lighting is especially useful where upper cabinets otherwise cast shadows on work surfaces.
Map electrical needs around actual appliance locations. Countertop appliances, refrigerators, dishwashers, disposals, wall ovens, microwaves, induction or electric cooking equipment, charging stations, and island outlets may have different circuit or code requirements. Local rules vary, so confirm applicable electrical and building requirements before construction.
Cooking ventilation should also be matched to the appliance, kitchen layout, and available duct route. Moving a cooktop to an island may look attractive on a floor plan but can make ventilation more complicated.
Add Kitchen Storage That Works
Once the major work centers are set, storage should support those activities rather than simply filling every available wall. Frequently used items should stay close to the task where they are needed.
Once the sink, cooking area, refrigerator, and prep zones are set, storage should support movement instead of crowding it.
Deep drawers can make pots, pans, dishes, and small appliances easier to reach than shelves at the back of a base cabinet. Pullouts can improve access to narrow pantry spaces, while tray dividers, spice storage, waste sorting, and drawer organizers give everyday items a predictable place.
- Use drawer dividers and spice storage near the main prep zone.
- Add pantry storage for dry goods, bulk items, and small appliances when space allows.
- Use vertical dividers for trays, cutting boards, and baking sheets.
- Use island cabinetry for less frequently used items if it does not reduce essential aisle width.
- Consider floor-to-ceiling storage where it improves capacity without making the room feel cramped.
A hanging pot rack can free cabinet space in the right room, but it should not interfere with lighting, sightlines, ventilation, or comfortable head clearance.
Plan for Accessibility and Future Use
A kitchen should work for the people using it now while allowing for changing needs where practical. Wider clearances, easy-to-reach drawers, lever-style hardware, good lighting, accessible appliance controls, and reduced reaching can make the room easier for children, older adults, and people with mobility limitations.
The latest NKBA planning guidance incorporates accessibility considerations such as wheelchairs and mobility aids more directly than earlier editions. If accessibility is a major project goal, use dimensions appropriate to the specific user rather than relying only on standard kitchen clearances.
Choose Kitchen Finishes and Appliances
Finishes and appliances should reinforce the functional plan rather than dictate it. Choose cabinet doors, countertops, backsplash, flooring, fixtures, and hardware after the main dimensions and work zones are settled.
Granite, marble, engineered stone, concrete, stainless steel, solid-surface materials, wood, and other countertop options differ in appearance, maintenance, stain resistance, heat tolerance, repairability, and price. Compare the characteristics that matter to the household rather than choosing only by appearance.
Integrated appliances can create a cleaner visual line, including premium models from brands such as Sub-Zero and Wolf, but not every appliance is designed to sit fully flush. Follow the exact manufacturer’s installation dimensions, ventilation requirements, door-clearance specifications, and service-access instructions for the selected model.
When replacing major appliances, energy use is another useful comparison point. The ENERGY STAR certified product list includes refrigerators, dishwashers, freezers, and residential electric cooking products that meet current efficiency specifications.
Hardware, faucets, backsplash materials, and statement finishes can then add personality. A restrained base palette makes it easier to change smaller decorative elements later without replacing the entire kitchen.
Check Codes, Permits, and Renovation Safety
Before demolition, confirm whether the project requires local permits or inspections. Structural changes and alterations to electrical, plumbing, gas, or ventilation systems may be regulated differently depending on the location.
Warning: In the United States, renovation work in many homes built before 1978 can disturb lead-based paint. The U.S. EPA’s lead-safe renovation guidance, updated in March 2026, explains required and recommended practices for controlling hazardous lead dust. Paid contractors performing covered work may need EPA or state certification.
Professional help is especially useful when removing walls, relocating gas appliances, changing service panels or branch circuits, modifying supply or drain lines, or creating new ventilation routes. A beautiful plan is not successful if the installation cannot meet applicable safety requirements.
Frequently Asked Questions
What Is the New Kitchen Trend for 2026?
The strongest 2026 kitchen trends are less about one decorative look and more about functionality, personalization, storage, technology, and wellness. The NKBA 2026 Kitchen Trends Report highlights multi-purpose kitchen hubs, storage maximization, smart technology, organic and earthy aesthetics, seamless design, material sophistication, and health and wellness. In its survey, 96% of respondents identified neutrals as popular, followed by greens and blues, while statement color often appears in backsplashes, islands, wallpaper, and accessories.
What Are the Common Mistakes to Avoid in Kitchen Layout Design?
Common mistakes include using work-triangle dimensions incorrectly, making work aisles too narrow, placing major traffic through the cooking zone, forgetting appliance-door clearance, leaving too little prep space, and treating storage as an afterthought. Poor task lighting, weak ventilation, inadequate electrical planning, and an oversized island can also make an attractive kitchen frustrating to use. Measure first, test circulation on the floor plan, and verify appliance installation requirements before ordering cabinets.
Is There an App Where I Can Take a Picture of My Kitchen and Redesign It?
Yes, but the tools work differently. Houzz Pro can scan a room and create editable 2D and 3D plans with visualization tools. magicplan can scan rooms on supported devices or import a floor-plan image and turn it into an editable measured plan. RoomSketcher supports editable 2D and 3D kitchen planning and visualization. SketchUp can import or photo-match images, but it generally requires more manual 3D modeling. A single photograph is useful for visualization, but accurate cabinet and appliance planning still requires real measurements.
How Can I Update My Kitchen Without Replacing It?
A kitchen can change substantially without replacing every cabinet. Repainting or refinishing suitable cabinet boxes and doors, changing hardware, improving task lighting, replacing a backsplash, updating faucets, adding drawer organizers, and repairing worn finishes can refresh the room while keeping its basic structure. Open shelving can replace selected upper cabinets where practical, but it should be chosen for storage needs rather than simply because it is decorative. Countertops or flooring can also be replaced independently when their condition or appearance justifies the cost.
Conclusion
A successful kitchen redesign starts with accurate measurements and a layout that supports real daily tasks. Work aisles, traffic, appliance clearances, storage, lighting, ventilation, and electrical needs should be resolved before expensive finishes are selected. The sink, cooking area, and refrigerator still matter, but modern kitchens often work better when planned as connected activity zones rather than a rigid triangle. Once the functional plan is sound, cabinetry, countertops, appliances, hardware, and color can give the room its finished character without compromising how well it works.
Sources
- National Kitchen & Bath Association — 2026 Kitchen & Bath Planning Guidelines Update — current guidance on activity centers, accessibility, storage, power, lighting, automation, and ventilation.
- NKBA | KBIS 2026 Kitchen Trends Report — current kitchen design, storage, technology, color, material, and lifestyle trends.
- U.S. Environmental Protection Agency — Steps to Lead-Safe Renovation, Repair and Painting — renovation safety guidance for pre-1978 housing.
- ENERGY STAR — Certified Product Categories — efficiency information for refrigerators, dishwashers, electric cooking products, and other appliances.
- RoomSketcher Kitchen Planner — official documentation for 2D and 3D kitchen planning and visualization.
- Houzz Pro Kitchen & Bath 3D Floor Planner — official information on room scanning, floor plans, 3D visualization, and AR tools.
