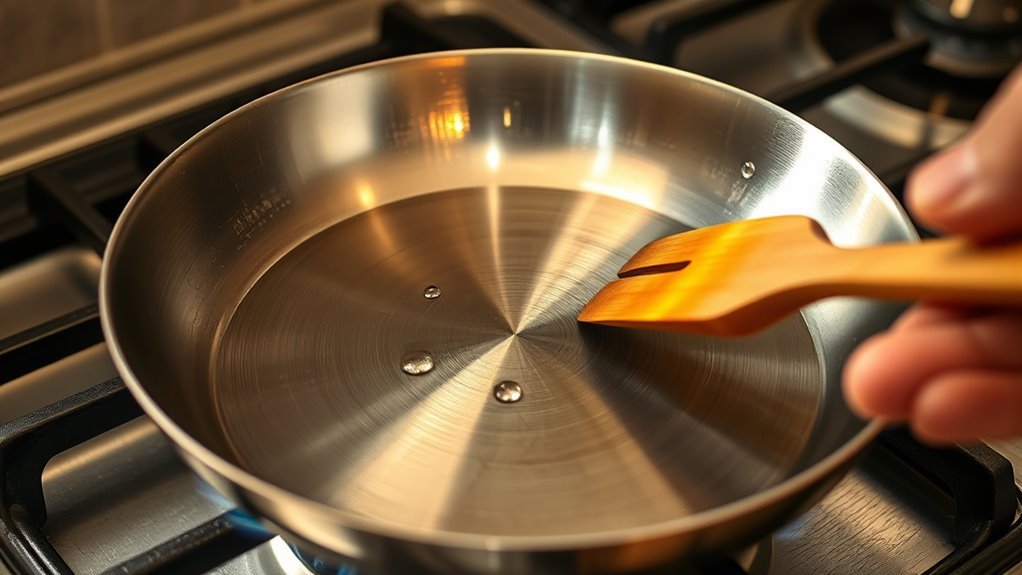
Like testing a car by listening to its engine, you can judge a stainless steel pan by how water behaves on it. You’ll learn a simple droplet test that tells you when the surface is ready or too hot, plus practical heat settings for gas and electric, when to add oil or ghee, and timing tips for tadka, onions, and paneer. Keep going to avoid sticking, burning, and to get consistent results every time.
Water Test: Is Your Stainless Steel Pan Too Hot?
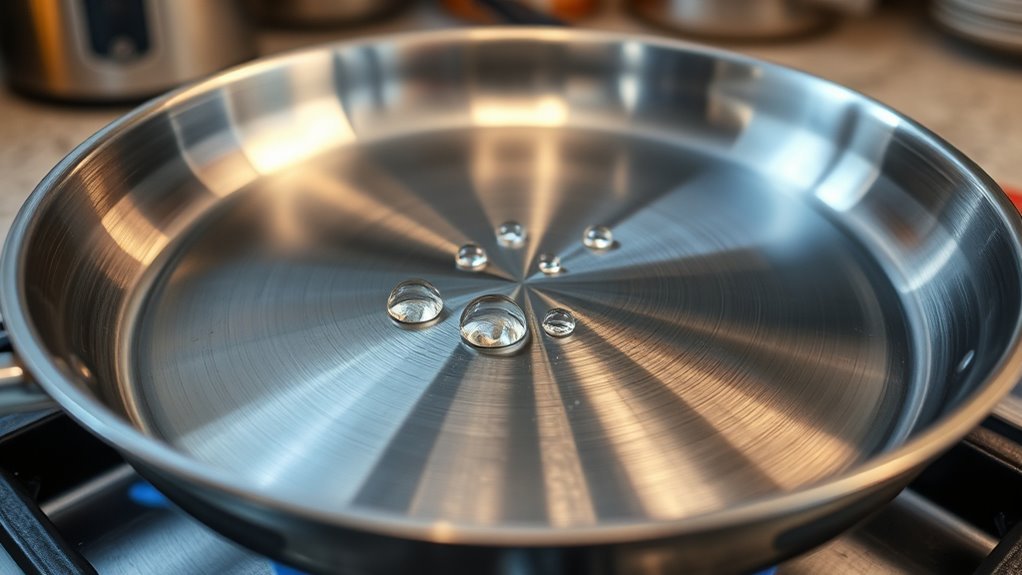
When you’re unsure whether a stainless steel pan’s ready, try the water test: flick a few drops onto the preheated surface—if they bead up and skitter (the Leidenfrost effect), the pan’s at a good cooking temperature; if they sizzle slowly or sit and evaporate, it’s underheated; if they spread and vanish instantly, it’s too hot, so let it cool slightly before adding oil or food.
Use that simple check to develop reliable heat control: bead-and-skitter droplets indicate the proper temperature to add oil or food and will reduce sticking. If droplets sizzle or disappear instantly, pull the pan off heat, wait a minute, then retest—overheated steel burns oils and food fast.
Once you hit the shimmering-oil stage, you’ve matched proper temperature with minimal guesswork. This method is empirical, repeatable, and frees you from dependence on vague flame settings; you’ll learn the pan’s behavior and gain practical autonomy over cooking outcomes.
Why Pan Temperature Matters for Indian Cooking
When you heat oil for a tadka, even a slight temperature spike can scorch whole spices in seconds, turning their aroma bitter instead of nutty.
Use the water-droplet test and aim for a medium range (about 325–400°F) so seeds pop and release flavor without charring.
Monitor sound and color closely and lower heat immediately if spices darken or sizzle too aggressively.
Heat’s Impact On Spices
Because spices release their essential oils quickly, you need to control pan temperature so they bloom without burning; aim for medium heat (about 325–375°F) and preheat the stainless steel pan for even distribution. You’ll avoid the bitter char that comes from high heat and protect the nuanced aromas that free your cooking.
- Tiny seeds crackle, tiny oils lift, scent filling your kitchen.
- Whole spices sizzle briefly, then settle, releasing depth without smoke.
- Ground spices toast fast; too-hot pans scorch their sugars and ruin balance.
- A well-preheated stainless steel cookware surface helps spices heat evenly, preventing hotspots.
Keep heat steady, watch the first few seconds, and you’ll keep flavors liberated and intact.
Timing For Tadkas
If you want a perfect tadka, heat the pan to medium so spices crackle and bloom instead of burning; use the water-droplet test—drops should bead and evaporate immediately—and add oil until it shimmers before tossing in whole or ground spices.
You’ll rely on timing to free essential oils without charring: add spices once the oil shimmers, listen for an immediate sizzle, and watch for brief crackling.
If the pan begins to smoke, cut heat at once—spices burn in seconds on overheated steel. Adjust to medium heat and use short intervals, removing spices if they darken too fast.
Consistent monitoring of sound and sight lets you control flavor, assert mastery, and refuse bitter outcomes.
Preheat a Stainless Steel Pan : Step‑By‑Step
Start with a clean, dry stainless steel pan and place it over medium heat so it warms gradually and evenly. You want controlled heat to avoid hotspots and to free yourself from the fear of ruining food.
After a minute or two, test the surface with water droplets: if they bead and dance, the pan’s ready for oil. Add a thin layer of oil, watch it shimmer, then introduce food. Listen and look for a steady sizzle — that tells you the pan is cooperating.
- Visualize tiny beads of water skittering across the surface.
- Imagine a thin ribbon of oil spreading and turning glossy.
- Hear the confident, steady sizzle as food meets metal.
- Feel the calm control as you adjust the flame to keep balance.
This method is evidence-based and practical: warm evenly, test with water, add oil at the right moment, and monitor sound and sight to maintain consistent cooking.
Heat Settings for Home Stoves (Low→High)
Start with low to medium heat (250–400°F) for gentle cooking—sauces, melting butter, and most everyday tasks—so you get even cooking without browning.
Move to medium to high (around 325–400°F and above) only when you need faster browning or a sear, and watch for the Maillard reaction to begin.
Use preheat cues (hand‑held heat at 2–3 inches, steady sizzle) and listen for changes in the sizzle to adjust before the pan gets too hot.
Low To Medium Heat
When you set your stove between roughly 250°F and 400°F, you’re working in the low-to-medium range that handles most everyday tasks: low (250–325°F) gently melts butter and simmers sauces without scorching, while medium (325–400°F) gives even browning and effective sautéing without forcing food to stick.
You’ll preheat properly so ingredients don’t cling; visual cues — shimmering oil, a steady sizzle — tell you the pan’s ready. Treat stainless like an iron pan in behavior but expect different heat response and adjust every time you cook.
- Butter melting evenly around soft onions
- Sauce barely bubbling at the edge
- Vegetables browning gently without char
- A quiet, steady sizzle that feels controlled
Medium To High Heat
You’ve seen how low-to-medium heat handles most everyday tasks; moving up into medium-to-high (roughly 350–425°F) gives you the power for faster browning and reliable searing without immediately scorching.
On home stoves, that zone sits above medium heat but below full blast, so you’ll get stronger Maillard reactions and clearer cooking results without constant babysitting.
Use the water droplet test: beads should skitter and evaporate quickly, not smoke violently.
Listen for a steady sizzle—too loud and it’s past safe range.
Maintain steady medium-to-high heat for consistent doneness; if fat smokes or food darkens too fast, lower the burner immediately.
Freedom in the kitchen comes from learning visual and auditory cues and adjusting temperatures confidently to get predictable, liberated meals.
When to Add Oil or Ghee to Prevent Sticking
How do you know the right moment to add oil or ghee so food won’t stick? Preheat your stainless steel pan on medium so cooking temperatures equalize and heat retention works for you.
Use the water droplet test: droplets that bead and dance mean the pan’s ready for oil alternatives or ghee. Don’t add fat too early — it can break down and increase sticking if the surface isn’t hot enough.
- imagine droplets skittering, proof the pan’s even warmth
- picture oil spreading and shimmering, a sign to drop food in
- see a thin gleam of ghee pooling, not smoking, ready to protect
- envision adjusting flame when shimmer fades, rescuing the sear
Add your oil after the pan reaches temperature and the fat shimmers; if it smokes, lower heat immediately.
Add oil once the pan’s hot and the fat shimmers — lower the heat if it starts to smoke.
This practice gives you control, reduces sticking, and frees you to cook with confidence and creativity.
Visual & Sound Cues That Tell You Heat
After you add oil or ghee at the water-bead stage, watch and listen for clear signals that tell you the pan’s heat is right. You’ll hear steady sizzle sounds the moment food hits the surface — that steady sizzle means the pan’s ready; a fading sizzle means it cooled and you should raise heat or wait.
Visually, track fond color: it should darken gradually to deep brown, not black. Black bits mean you’ve overshot temperature and need to pull back.
Use water droplets as a quick test: beads that dance and vaporize immediately show adequate heat; slow-sizzling droplets mean the pan needs more time.
Watch the oil: shimmer and fluid movement mean go; smoke means stop and cool. For an extra, tactile check, hold your hand 2–3 inches above the surface: warm within one second signals high heat, three seconds signals medium.
These cues free you from guesswork and help you control heat precisely.
Technique Tips for Tadka, Onions, and Paneer
Start by heating the pan on medium until a quick water bead skitters and spices crackle — that’s the window for a perfect tadka where mustard seeds pop and cumin blooms without burning.
You’ll use tadka techniques that rely on even heat distribution: add oil, test with a droplet, then toss in seeds.
For onion caramelization, preheat on medium to medium-low so sugars release slowly; stir often, watching for an even, golden sweep rather than hot spots.
For paneer searing, keep the pan at medium so you get a brown crust while the interior stays tender and moist.
- A single olive-oil sheen that shivers, then settles: ready for tadka.
- Slow, patient browning rings on onions — not charred edges.
- A steady, thin sizzle under paneer indicating proper sear.
- Quick water beads that vaporize: your go/no-go test.
Adjust heat if the sizzle fades; freedom in the pan comes from controlled temperature, not force.
Troubleshooting: Why Food Still Sticks or Burns
If food keeps sticking or burning, you’re probably misjudging pan temperature or trapping moisture by overcrowding.
Use the water droplet test to confirm the pan’s ready and always let it reheat between batches so food sears instead of steams.
Also avoid crowding the pan—too much moisture lowers surface heat and creates hotspots that cause sticking and burning.
Pan Temperature Misjudgment
Wondering why your stainless steel pan still sticks or burns even when you think the heat’s right? You’re likely misjudging pan temp.
Use temperature control techniques: do the water droplet test — beads that dance then evaporate mean ready; slow sizzle means too cool.
Watch oil: a shimmering cooking oil types surface is good; smoking oil means overheated and will burn food.
Don’t rush — add food only when cues align.
- beads jumping, then disappearing
- oil gleaming, not smoking
- steady sizzle when food hits
- visible browning fond forming
Adjust heat in real time by sound and sight, and apply food release methods like waiting for natural release before flipping.
These practical steps free you from stuck, burnt results.
Moisture And Overcrowding
Because trapped moisture cools the pan and creates steam, wet or crowded ingredients are a common cause of sticking and uneven browning. You’ll dry proteins and vegetables thoroughly before they hit the surface — moisture control is nonnegotiable for a clean sear.
Don’t dump everything in at once; practice deliberate pan spacing so each piece gets direct heat and airflow. Overcrowding forces steaming, lowers surface temperature, and makes sticking or burning more likely.
If the pan cools after adding food, raise heat slightly and give it time to recover between batches rather than pressing on. These simple steps — dry food, respect pan spacing, and focus on steam prevention — free you from salvaging a stuck, unevenly cooked meal and reclaim control of your stove.
Pan Care: Cleaning, Seasoning, and Hotspots
When you care for a stainless steel pan properly, it stays responsive and avoids hotspots that ruin cooking; start with a clean, dry pan and heat it gradually on medium rather than blasting it with high heat. You’ll extend freedom in the kitchen by preventing uneven cooking and frustrating sticking.
Use practical Cleaning Techniques: a baking soda paste removes stains without abrasion. After preheating, apply a thin oil layer to gain Seasoning Benefits—improved release and easier cleanup.
Watch for Hotspot Detection: uneven browning or sizzling tells you where heat concentrates, so adjust burner size or pan position. Protect the surface by avoiding metal utensils and letting the pan cool before washing; that preserves your investment.
- visual: a shimmer of oil across a heated surface
- tactile: smooth stainless, free of nicks
- olfactory: even, golden browning scent
- temporal: gradual heat, not sudden flare
These steps are evidence-based, practical, and liberating—you’ll cook with control, not chaos.
Quick Checklist: Preheat, Test, Add Fat, Cook
You’ve already learned how slow, steady heating and clean, oiled surfaces prevent hotspots; now apply that groundwork with a simple checklist to get cooking right every time.
Preheat your stainless steel pan on medium for a few minutes to allow even heat distribution and ideal heat retention. That reduces sticking and improves control — a core pan safety tips habit.
Preheat your stainless steel pan on medium for a few minutes to ensure even heat and prevent sticking.
Test with the water droplet: beads that dance mean the cooking surface is ready. Add fat only after beads appear; watch for the oil to shimmer. That shimmer signals proper temperature for searing and browning without burning.
While cooking, listen for a steady sizzle; if it fades, the pan’s cooling and you should nudge the heat up.
Monitor fond color — golden is good, black is too hot and will ruin flavor. These steps let you reclaim authority at the stove: precise, repeatable actions that protect food, pan, and your freedom to cook confidently.
Frequently Asked Questions
Can a Stainless Steel Pan Go in a 400 Degree Oven?
Yes — you can usually put a stainless steel pan in a 400°F oven.
You’ll check manufacturer limits and handle materials first; oven safety tips say avoid plastic or rubber handles.
Stainless steel durability and tri-ply construction handle that cooking temperature guide well, giving even heat and good retention.
Preheat to prevent thermal shock, skip nonstick coatings not rated for high heat, and you’ll cook confidently without sacrificing freedom in the kitchen.
Is 304 Stainless Steel Safe to Use in Hot Water?
Absolutely — you can dunk 304 stainless steel in boiling water without sweating; it laughs at heat.
You’ll benefit from 304 composition (18/8) that gives strong heat resistance and corrosion resistance, so it won’t leach or degrade.
You’ll use it confidently for cooking and cleaning, rinsing with hot water and mild detergent to keep it pristine.
Trust the alloy’s durability and enjoy the freedom to cook boldly.
When to Throw Out a Stainless Steel Pan?
Throw out a stainless steel pan when pan replacement signs appear: significant warping, deep scratches or pitting, persistent discoloration or rust, poor heat retention, or a loose/cracked handle.
You’ll notice cooking performance issues like uneven browning or sticking despite proper technique.
Maintain freedom by following maintenance tips: clean promptly, avoid abrasive pads, dry fully, and replace when damage compromises safety or results—don’t cling to faulty gear.
Can You Overheat a Stainless Steel Pan?
Yes — you can overheat a stainless steel pan. About 60% of home cooks report smoking oil issues when temps exceed 450°F.
For pan safety tips, watch for overheating signs like smoking oil, warped metal, or blue discoloration.
Adjust cooking techniques by lowering heat, using the water droplet test, and adding oil after preheat. That way you protect flavor, extend pan life, and reclaim control in the kitchen.
Conclusion
Think the water-droplet test’s just folk wisdom? It isn’t — physics backs it: beading means the Leidenfrost effect’s protecting the droplets, signaling ideal searing temperature; spreading and vanishing shows excessive heat. So trust the test, adjust heat, and add oil or ghee only once the pan passes the bead-and-skitter check. That small, evidence-based habit prevents sticking, burning, and uneven cooking, keeping your tadka, onions, and paneer perfectly cooked every time.