
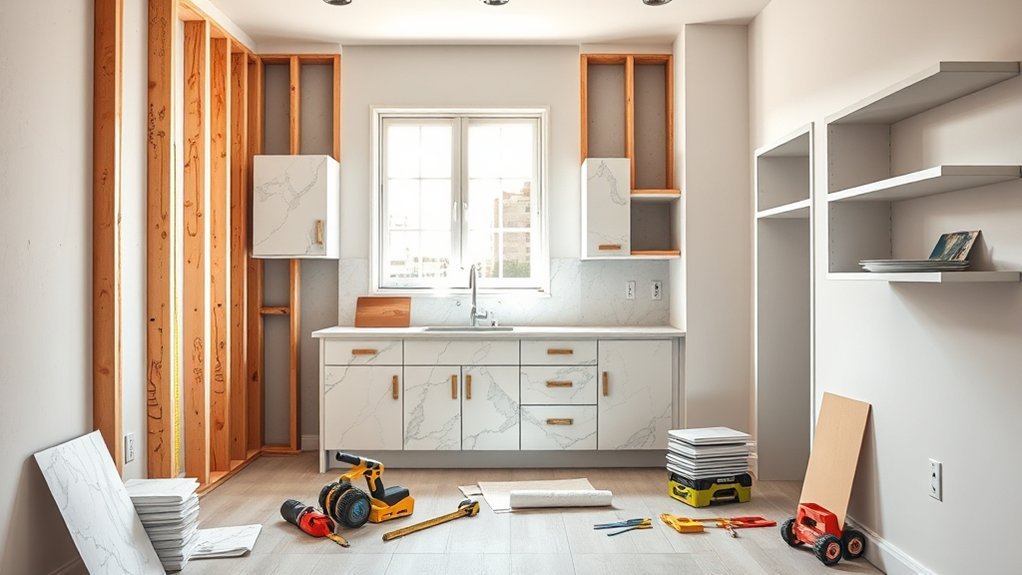
A successful small kitchen remodel starts with the scope, not the finishes. Decide what must change, measure the room and utilities accurately, set a budget with a contingency, and choose a layout that protects circulation and work space. Before demolition, confirm appliance specifications, permit requirements, material lead times, and any safety issues that apply to the home.
Quick Answer
To plan a small kitchen remodel, set the scope and budget first, measure the room and utilities, compare layouts, verify aisle clearances, select appliances before finalizing cabinets, check permits and safety requirements, then order long-lead items before demolition. Keep storage vertical and protect clear work zones instead of trying to fit oversized features into a tight room.
Key Takeaways
- Define the remodel scope before choosing cabinets, countertops, or appliances.
- Measure walls, openings, ceiling height, utilities, appliance spaces, and door swings—not just floor dimensions.
- Keep ordinary walkways clear and provide more room where people actively cook between opposing counters.
- Use vertical storage, drawer organizers, narrow pull-outs, and correctly sized appliances to gain capacity without crowding the room.
- Check local permits and inspections before moving plumbing, electrical, gas, ventilation, or walls.
- Confirm critical materials and appliances before demolition so the kitchen is not left unusable while delayed items arrive.
At a Glance
| Time Required | Several weeks to several months depending on design changes, permits, product lead times, contractor scheduling, and inspections |
| Difficulty | Intermediate planning; advanced when electrical, plumbing, gas, ventilation, structural, or cabinet-installation work is involved |
| Tools Needed | Tape measure or laser measure, graph paper or design software, level, appliance specification sheets, camera, notebook, and budget worksheet |
| Cost | Varies widely by scope and market. For context, the 2025 JLC Cost vs. Value report lists $28,458 as the national average for its specifically defined midrange minor kitchen remodel; a smaller cosmetic project can cost less, while layout changes and premium materials can cost far more. |
Set Your Small Kitchen Remodel Budget and Goals

Start by deciding whether the project is a cosmetic refresh, a cabinet-and-appliance replacement, or a layout-changing renovation. Those scopes can have very different costs even when the kitchens are the same size.
For a useful national benchmark, the 2025 JLC Cost vs. Value report lists an average job cost of $28,458 for its defined midrange minor kitchen remodel. That figure is a benchmark for a specific project specification, not a quote for every small kitchen. Location, cabinet type, countertop material, appliance package, labor rates, and changes to utilities can move the price substantially.
Build the budget around the actual scope. Separate the project into cabinets and storage, countertops, appliances, flooring, lighting, plumbing, electrical work, ventilation, paint, permits, labor, and disposal. Keep a contingency instead of committing every available dollar to planned purchases, especially in an older home where opening walls or removing flooring can reveal extra work.
Then rank the goals. Common priorities include:
- More usable storage
- More uninterrupted prep space
- Better lighting
- Improved ventilation
- Safer traffic flow
- Updated appliances
- Easier-to-clean finishes
Separate must-haves from nice-to-haves before choosing decorative upgrades. That makes it easier to cut costs without sacrificing the reason for remodeling in the first place.
Pro Tip: Price the complete functional project before upgrading finishes. A premium faucet or countertop is easy to substitute later; missing electrical work, ventilation, cabinet fillers, or appliance-clearance requirements can force expensive changes after installation begins.
Measure Your Kitchen and Rank Priorities
Accurate measurements establish the real limits of a small kitchen. Measure more than the room’s length and width. Record ceiling height, wall lengths, windows, doors, trim, soffits, radiators, vents, outlets, switches, plumbing, gas connections, and anything else that cabinets or appliances must clear.
Also measure each opening from a fixed corner so its position can be recreated on a scaled drawing. Note which way doors swing and how far appliance doors, dishwasher doors, and drawers extend when open.
Accurate Space Measurements
Create a simple floor plan using graph paper or design software. Measure each wall at more than one height when the house is older, because walls and corners are not always perfectly square.
Record:
- Floor-to-ceiling height
- Full length of every wall
- Door and window widths and positions
- Window-sill height
- Existing cabinet and countertop depth
- Plumbing supply and drain locations
- Electrical outlets, switches, and appliance connections
- Gas connection locations, if present
- Range-hood or exhaust-duct location
- Refrigerator, range, dishwasher, and microwave dimensions
- Door, drawer, and appliance-door swing space
Measure the actual appliance models you plan to use from their manufacturer specification sheets. A nominal appliance width does not always tell you the required installation opening, ventilation gap, handle projection, door clearance, or electrical connection space.
Identify Must-Have Features
With the footprint mapped, decide which improvements will affect daily use most. For one household, that may be drawer storage and better prep lighting. For another, it may be a dishwasher, a larger sink, better ventilation, or more counter space beside the range.
A small island can add storage and prep space, but only when the room has enough clearance around it. In many compact kitchens, a narrow movable cart, peninsula, or uninterrupted floor area works better than a fixed island.
Write must-haves and optional upgrades in separate columns. Test each choice against the available space, budget, and circulation before finalizing the plan.
Rank Layout Priorities
Different footprints favor different layouts:
- One-wall: useful where the kitchen must occupy the least floor area or share space with a living zone.
- Galley: efficient in narrow rooms because storage and work surfaces can run along opposing walls.
- L-shape: keeps two connected walls active while leaving the opposite side open.
- U-shape: offers substantial storage and counter area when enough room remains between opposing runs.
Do not select a layout only because it looks good in a photo. Check door openings, appliance doors, prep areas, traffic routes, seating, and the number of people who regularly cook.
Choose the Best Layout for a Small Kitchen
There is no single best layout for every small kitchen. The best plan is the one that provides enough work surface and storage while keeping normal traffic away from active cooking and cleanup areas.
The traditional sink-range-refrigerator work triangle is still a useful way to check travel distances, but it should not be the only test. The 2026 NKBA Kitchen & Bath Planning Guidelines update also emphasizes defined activity centers, work areas, accessibility, power planning, lighting, ventilation, and other building-system considerations.
For a modern kitchen, think in practical centers such as food storage, preparation, cooking, cleanup, and serving. Keep the items needed for each task close to that activity whenever possible.
Space-Saving Layouts
A galley kitchen can be extremely efficient when the room is long and narrow. An L-shape can open the kitchen toward an adjoining room. A U-shape creates more surrounding storage and counter space but requires enough center clearance to avoid feeling boxed in. A one-wall layout sacrifices some counter area but may provide the most open floor plan.
Open shelving can reduce the visual weight of upper cabinets, but it is not automatically the best storage solution. Closed cabinets usually hide more items and protect them from cooking dust and grease. Use open shelves selectively where the items are attractive, frequently used, and easy to clean.
Workflow and Traffic Flow
Walkways and work aisles are not the same thing. The publicly available NKBA kitchen planning guide recommends at least 36 inches for a walkway. For an active work aisle between counters, tall cabinets, or appliances, it recommends at least 42 inches for one cook and 48 inches for multiple cooks. Current local codes and the latest adopted standards should also be checked for the project.
| Layout | Main Strength | Often Suits |
|---|---|---|
| One-wall | Small footprint | Studios and open-plan rooms |
| L-shape | Open circulation | Corner kitchens and shared living spaces |
| Galley | Efficient parallel work surfaces | Long, narrow rooms |
| U-shape | High storage and counter capacity | Rooms with enough center aisle clearance |
| Peninsula | Extra prep or seating without a freestanding island | Layouts where one end can connect to cabinetry or a wall |
A 36-inch walkway and a kitchen work aisle serve different purposes. Where active cooking takes place between opposing surfaces, additional clearance can make the kitchen safer and easier to use.
Plan Small Kitchen Storage, Cabinets, and Appliances
Storage can determine whether a compact kitchen feels organized or constantly crowded. Use the full height of the room where practical, and concentrate everyday items near the tasks where they are used.
Tall cabinets can turn unused upper-wall space into storage for seasonal cookware and less frequently used items. Deep drawers make pots and pans easier to reach than low shelves, while narrow pull-outs can use small gaps for spices, oils, trays, or cleaning supplies.
- Ceiling-height cabinets where proportions and access make sense
- Deep drawers for cookware and dishes
- Pull-out pantry units in narrow spaces
- Corner organizers where ordinary shelves are hard to reach
- Tray dividers for baking sheets and cutting boards
- Drawer organizers for utensils and spices
- Under-sink organizers that leave plumbing accessible
Choose appliances before final cabinet drawings are approved. Confirm installation openings, required clearances, electrical or gas requirements, ventilation, water connections, and door swings. This is especially important for refrigerators beside walls, dishwashers near corners, built-in microwaves, and ranges next to cabinet ends.
A combination microwave and oven or a smaller appliance can sometimes free counter or cabinet space, but size alone does not determine efficiency. If energy use matters, compare independently certified products. ENERGY STAR provides certified-product information for electric cooking equipment and other kitchen appliances.
Note: Do not order cabinets from appliance width alone. Use the manufacturer’s installation document for the exact model, including cutout dimensions, ventilation gaps, electrical or gas locations, handle projection, and door-opening requirements.
Check Permits, Utilities, and Safety Before Demolition
Before removing cabinets or opening walls, determine which parts of the project require permits or inspections. Requirements vary by jurisdiction, so the local building department is the final authority.
The 2024 International Residential Code, which is a model code adopted or modified by many jurisdictions, distinguishes ordinary finish work from regulated alterations. Moving or replacing electrical, plumbing, gas, mechanical, or structural systems can require permits and inspections even when new cabinets and countertops alone would not.
Confirm these items before construction begins:
- Whether building, electrical, plumbing, mechanical, or gas permits apply
- Whether a wall is load-bearing before removing or altering it
- Available electrical capacity for the planned appliances
- Required range-hood or ventilation path
- Water-supply and drain locations
- Gas-piping requirements where gas appliances are used
- Inspection stages that must occur before walls are closed
Warning: In the United States, renovation work that disturbs painted surfaces in many homes built before 1978 can create hazardous lead dust. EPA’s Renovation, Repair and Painting rules apply to many paid contractors working in pre-1978 housing. Check EPA RRP requirements and use appropriate lead-safe practices before sanding, cutting, demolishing, or disturbing painted surfaces.
Build Your Small Kitchen Remodel Timeline
A realistic remodel timeline is based on dependencies rather than one universal number of weeks. A cosmetic refresh with existing utilities can move quickly, while custom cabinets, structural work, permit reviews, or relocated plumbing and electrical systems can extend the project substantially.
Break the schedule into phases:
- Planning: measure the room, define scope, create drawings, estimate costs, and verify local requirements.
- Selections and ordering: confirm cabinets, appliances, fixtures, flooring, lighting, and other critical products.
- Preconstruction: obtain required permits, confirm contractor scheduling, protect adjacent rooms, and plan temporary food preparation.
- Demolition and rough work: remove materials, complete framing changes, and rough in electrical, plumbing, gas, or ventilation systems.
- Required inspections: complete inspections before regulated work is concealed where applicable.
- Surfaces and cabinets: close walls, prepare floors, install cabinetry, and template countertops when the material requires field measurements.
- Finish installation: install countertops, backsplash, appliances, plumbing fixtures, lighting, hardware, trim, and paint.
- Final checks: complete inspections, test appliances and fixtures, adjust doors and drawers, and finish the punch list.
Do not demolish a functioning kitchen simply because the design is complete. Confirm the availability of critical cabinets, appliances, fixtures, and materials first. A delayed refrigerator may be inconvenient; delayed cabinets can stop countertops, plumbing fixtures, backsplash, and appliance installation at the same time.
If the kitchen will be unusable, create a temporary station elsewhere with a refrigerator, microwave or other permitted countertop appliance, drinking water, basic utensils, and a safe place to wash or store dishes.
Avoid Common Small Kitchen Remodel Mistakes
Small kitchens leave less room for planning errors. The most expensive mistakes often happen when attractive features are chosen before circulation, appliance dimensions, utilities, and installation requirements are confirmed.
- Forcing in an island: extra storage is not useful if it creates a narrow work aisle.
- Ignoring appliance doors: refrigerator, dishwasher, oven, and cabinet doors can collide in a compact plan.
- Moving utilities without pricing the work: relocating a sink, range, or major electrical connection can change the budget quickly.
- Ordering cabinets before appliances: final openings should reflect exact model specifications.
- Using too little task lighting: counters need usable light even when the room already has a central fixture.
- Choosing storage only by cabinet count: drawers, pull-outs, shelf spacing, and accessibility matter as much as total cabinet volume.
- Demolishing before critical products are secured: delays become much harder to manage once the kitchen is unusable.
- Ignoring ventilation: cooking moisture, smoke, grease, and odors need an appropriate strategy.
- Following trends at the expense of durability: frequently touched hardware, work surfaces, drawer slides, and hinges should tolerate everyday use.
Light finishes and open shelving can make a room look less visually heavy, but appearance should not override useful storage. Likewise, compact appliances can preserve space, but only if their capacity still fits the household’s needs.
In a small kitchen, every dimension has consequences: an extra-deep refrigerator, oversized handle, misplaced filler strip, or narrow aisle can affect several surrounding components.
Frequently Asked Questions
In What Order Should You Remodel a Kitchen?
Plan and measure first, finalize the design and product specifications, check permits, order critical materials, then begin demolition. Rough electrical, plumbing, gas, ventilation, and framing work comes before walls are closed. Cabinets normally precede countertop templating, followed by countertops, backsplash, fixtures, appliances, hardware, trim, and final inspections or adjustments.
What Are Common Mistakes to Avoid in a Small Kitchen?
Avoid oversized islands and appliances, narrow work aisles, poor task lighting, weak ventilation, inaccessible corner storage, and cabinet plans that ignore appliance-door clearance. Also avoid demolishing the existing kitchen before critical cabinets and appliances are confirmed.
What Is the Best Kitchen Layout for a Small Kitchen?
There is no universal best layout. Galley kitchens often work well in narrow rooms, L-shaped kitchens can keep a corner open, one-wall kitchens use very little floor area, and U-shaped kitchens provide more surrounding storage when adequate center clearance is available. Choose the configuration that best fits the room’s dimensions, doors, utilities, appliances, and cooking habits.
How Do You Plan a Kitchen Remodel Step by Step?
Define the scope and budget, measure the room, map utilities, compare layouts, select exact appliances, finalize cabinets and finishes, check permit and safety requirements, order long-lead products, schedule the work, complete rough construction and inspections, then install finishes and perform final checks.
Do You Need a Permit for a Small Kitchen Remodel?
It depends on the jurisdiction and scope. Replacing cabinets, countertops, paint, or similar finishes may not require a permit in many locations, while moving electrical wiring, plumbing, gas lines, mechanical systems, or structural components commonly triggers permit or inspection requirements. Check with the local building department before work begins.
How Wide Should a Small Kitchen Aisle Be?
NKBA’s publicly available planning guidance recommends at least 36 inches for a walkway. For a work aisle between opposing counters, cabinets, or appliances, it recommends at least 42 inches for one cook and 48 inches for multiple cooks. Local codes and accessibility needs can require different or additional clearances.
Conclusion
A small kitchen can work extremely well when the plan protects circulation, work surfaces, storage, and appliance clearances before decorative choices take over. Start with accurate measurements and a realistic scope, verify utilities and permits, choose appliances before final cabinet dimensions, and schedule the remodel around critical product availability. Thoughtful drawers, pull-outs, vertical storage, durable surfaces, and correctly sized work zones can make limited square footage easier to cook in and easier to maintain.
Sources
- National Kitchen & Bath Association — 2026 Kitchen & Bath Planning Guidelines update — current planning approach, activity centers, accessibility, building systems, lighting, power, and ventilation.
- National Kitchen & Bath Association — public Kitchen Planning Guidelines — walkway and work-aisle planning dimensions.
- International Code Council — 2024 International Residential Code, Chapter 1 — model-code permit and inspection framework for alterations and regulated building systems.
- U.S. Environmental Protection Agency — Renovation, Repair and Painting Program — lead-safe requirements for applicable renovation work in pre-1978 housing.
- ENERGY STAR — Electric Cooking Products — certified energy-efficient kitchen-appliance guidance.
- Journal of Light Construction — 2025 Cost vs. Value Report — national benchmark for the defined midrange minor kitchen remodel used for cost context.

1 thought on “How to Remodel a Small Kitchen: Step-by-Step Planning Guide”