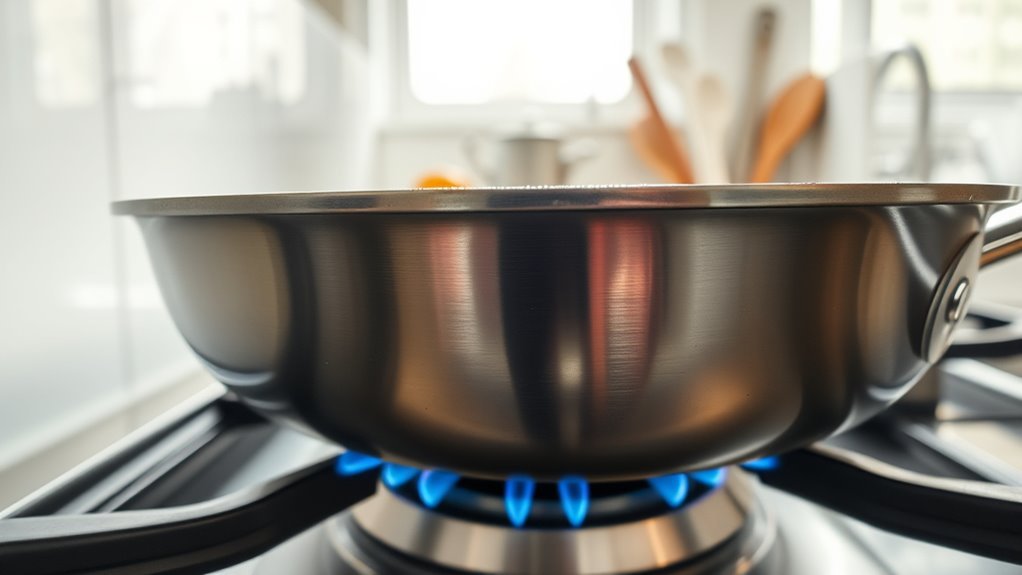
You’ll know your stainless steel pan is ready when it hits about 200°F and water droplets bead and skate across the surface; that simple test is far more reliable than guessing by time alone. Preheat on medium-high, match burner size to pan, and keep ingredients near room temperature to maintain heat for a proper sear. Learn the exact cues, temperatures for different proteins, and when to add oil so you avoid sticking and rescue a pan that’s gone cold—here’s how.
Do the Water Droplet Test (And Read the Results)
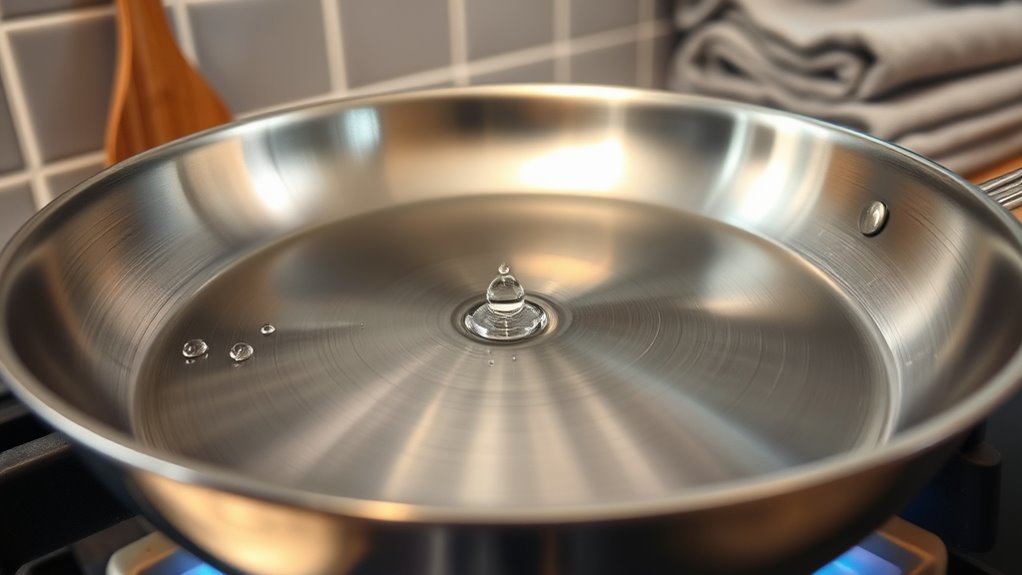
Wondering whether your stainless steel pan is ready? Use the water droplet test: heat the pan on medium-high heat and flick a few droplets onto the surface.
If a droplet evaporates immediately, the pan isn’t hot enough; keep heating. If droplets scatter violently, it’s overheated — reduce heat and let it cool slightly.
When droplets bead into tight balls and dance, you’ve reached the right temperature for cooking eggs and other delicate tasks. Add oil only then; it should shimmer and flow, showing proper oil behavior.
If oil moves slowly or looks thick, return to temperature control and heat a bit more to reach ideal cooking conditions.
Rely on consistent practice with this simple test to build your instinct so you won’t need to repeat it every time. This method gives you precise, evidence-based feedback and empowers you to control heat confidently in pursuit of culinary freedom.
Preheat Times by Pan Size & Stove Type
Consider your pan’s diameter first: smaller pans usually need about 2–3 minutes on medium, while larger pans take an extra minute or two to reach the target surface temperature.
Remember burner type matters—gas and induction heat faster and respond quicker than traditional electric coils—so adjust preheat time accordingly.
Aim for the water-droplet test result (~200°F) and always match burner size to pan bottom for even heating.
Pan Diameter Matters
Although burner output and cookware thickness matter, pan diameter is a primary determinant of preheat time: smaller stainless steel pans heat faster because they present less surface area to the flame or element, while larger pans take longer to reach the same temperature.
You should factor pan diameter into your timing: an 8-inch pan often hits ideal cooking temperature (~200°F) in about 1–2 minutes on medium heat, a 10-inch about 2–3 minutes, and a 12-inch roughly 3–4 minutes.
When heating pans, account for stove type and variations in stove performance; electric setups commonly run slower.
Monitor the pan visually and by the water-drop test to confirm the cooking surface is ready.
Adjust confidently for larger pans and reclaim control of your cooktop.
Burner Type Differences
Having matched burner size to pan diameter, you’ll also need to account for how different stove types affect preheat time and heat control.
For stainless steel pans, aim for roughly 2–3 minutes on medium as a baseline, but adjust: larger pans need more time.
Gas stoves give rapid pan heat and fast recovery after temperature drops, so you’ll regain control quickly.
Electric coils heat slower and cool slowly, risking uneven heating if you don’t allow extra preheating.
Induction cooktops deliver the fastest, most efficient preheating your pan will see via direct heat transfer, shortening wait times and improving even heating.
Use the water droplet test near 200°F for best results and trust sensory feedback to achieve liberation in the kitchen.
Preheat Time Estimates
For most stainless steel pans, expect about 2–3 minutes on medium heat as a baseline, but adjust for pan size and stove type: small skillets often reach working temperature in under 2 minutes, large pans can take up to 5 minutes.
Gas will heat fastest, induction is fastest and most uniform, and electric coils are slowest to both heat and cool. Preheat times depend on mass and heat source; place the pan over medium heat and time it.
You’ll know a properly preheated pan when water droplets bead and dance without evaporating immediately. Aim for about 200°F as a target proper temperature.
Add oil only to a hot, preheated pan; avoid unnecessary high heat unless recipe demands specific temperature ranges.
Spot the Cues: What “Hot Enough” Looks, Sounds, and Feels Like
Look for three reliable cues before you add food: water droplets should bead and skate across the surface (about 200°F). Oil should shimmer and flow smoothly, and you should hear a steady, clear sizzle when food hits the pan.
If droplets evaporate instantly, the pan’s too cold, while violent splatter or heavy smoke means it’s too hot—lower the heat.
Use these visual, tactile, and audible signals together to time searing and prevent sticking or burning.
Water Droplet Behavior
Wondering how to tell when your stainless pan’s ready? You can rely on water droplet behavior as a precise cue. Sprinkle a few droplets; at about 200°F they bead, dance, and glide — that Leidenfrost-like motion shows the pan reached ideal heat for cooking.
If a single droplet rolls freely, you’re at the threshold to add oil safely. Add oil only when droplets indicate readiness; then listen for a gentle sizzle as food hits the surface. A loud sputter means the pan is too hot and you should lower the heat immediately to avoid burning. No sound suggests the temperature’s too low.
Use these tactile, audible, and visual cues to seize control of your cooking and reclaim confidence at the stove.
Oil Movement And Shine
After you’ve used the droplet test to confirm the pan’s around 200°F, watch the oil’s movement and surface sheen to decide when to add food.
In stainless steel cookware, oil movement is a primary visual cue: properly heated oil glides and forms a thin, uniform shine that signals the right cooking temperature.
Swirl the pan; if oil flows smoothly and creates a shimmering film, you can add ingredients. If droplets remain thick and sluggish, heat the pan a bit longer to avoid sticking.
Use oils with a high smoke point for more margin; maintain smoke point awareness to prevent burning.
Pair this with the water droplet check and listen for a consistent sizzling sound when food hits the pan to confirm readiness.
Audible Sizzle And Smell
How will you know the pan’s truly ready? Listen for an audible sizzle the moment food touches the surface — that cue tells you it’s hot enough for searing proteins and advancing the cooking process.
Observe oil should glide across the pan; sluggish oil means more heat is needed. Flick water droplets: when they bead and dance, you’re near the ideal temperature (~200°F).
Trust the aroma of cooking: a deep, savory scent signals caramelization without burning. If smoke appears, the pan’s overheated — immediately reduces the heat to prevent temperature shock and ruined food.
These sensory checks free you from guesswork: rely on sizzle, oil movement, water droplets, and smell to time additions and control heat precisely.
Target Pan Temps for Steak, Fish, Poultry, and Veg
When should you heat your stainless steel pan to specific temperatures? Know the targets and resist the urge to guess: for ideal cooking of steak, bring the pan temperature to 375–450°F so you get a rapid sear and rich crust.
For cooking delicate fish, aim lower—325–375°F—to prevent sticking while preserving a tender texture.
Poultry (and pork) does best at 350–400°F for even cooking and juicy results.
Plant-based proteins and vegetables respond to a searing range of 350–425°F to brown without burning.
Use the water test: droplets that dance mean the surface is ready. Measure when you can, but this tactile check complements a thermometer or experience.
Heat gradually, then stabilize the temperature before you proceed.
These ranges free you from overcooking and let technique, not fear, guide the outcome—liberating you to trust heat, timing, and practice for consistent results.
When to Add Oil & Food to Prevent Sticking
If you want food to release cleanly, first heat your stainless steel pan on medium for 2–3 minutes until it reaches about 200°F and passes the water-droplet test; only then add the oil so it heats and bonds with the metal, creating that temporary non-stick surface.
Heat your pan on moderate heat—this prevents scorching and lets oil reach its working temperature. Use a high-smoke-point oil and wait until it shimmers before you add food.
Keep ingredients at room temperature; cold food will drop the pan’s temperature and increase sticking.
Don’t overcrowd the pan—leave space so each piece sears evenly and the pan recovers heat between additions. For delicate proteins, let them form a crust before moving them; they’ll release naturally when properly seared.
These steps liberate you from constant flipping and scrubbing: preheat, perform the water test, add oil, then introduce room-temperature ingredients on moderate heat to reliably prevent sticking and produce clean releases.
Recovering Heat and Quick Troubleshooting
As soon as your pan’s temperature drops, work to recover heat by keeping the burner at medium-high rather than blasting it to max—this steadier setting restores even heat without warping the stainless steel. When recovering heat after adding cold ingredients, add oil and food promptly to raise pan temperature and prevent sticking. Use the water test before each addition; dancing droplets signal readiness. Monitor the pan: if food clings, temperature likely fell too low for searing.
| Issue | Quick Action | Goal |
|---|---|---|
| Cold ingredients cool pan | Add oil and food, wait | Recovering heat |
| Food sticking early | Hold off, watch crust | Golden crust forms |
| Overheated pan | Reduce to medium-high | Avoid warping |
Troubleshoot by observing reactions rather than pan-worrying: patience with sticking is tactical—food will release once a proper crust forms. Rely on measured high temperatures, the water test, and active monitoring to liberate consistent, nonstick results.
Frequently Asked Questions
Can a Stainless Steel Pan Go in a 400 Degree Oven?
Yes — you can usually put a stainless steel pan in a 400°F oven if its pan materials (no plastic handles) allow it.
You’ll get reliable heat distribution and good heat retention, improving performance comparison with thinner pans.
Use oven temperature monitoring, adapt recipes for roasting or braising, and watch food reactions like sticking or browning.
Follow safety tips, avoid thermal shock, and clean per oven cleaning guidance to preserve cookware life.
My Stainless Steel Pan Gets Too Hot. What Should I Do?
Turn the heat down immediately and rescue your meal before the pan becomes a volcanic inferno.
You’ll manage pan temperature by using heat control, removing the pan briefly to cool, and testing with water droplets.
Adjust oil selection and add a thin layer to prevent food sticking; improve heat distribution with a diffuser.
Maintain pan seasoning, follow safety tips, and tweak cooking techniques and cooking time to preserve flavor and pan maintenance.
How Long Should I Let My Stainless Steel Pan Heat Up?
You should preheat your stainless steel pan about 2–3 minutes on medium.
Use pan heating techniques like gradual stovetop settings and heat distribution methods to reach ideal cooking temperatures.
Test with temperature testing methods (water bead test) and watch oil shimmering; that plus oil selection tips prevents food sticking.
Follow pan seasoning advice, safety precautions, and adjust preheating times if ingredients are cold.
These steps free you to cook confidently and avoid sticking.
What Are the Downsides of Using Stainless Steel Pans?
You’ll sometimes feel betrayed by stainless steel pans: they’ll cling to food like a jealous lover. You’ll face food sticking, maintenance issues and trickier cleaning; heat retention isn’t as good as cast iron, affecting cooking performance.
They score high on stainless steel durability and scratch resistance, resist color fading, and sit mid in price range, but have weight comparison drawbacks and versatility limitations for delicate, low-fat cooking.
Conclusion
You’ll know your stainless steel pan is ready when water beads and skates—about 200°F—so you can get a crisp, even sear instead of steam and sticking. Preheat to match burner size, use room‑temperature ingredients, and add oil just before food to form a protective film. If droplets sputter or evaporate, the pan’s too cold; if smoke rises, it’s too hot. Control heat, recover briefly after crowding, and troubleshoot quickly to preserve texture and flavor.