
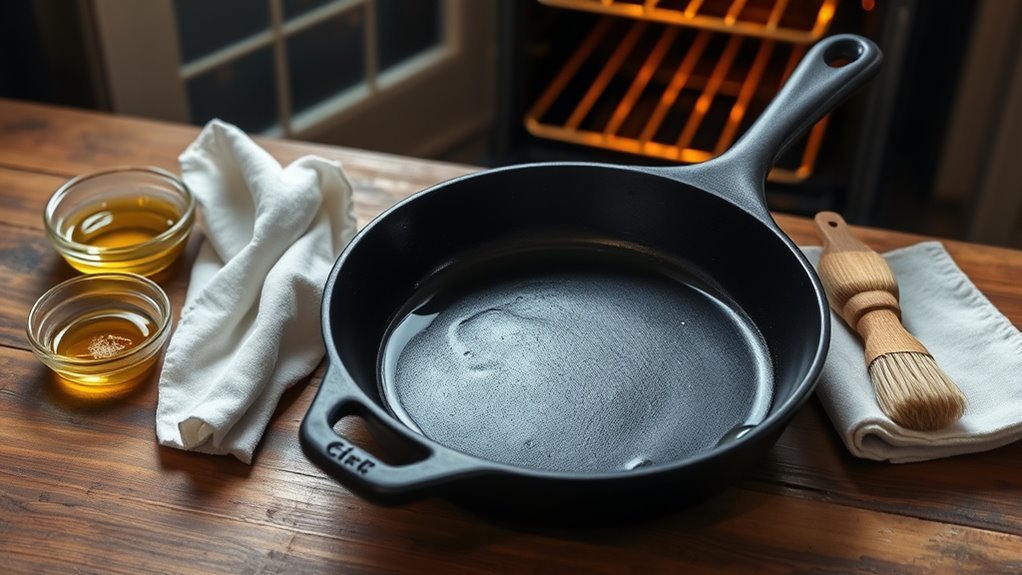
If you’ve got an old cast iron skillet, seasoning it properly can transform its performance in the kitchen. You’ll want to start by cleaning it thoroughly to remove any rust and old seasoning. After that, applying the right oil is essential for creating a nonstick surface. But there’s more to the process than just oil and heat. Understanding each step guarantees your skillet lasts for generations. Let’s explore how to achieve that perfect seasoning.
Why Seasoning Your Cast Iron Skillet Is Essential

Seasoning your cast iron skillet isn’t just a nice-to-have; it’s vital for maintaining its functionality and longevity. This process creates a protective coating that prevents rust and enhances durability, thanks to the bonding of oil to the metal through polymerization.
A well-seasoned skillet develops a natural nonstick surface, making it easier to cook sticky foods while improving your overall cooking experience.
Regularly seasoning your skillet not only maintains its performance but also builds up layers that enhance its effectiveness over time. Without proper seasoning, your cast iron skillet can become prone to rust and food sticking, which complicates cleaning and usage.
Plus, seasoning adds trace amounts of iron to your meals, which can be beneficial, especially for those with iron deficiencies. Embracing the seasoning ritual liberates you from culinary frustrations and guarantees your skillet remains a reliable kitchen ally.
Essential Tools and Ingredients for Seasoning Your Skillet
To effectively season your cast iron skillet, you’ll need a few key tools and ingredients.
Start by gathering high smoke point oils like vegetable or flaxseed oil, as they’ll create that sought-after non-stick surface.
Don’t forget cleaning supplies, such as steel wool and warm soapy water, to prepare the skillet for the seasoning process.
Essential Oils for Seasoning
When it comes to seasoning your cast iron skillet, selecting the right oils is essential for achieving a durable, nonstick surface.
Opt for oils with high smoke points that can polymerize effectively. Here are three top choices:
- Vegetable Oil: Versatile and cost-effective, it creates a strong bond.
- Canola Oil: Another excellent choice, it offers a high smoke point and a neutral flavor.
- Flaxseed Oil: Known for forming a hard, durable layer, it’s perfect for a long-lasting finish.
Remember to apply a thin layer of your chosen oil, buffing it to avoid pooling.
Regularly re-season your skillet every few months to maintain that beautiful surface.
Avoid oils like olive oil, as they can lead to stickiness rather than protection.
Recommended Cleaning Supplies
Before you start seasoning your cast iron skillet, gathering the right cleaning supplies is essential for ensuring a smooth process.
First, grab a stiff brush or a non-metal scrubber to remove any rust or debris, creating a clean surface for seasoning.
For your initial wash, a mixture of warm, soapy water works well; just remember to use minimal soap in future cleanings to preserve your skillet’s seasoning.
You’ll also need paper towels or lint-free cloths to dry the skillet thoroughly, preventing moisture-related rust.
Finally, consider placing aluminum foil on the bottom rack of your oven to catch any oil drips during the seasoning process.
With these supplies, you’re well-prepared to rejuvenate your cast iron skillet!
Necessary Cooking Utensils
Gathering the right cooking utensils is essential for successfully seasoning your cast iron skillet. Having the proper tools guarantees you effectively prepare your skillet for a long-lasting non-stick surface.
Here are three must-have items:
- Stiff Brush or Scrubber: Use this to remove old seasoning and rust, prepping your skillet for a fresh start.
- Lint-Free Cloth or Paper Towel: This is perfect for applying a thin, even layer of cooking oil across the skillet’s surface, including the handle.
- High Smoke Point Cooking Oil: Choose oils like vegetable, canola, or flaxseed oil for effective seasoning.
Don’t forget to place aluminum foil on the bottom rack to catch any drips while seasoning your cast iron skillets!
Step 1: Clean Your Skillet Thoroughly
To kick off the cleaning process, gather your essential supplies, including warm, soapy water and a stiff brush or steel wool.
Focus on removing rust and old seasoning to reveal bare metal, which helps the oil bond effectively during seasoning.
After scrubbing, rinse thoroughly and dry your skillet completely to guarantee a solid foundation for your new seasoning layer.
Essential Cleaning Supplies
Cleaning your cast iron skillet is essential for a successful seasoning process. To tackle this task effectively, gather these essential cleaning supplies:
- Warm, soapy water – This helps break down old seasoning and food residue.
- Scrub brush or steel wool – Choose non-abrasive options to scrub the pan without scratching the surface.
- Lint-free cloth or paper towels – These are vital for drying completely, preventing any moisture that can cause rust.
Once you’ve scrubbed the pan thoroughly, rinse it with hot water to remove all soap.
After rinsing, dry completely using your cloth or paper towels. For extra assurance, you can place the skillet on a stovetop flame for a few minutes to eliminate any lingering moisture before proceeding to oil it.
Removing Rust Effectively
Scrub away rust from your skillet with a mixture of warm, soapy water and a stiff brush or steel wool. Focus on the rusted areas, removing loose rust and debris effectively.
For stubborn spots, soak the skillet in equal parts vinegar and water for up to an hour, then scrub again to lift the rust. Rinse thoroughly with hot water to eliminate any soap or vinegar residue, ensuring a clean surface for seasoning.
Dry your skillet immediately with a lint-free cloth or paper towel. To eliminate any remaining moisture, consider using a stovetop flame.
Finally, apply a thin layer of cooking oil to the entire skillet, including the handle, preparing it for the next step in the seasoning process.
Drying Techniques For Longevity
While it might seem tempting to skip the drying process, ensuring your cast iron skillet is completely dry is essential for its longevity. Moisture buildup can lead to rust, and you want to avoid that at all costs.
Here are some effective drying techniques:
- Wipe Down: Use a lint-free cloth or paper towel to wipe the skillet thoroughly after washing.
- Heat It Up: Place the skillet on the stovetop over low heat for a few minutes to eliminate any remaining moisture.
- Store Wisely: Keep your skillet in a dry place and consider adding a paper towel inside to absorb any residual moisture.
Following these steps will help you prevent rust and maintain your skillet for years to come.
Step 2: Applying Oil for Effective Seasoning
To effectively season your old cast iron skillet, start by choosing a high smoke point oil like vegetable, canola, or flaxseed oil. These oils bond well during the heating process, ensuring a strong seasoning layer.
Next, apply a thin, even layer of oil inside and out, including the handle. This prevents pooling and guarantees a smooth finish. Remember, a little goes a long way; even half a teaspoon for a 12-inch skillet is sufficient.
After applying the oil, buff the skillet with a lint-free cloth or paper towel until it looks non-greasy. This step is essential as it helps create a durable nonstick surface. Avoid excess oil, as it can lead to a sticky residue.
Finally, make sure to reapply and buff out any remaining oil before proceeding to heat your skillet, ensuring ideal bonding for your seasoning process.
Step 3: Baking Your Skillet for Optimal Bonding
Baking your skillet is essential for achieving a strong, durable seasoning layer. This process allows the oil to bond with the cast iron, creating a non-stick surface. Here’s how to do it:
- Preheat your oven to a high temperature between 450°F to 500°F (230°C to 260°C).
- Place a sheet of aluminum foil on the bottom rack to catch any excess oil drips.
- Position the oiled skillet upside down on the middle rack for even heat distribution.
Bake the skillet for one hour. This duration allows the oil to polymerize, ensuring a robust coating.
Once the hour’s up, turn off the oven but leave the skillet inside to cool. This cooling period helps solidify the bond between the oil and the cast iron pan.
Step 4: Repeat the Seasoning Process for a Durable Finish
As you aim for a durable finish, repeating the seasoning process is essential for enhancing your cast iron skillet’s performance. You should repeat the seasoning 3 to 4 times, allowing robust layers of polymerized oil to bond effectively to the surface. After each session, let the skillet cool before applying a thin layer of oil to prevent sticky residue.
Consistently heat the oiled pan upside down in the oven at 450°F (230°C) for 30 minutes. This method promotes polymerization, creating a solid nonstick surface. Each additional layer you apply enhances durability and resistance to rust.
Here’s a quick reference to guide you through the process:
| Step | Action | Goal |
|---|---|---|
| Apply Oil | Thin layer after cooling | Avoid sticky residue |
| Heat Skillet | Upside down at 450°F for 30 minutes | Solid nonstick surface |
| Repeat | 3 to 4 times | Achieve durable finish |
How to Maintain Your Seasoned Cast Iron Skillet
Maintaining your seasoned cast iron skillet is essential for guaranteeing its longevity and performance. By following these simple steps, you can keep your skillet in top shape:
Maintaining your seasoned cast iron skillet is vital for its longevity and performance. Follow these tips to keep it in excellent condition.
- Clean without Soap: Use hot water and a stiff brush to clean. This preserves the layer of seasoning.
- Dry Immediately: After washing, dry your skillet completely over low heat to prevent rust.
- Reapply Oil: After each use, apply a thin layer of cooking oil. This maintains your seasoned cast iron skillet’s nonstick surface and protects against moisture.
Regular cooking with fats like oils or butter enhances the seasoning, building a robust nonstick layer over time.
Store your skillet in a dry place, possibly with a paper towel inside to absorb any residual moisture.
What Oil Should You Use for Seasoning?
Choosing the right oil for seasoning your cast iron skillet is essential, since it directly affects the skillet’s non-stick surface and longevity. Opt for oils with a high smoke point, like vegetable oil, canola oil, or flaxseed oil. These oils create a durable, non-stick surface when heated properly.
Avoid oils with low smoke points, such as olive oil and butter, as they can burn and leave a sticky residue, hindering your seasoning efforts.
For best results, apply a thin layer of oil—too much can pool and result in uneven seasoning. Flaxseed oil is particularly recommended for its polymerization properties, forming a hard, effective layer at high temperatures.
After applying, buff off the excess oil and heat the skillet upside down in the oven to guarantee even seasoning. This careful selection and application of oil will enhance your skillet’s performance and lifespan.
Frequently Asked Questions
What Ruins Cast Iron Seasoning?
Excessive soap use, cooking acidic foods, and improper cleaning can ruin your cast iron seasoning.
To prevent rust, focus on effective cleaning techniques that remove food residue without stripping oils. Heat management is essential; avoid high temperatures without enough oil to prevent burning off the seasoning.
Regularly reapply oil after cleaning to maintain that nonstick surface. By staying mindful of these factors, you’ll keep your skillet in excellent condition for years to come.
How Do I Tell if My Cast Iron Is Seasoned Well?
To tell if your cast iron’s seasoned well, look for smooth, shiny, dark surfaces free from rust or stickiness. If food releases easily, that’s a good sign of effective seasoning.
Check for consistent color; uneven patches may need restoration techniques. If it smokes excessively during cooking, the seasoning might be too thick.
Regular use with fatty foods is key—follow these maintenance tips to reinforce and enhance your skillet’s nonstick properties.
What Are Some Common Mistakes When Seasoning Cast Iron?
When seasoning cast iron, you might make common seasoning errors that compromise your skillet’s performance.
Using improper oil application, like slathering on too much oil, creates a sticky surface. Also, excessive heat use without preheating your oven can lead to uneven seasoning.
Don’t forget to clean your skillet thoroughly beforehand. Finally, guarantee good ventilation to avoid excessive smoke.
Regular touch-ups are essential to maintain that perfect nonstick finish!
Do You Oil Cast Iron After Seasoning?
You’ve got to treat your cast iron like a prized possession; a little oil goes a long way.
Yes, you should oil your skillet after seasoning. Use high smoke point oils, like vegetable or canola, and remember to wipe off the excess.
Frequent seasoning and light oiling after each use protects against rust and enhances nonstick properties.
This cast iron maintenance guarantees your skillet remains a culinary companion for years to come.
Conclusion
You’ve successfully transformed your old cast iron skillet from a rusty relic into a culinary gem. Now, every time you flip pancakes or sear steak, you can feel like a gourmet chef—after all, who needs non-stick pans when you’ve got a seasoned skillet that could probably survive a zombie apocalypse? Just remember, treat it right and avoid soap like it’s the plague. Your skillet will reward you with nonstick perfection and possibly even a touch of culinary magic!