
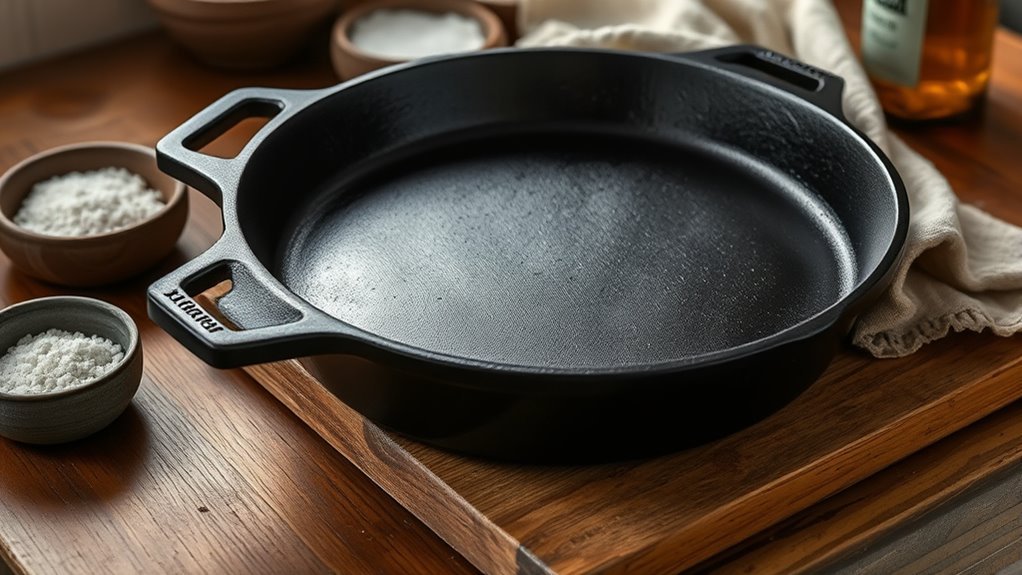
You’ll want to know seasoning because it’s the simple oil‑plus‑heat process that builds a hard, food‑friendly coating on cast iron. It creates a near non‑stick surface, stops rust, and lengthens the pan’s life when you care for it right. This isn’t magic—just chemistry and routine—and knowing when and how to re‑season can save you time and improve results in the kitchen.
Quick Answer: How to Re‑Season Cast Iron Fast
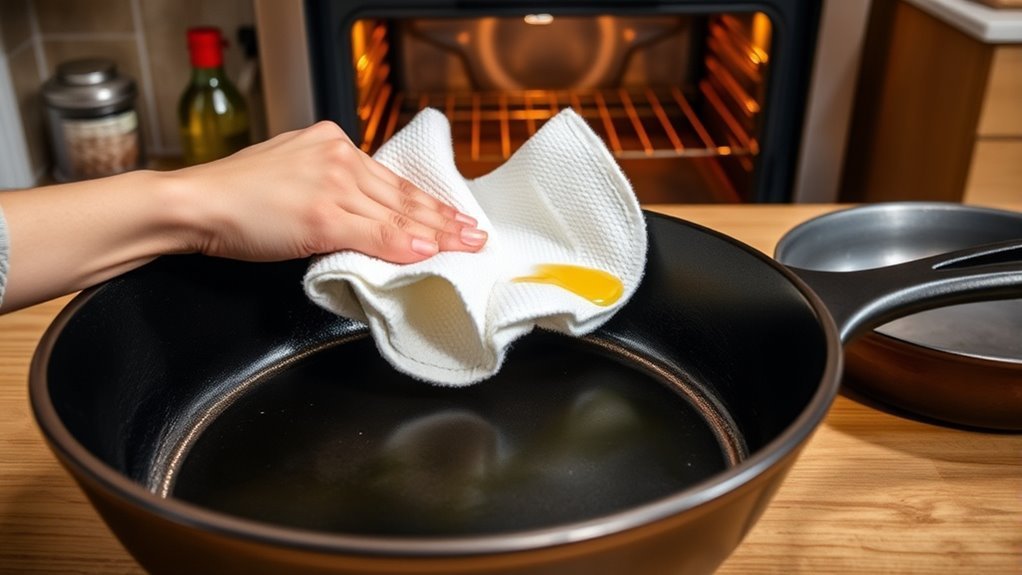
Want a fast, reliable way to re‑season cast iron? Start by stripping old buildup if needed: scrub with a mild abrasive or use oven cleaner so the surface’s ready to accept oil.
Wipe the pan dry, then apply a thin, even coat of vegetable or flaxseed oil over the cooking surface, sides, and handle—every part needs protection.
Preheat your oven to about 450°F (232°C). Place the oiled pan upside down on the top rack and put foil on the bottom rack to catch drips.
Preheat oven to 450°F (232°C), place the oiled skillet upside down on the top rack, foil beneath to catch drips
Bake for roughly one hour so the oil can polymerize into a durable layer; that chemical change is what builds a dependable non‑stick surface.
Turn the oven off and let the pan cool inside to avoid thermal shock.
After re‑seasoning, maintain your work: oil lightly after use and skip harsh soaps to extend the finish.
This routine frees you from frequent re‑seasoning and keeps your skillet ready for any kitchen task.
What Seasoning on Cast Iron Is
Seasoning on cast iron is a thin, durable layer of polymerized oil that you build up on the metal to create a non‑stick, rust‑resistant surface. You rely on seasoning to make the pan cook better and last longer; it develops through repeated use and mindful care. Proper seasoning reduces the need for excess fat and protects against corrosion, but it can be damaged by harsh cleaning. You preserve seasoning by drying thoroughly and applying a light coat of oil after washing, ensuring steady performance and liberation from disposable cookware.
| Benefit | Risk if Neglected | Maintenance |
|---|---|---|
| Improved non‑stick | Rust development | Dry after wash |
| Easier cooking | Food adhesion | Light oiling |
| Longer lifespan | Layer stripping | Use gentle cleaning |
| Reduced waste | Frequent reseasoning | Regular use |
Respect the layer, maintain it, and you’ll free yourself from replacing pans while enjoying better cooking results.
How Seasoning Forms (Simple Oil + Heat Chemistry)
When you heat a thin coat of oil on cast iron, the fats undergo chemical changes—breaking down and recombining into long chains that crosslink into a hard, plastic‑like film that bonds to the metal. You control this polymerization by applying a very thin, even coat of oil and exposing the pan to sustained high heat so the molecules oxidize and fuse to the iron surface.
Different oils behave differently because of smoke points and fatty‑acid composition; choose one with a suitable smoke point for consistent crosslinking.
- Use a thin layer of oil; excess pools and won’t polymerize evenly.
- Heat steadily above the oil’s smoke point to drive polymerization.
- Repeat cycles to build durable, bonded layers.
- Higher smoke‑point oils often give more predictable results.
- Allow full cooling to let the film harden and adhere.
This simple oil+heat chemistry gives you agency: deliberate steps make a resilient, bonded seasoning layer.
Why Seasoning Matters: Non-Stick, Rust Prevention, Longevity
Because a properly bonded seasoning turns oil into a tough, baked-on film, your cast iron becomes naturally non-stick, resists moisture, and can last decades with routine care.
You’ll notice food releases easier and cleanup takes less time because seasoning fills microscopic pores and builds a slick surface that improves with use. That same film blocks water and oxygen from the iron, cutting the chemical pathways that cause rust; a maintained layer is your first line of defense.
To protect that investment and preserve longevity, adopt simple habits: wipe and lightly oil the pan after drying, cook with fats that reinforce the patina, and avoid prolonged soaking.
These practical steps minimize the need for intensive re-seasoning and let the pan’s appearance deepen into a rich, dark patina that signals health and performance.
Treat seasoning as empowerment—you’re not just maintaining cookware, you’re owning a tool that can serve generations.
How to Tell If Your Pan Needs Re‑Seasoning
How do you know it’s time to re‑season your cast iron? You check it like you check any tool you rely on: look, test, and act. Signs that demand re‑seasoning are straightforward and freeing — you don’t have to guess.
- Visible rust or odd discoloration on the surface.
- Food starts sticking during cooking, despite proper heat.
- Bare or dull patches where the seasoning is missing.
- You’ve been washing often without oiling afterward.
- Heavy, frequent use shortens the interval between re‑seasoning.
Inspect the pan after cooling; run your fingers (carefully) to feel for rough spots.
If any bullet-point sign shows up, re‑seasoning will restore the protective, nonstick layer and prevent further corrosion.
Remember: well-maintained pans can go years without a full re‑seasoning, but regular checks empower you to act before damage spreads.
Re‑seasoning is a simple, evidence-based step that keeps your pan reliable and your cooking liberated.
Daily Care to Protect Your Seasoning
If you want your cast iron to stay reliable, wash and dry it promptly after use, then rub on a thin layer of oil while it’s still warm. You’ll prevent moisture buildup that causes rust and weakens the seasoning.
Use gentle cleaning — hot water, a soft brush or non‑abrasive scrub pad — so you don’t strip the polymerized surface. Dry thoroughly; any lingering dampness defeats your work.
Clean with hot water and a gentle brush or non‑abrasive pad; dry completely so seasoning stays intact.
Apply a thin coat of oil (a teaspoon spread evenly) to the warm pan and wipe off excess so it’s barely noticeable. Regular cooking also reinforces the seasoning naturally, so use the pan often rather than storing it idle.
Check the surface for dull or bare spots after each meal; if you spot them, address them promptly before rust sets in. These simple, disciplined steps let your pan serve you reliably and free you from constant re‑seasoning chores.
Full Step‑By‑Step Re‑Seasoning Method
When your pan’s seasoning is flaking, dull, or rusty, strip it back and rebuild a fresh polymerized coating so it performs like new. You’ll reclaim control over your cookware by removing old layers and rebuilding a durable surface that resists rust and carbon buildup.
- Strip all existing seasoning with a strong cleaner or abrasive until you see bare metal.
- Wash thoroughly and dry immediately to eliminate moisture; water invites rust.
- Apply a thin, even coat of high‑smoke point oil (flaxseed or vegetable); wipe off excess to avoid stickiness.
- Place the pan upside down in a 450–500°F oven for about an hour to polymerize the oil into a hard layer.
- Let the pan cool inside the oven, then repeat oiling and heating cycles until the seasoning is strong and even.
This method is evidence‑based, practical, and liberating: it transforms neglected cast iron into a reliable, carbon‑resistant tool you can trust.
Troubleshooting Common Seasoning Problems
After you’ve stripped and rebuilt a seasoning, or even if you’ve only been maintaining the pan, you’ll sometimes run into problems like uneven coating, rust, flaking, or localized stickiness. You can diagnose and fix these issues efficiently so your pan serves you, not the other way around. Uneven seasoning usually comes from too-thick or patchy oil—clean the surface, apply a thin even layer, and bake. Rust means water stayed: scrub to bare metal, dry thoroughly, and re-season immediately. Flaking indicates polymerized layers failed from high heat or wrong oil—strip to sound metal and re-season with a stable oil. Local stickiness signals thin or missing seasoning in hot spots; add thin layers and cure between each.
| Problem | Quick Fix |
|---|---|
| Uneven coating | Thin, even oil; bake |
| Rust | Remove rust; dry; re-season |
| Flaking | Strip; rebuild seasoning |
| Sticky spots | Spot-clean; add thin layers |
How Often to Re‑Season: Real‑World Schedules and Factors
Anyone who’s cooked regularly with cast iron learns that re-seasoning isn’t on a fixed schedule but depends on use and care: heavy daily frying will keep the surface well-maintained and may mean you only need intensive re-seasoning every few years, while infrequent use, abrasive scrubbing, or rust will push you toward more frequent rebuilding.
You gauge need by inspecting the surface: shiny, smooth black means you’re fine; dull, sticky, or patchy areas signal action.
- Re-seasoning once every 10–15 years suits some users who cook often and avoid harsh scrubs.
- Re-seasoning every 1–3 years fits moderate users or those who occasionally strip and rebuild.
- Immediate re-seasoning is required after removing rust or using aggressive abrasives.
- Light maintenance coats (thin oil after cooking) reduce how often full re-seasoning is needed.
- Check before each heavy use; missing spots or flaking tell you to restore the seasoning.
Be practical: freedom comes from reliable habits, not constant overhauls.
Frequently Asked Questions
Is It Okay to Use Cast Iron Without Seasoning?
No — you shouldn’t regularly use cast iron without seasoning. Unseasoned pans cause food sticking, uneven cooking, metallic taste, and rust; they also risk iron leaching.
Seasoning gives Usage Benefits: a durable, nonstick surface that tolerates high heat and acidic foods.
You’ll get better performance and longevity by maintaining seasoning; it’s practical, evidence-based care that frees you from constant frustration and preserves your cookware’s usefulness.
How Often Should You Season Your Cast Iron?
About once every 1–15 years, depending on use: a survey-like stat shows some cooks only re-season every 15 years while others do it every couple of years.
Your Seasoning Frequency depends on cooking regularity, rust, and missing spots. If you cook often and oil after washing, you’ll need less re-seasoning; if rust appears or seasoning flakes, strip and rebuild.
You’re empowered to choose a routine that frees you.
Should I Season Cast Iron at 350 or 450?
Season at 450°F for a stronger, more durable finish; 350°F is gentler but less robust.
Use this Temperature Guide: pick 450°F if your oil’s smoke point’s high and you want long-lasting polymerization, but choose 350°F if you’re protecting a delicate surface or avoiding heavy smoke.
Clean and dry the pan first, ventilate well, and trust the process—you’ll free yourself from sticky pans and gain a resilient, nonstick tool.
What Ruins Cast Iron Seasoning?
Harsh scrubbing, acidic meals, soaking, high heat without oil, and scratching from poor storage ruin cast iron seasoning.
You’ll strip polymerized oil layers when you scrub with steel wool or use strong detergents. Cooking tomatoes often, leaving pans wet, or overheating without fat breaks down Seasoning Techniques you used.
Protect your freedom to cook by using gentle cleaning, drying and oiling, avoiding long soaks, and storing with protective layers to preserve seasoning.
Conclusion
You’ve learned that seasoning is a thin, polymerized oil layer that makes cast iron non-stick, rust-resistant, and long-lasting. Re‑seasoning is simple: clean, dry, oil, and heat. For example, a home cook I know revived a neglected skillet by scrubbing rust, coating it with flaxseed oil, and baking at 450°F—after three cycles it performed like new. Keep up daily care (warm water, quick dry, light oil) and re‑season only when wear shows.