
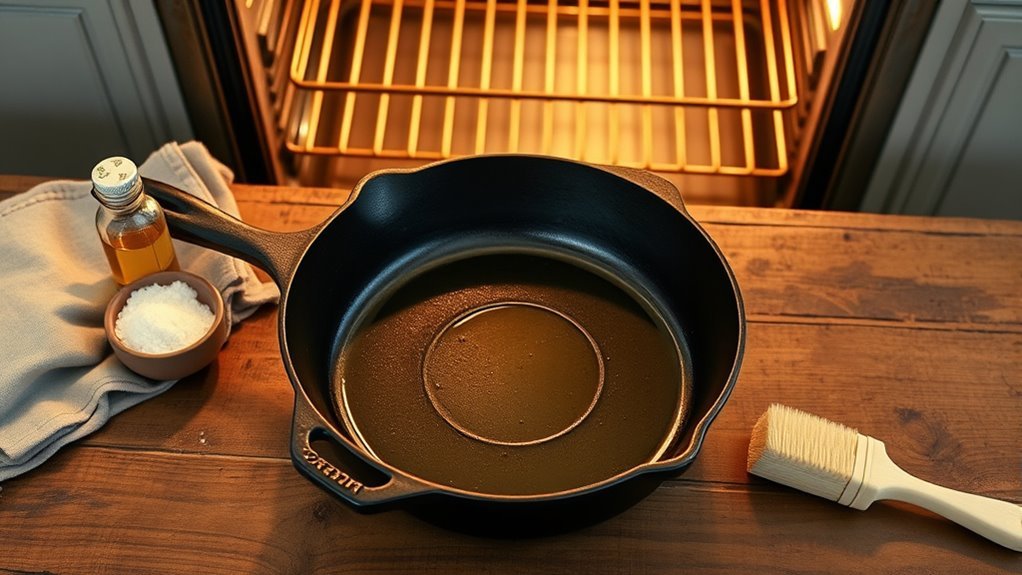
Picture your Lodge cast iron pan gleaming with a rich, dark finish, ready to sear meats and bake cornbread. Seasoning it properly is essential for creating that non-stick surface and preventing rust. You’ll want to prepare your pan carefully and use the right oil for the job. As you follow these steps, you’ll guarantee your pan not only lasts but also enhances your cooking. Let’s explore the process that transforms your pan into a kitchen essential.
Why Seasoning Matters for Your Cast Iron Pan
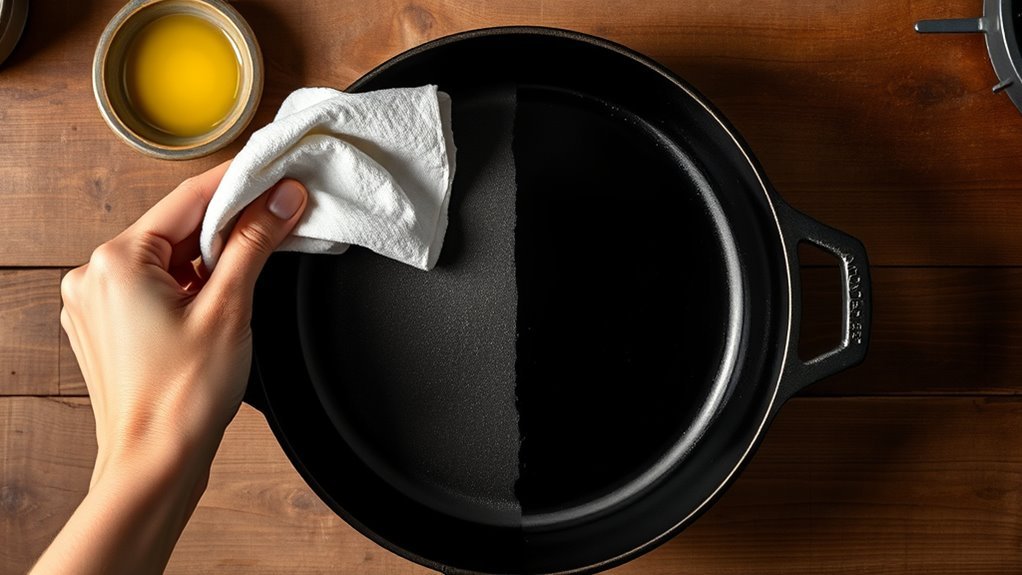
Seasoning your cast iron pan is like giving it a protective armor, essential for its longevity and performance. This process creates a robust protective layer of polymerized oil that prevents rust and enhances your pan’s nonstick properties.
When you heat thin layers of fat, they bond to the metal and each other, forming a durable cooking surface that improves with each use. A well-maintained seasoning layer allows you to cook acidic foods without damaging your pan, unlike poorly seasoned cookware that can degrade quickly.
Regular maintenance of this seasoning isn’t just a task; it’s a commitment to preserving a kitchen ally that can last generations. Embracing this ritual means liberating yourself from flimsy alternatives, ensuring your cast iron remains a reliable companion for all your culinary adventures.
Step 1: Preparing Your Lodge Cast Iron Pan
With your cast iron pan’s seasoning in mind, it’s time to prepare your Lodge cast iron pan for its first seasoning. Start by washing your pan with warm, soapy water to eliminate any factory residues or dust that might interfere with the seasoning process.
Once clean, dry the pan thoroughly with a paper towel or lint-free cloth—removing all moisture is essential for effective seasoning.
Now, it’s time to apply a thin layer of high smoke point oil, like vegetable or canola, both inside and out. Make sure it’s even and not overly greasy to prevent pooling during the seasoning process.
Preheat your oven to 450°F (230°C) and place the oiled pan upside down on the top rack, using a baking sheet below to catch any drips.
To build a solid initial layer of seasoning, repeat this oiling and heating process 3 to 4 times, ensuring a durable, nonstick surface.
Step 2: Applying Oil for Optimal Seasoning
To achieve a beautifully seasoned cast iron pan, you need to apply oil correctly. Start by choosing a high smoke point cooking oil, like vegetable, canola, or corn oil, for effective seasoning.
Achieve a perfectly seasoned cast iron pan by using a high smoke point oil and applying it evenly.
Here’s how you can master this step:
- Coat the inside and outside of the pan evenly, including the handle.
- Use a thin layer of oil; excess can lead to flaking.
- Buff the surface until it looks non-greasy, avoiding pools of oil.
- Focus on creating a thorough protective layer for durability.
- Regularly reapply oil after each use to maintain the seasoning and prevent rust.
This careful application is essential in the seasoning process, ensuring your cast iron pan develops a strong, nonstick layer of seasoning.
Embrace this ritual, and your pan will reward you with delicious meals for years to come!
Step 3: Baking Your Pan for Perfect Seasoning
Now that your pan is oiled, it’s time to bake it for that perfect seasoning.
Preheat your oven to 450°F (230°C) to guarantee the oil bonds effectively with the metal, creating a durable surface.
Baking for 30 minutes not only solidifies the seasoning but also enhances the nonstick properties you’ll love.
Optimal Baking Temperature
When you’re ready to bake your cast iron pan for seasoning, setting the ideal temperature is essential for achieving that durable nonstick surface. The best baking temperature ranges from 450°F to 500°F, where effective polymerization of the oil occurs.
Here’s what you need to keep in mind:
- Place your pan upside down on the top rack to avoid oil pooling.
- Use aluminum foil on the bottom rack to catch any drips.
- Bake for a duration of one hour to bond the oil with the metal.
- Guarantee proper ventilation to manage any potential smoke.
- Don’t rush; this heat is key to creating that beautifully seasoned cast iron you’ll love cooking with!
Time for Best Results
Baking your cast iron pan at the right temperature for the right duration is essential for achieving a flawless seasoning. Preheat your oven to between 450°F and 500°F; this high heat guarantees effective polymerization of the oil.
After applying a light coat of seasoning spray, place your Lodge cast iron pan upside down on the top rack. This prevents excess oil from pooling inside. Don’t forget to put a baking sheet on the bottom rack to catch any drips.
Bake for one hour to let the layer of oil bond to your cooking surface, creating a durable seasoning. Once done, turn off the oven and let the pan cool inside for the best results and to avoid any thermal shock.
Step 4: Repeat for a Stronger Seasoning
To build a robust seasoning on your cast iron pan, you’ll want to repeat the oiling and heating process several times. This repetition guarantees a strong, durable layer that enhances nonstick performance.
- Apply a thin layer of cooking oil to the pan.
- Buff the oil thoroughly to prevent pooling.
- Place the oiled pan upside down in a preheated oven at 450°F (230°C).
- Bake for 30 minutes, using a baking sheet to catch drips.
- Repeat this process three to four times.
Each additional layer of seasoning improves the pan’s nonstick surface and longevity.
Regularly seasoning your cast iron creates a protective coating that becomes increasingly effective over time. Embrace this ritual, and soon you’ll wield a pan that not only cooks beautifully but also empowers your culinary creativity.
The more you season, the more liberated your cooking experience will be!
Step 5: Maintaining Your Cast Iron Seasoning Effectively
Maintaining the seasoning on your cast iron pan is essential for keeping it in top shape and guaranteeing a nonstick surface. Regular cooking with fats and oils actually enhances this seasoning layer, making your pan even more effective.
After each use, skip the soap; instead, clean it with hot water and a stiff brush to preserve that precious seasoning.
After using your cast iron, opt for hot water and a stiff brush to keep that valuable seasoning intact.
Always dry your cast iron immediately after washing to prevent rust—consider heating it briefly on low to eliminate any lingering moisture.
Once it’s dry, reapply a thin layer of cooking oil to maintain the seasoning and create a protective barrier against rust.
Finally, store your cookware in a dry environment; using a paper towel can help absorb moisture and prevent deterioration.
Step 6: Resolving Common Seasoning Challenges
Even with careful maintenance, you might encounter some common seasoning challenges with your cast iron pan. Don’t worry; these are easily resolvable! Here’s what to keep an eye out for:
- Sticky or flaking seasoning
- Rust spots
- Variations in seasoning texture
- Dark residue on towels
- Effects of acidic foods
If you find sticky or flaking seasoning, it’s often due to oil being applied too thickly. Always buff your pan until it looks non-greasy before seasoning.
For rust, scrub the area with a Rust Eraser or steel wool, then wash, dry, and coat with a thin layer of oil.
Remember, variations in texture can be smoothed with use. If you see dark residue on your towels, it’s just layers of seasoning being released—this can enhance performance!
Finally, limit cooking acidic foods to preserve your pan’s seasoning.
Frequently Asked Questions
Should I Season Cast Iron at 350 or 450?
You should season cast iron at 450°F for the best results. This ideal oven temperature enhances heat distribution and promotes effective polymerization of the oil, creating a durable, non-stick surface.
Oils with high smoking points work best at this temperature, preventing burning and ensuring a smooth finish. Regularly seasoning at 450°F can improve your cookware’s performance and longevity, so embrace this higher heat for a liberating cooking experience!
What Ruins Cast Iron Seasoning?
Several factors can ruin your cast iron seasoning. Frequent cooking of acidic foods can strip away the protective layer, while harsh cleaning methods, like abrasive scrubbing, can damage it.
Soaking your pan in water promotes rust, which sabotages seasoning efforts. Always control the temperature during cooking and guarantee you use the right oil types.
Regular seasoning and proper drying after washing enhance cookware longevity and help prevent rust, keeping your pan in top shape.
How to Tell if Your Cast Iron Is Properly Seasoned?
You can tell your cast iron’s properly seasoned by its glossy, dark surface that feels smooth to the touch.
When you cook, foods should glide effortlessly, enhancing flavors without sticking.
Watch for rust spots or flaking; these signal a need for maintenance.
If you see a faint, oily sheen post-cooking, your seasoning’s intact.
Regular use of fats helps maintain seasoning, while avoiding common mistakes guarantees your pan stays in top shape.
Can You Use Dawn Dish Soap on Lodge Cast Iron?
Yes, you can use Dawn dish soap on your Lodge cast iron for initial cleaning, but it’s best to limit its use.
Frequent soap applications can strip away your seasoning, impacting cast iron maintenance. Instead, opt for hot water and a stiff brush for regular cleaning.
Consider soap alternatives like coarse salt for stubborn spots. Always dry your pan thoroughly to prevent rust, and reapply cooking oils to maintain that beautiful frying surface.
Conclusion
In just a few simple steps, you’ve not only seasoned your Lodge cast iron pan but transformed it into a culinary superhero! With each layer of oil and heat, you’ve infused it with magical powers, ready to create the most mouthwatering dishes imaginable. Imagine flipping pancakes that slide off like a dream or searing steaks with a perfect crust. Your pan’s now a masterpiece, and you’re the proud artist—ready to commence endless cooking adventures!