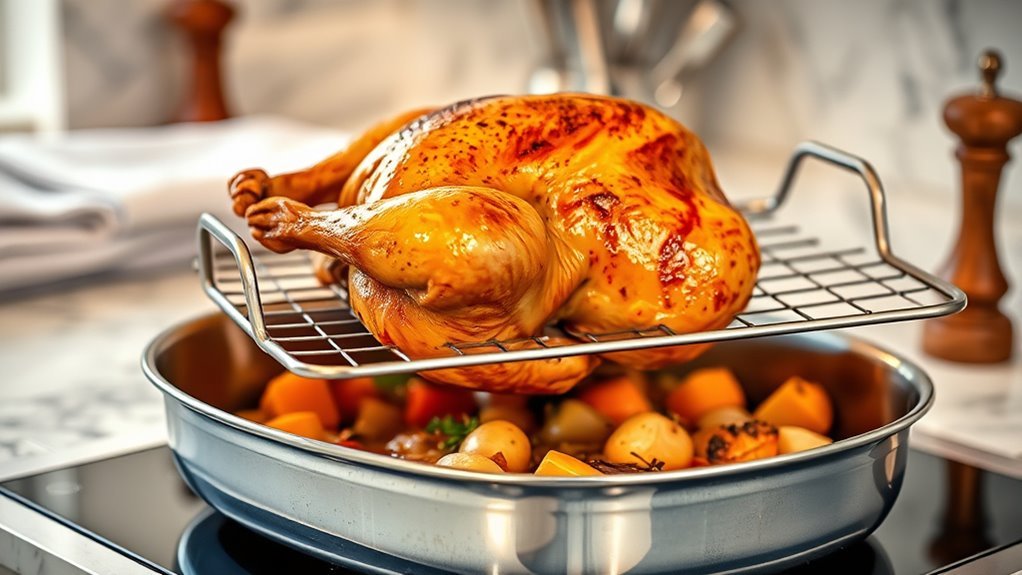
A roasting rack helps you cook chicken, turkey, beef, and other roasts with better airflow and more even browning. It holds food above the pan, so the underside does not sit in hot fat and juices. This simple kitchen tool also makes collecting drippings for gravy easier.
Quick Answer
A roasting rack is a raised metal support that sits inside a roasting pan. It lifts meat above accumulated juices, improves airflow, encourages more even browning, and lets excess fat drain away. Use it for whole poultry, beef roasts, pork, and lamb. Choose a stable, oven-safe rack that fits your pan and supports the food.
Key Takeaways
- V-shaped racks support whole poultry, while flat racks work well for smaller cuts and vegetables.
- A roasting rack helps improve browning, but it does not guarantee juicy meat or reduce cooking time by a fixed amount.
- Use a food thermometer to check doneness instead of relying only on cooking time or appearance.
- An oven-safe cooling rack, sturdy foil supports, or thick-cut vegetables can replace a traditional rack.
- Check the rack’s oven-temperature limit and clean it thoroughly after contact with raw meat.
What Is a Roasting Rack and Why Use One?
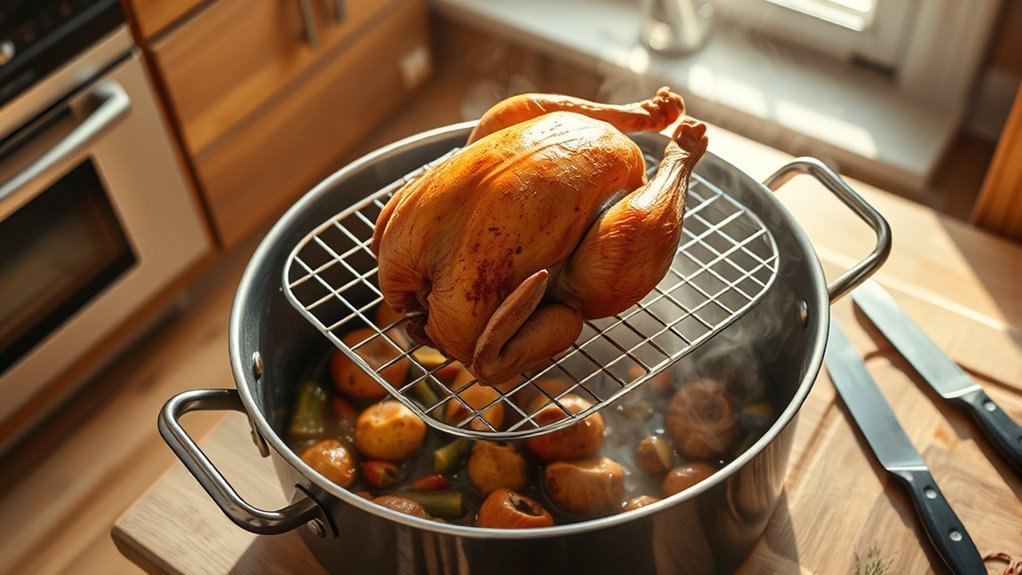
A roasting rack is a metal frame or wire grid that holds food above the bottom of a roasting pan. Its main purpose is to expose more of the food to hot air while keeping it out of the liquid collecting underneath.
Without a rack, the underside of your meat rests directly against the pan. As fat and juices collect, that surface can stay moist instead of developing a browned crust.
A rack creates space below the roast. This encourages more even cooking and better browning, especially with whole poultry and large cuts of meat.
Most roasting racks come in three basic shapes:
- Flat racks: Suitable for beef roasts, pork loin, smaller poultry, and foods that need a level surface.
- V-shaped racks: Cradle whole chickens, turkeys, and rounded roasts to reduce movement.
- Adjustable or foldable racks: Offer flexible positioning or easier storage, depending on their design.
As the meat cooks, juices and rendered fat collect in the pan. You can use suitable drippings for basting, gravy, or a rich pan sauce.
A rack is helpful, but it is not essential for every roasting recipe. Foods cooked directly in liquid, such as braised meat, usually do not need one.
Benefits of Using a Roasting Rack for Cooking
The biggest benefits of a roasting rack are improved airflow, better browning, and easier separation of meat from its drippings. It also provides a stable cooking surface when you use the correct size and design.
- Crispier skin: Keeping poultry above pooled juices helps prevent the underside from becoming soggy. A dry surface also browns more readily.
- More even heat exposure: Hot oven air can reach more of the roast, including areas that would otherwise touch the pan.
- Less contact with grease: Rendered fat collects underneath instead of surrounding the meat. The final fat content still depends on the cut and how you serve it.
- Useful pan drippings: You can collect cooking juices for gravy without leaving the roast submerged in them.
- Better support: A properly sized rack helps hold heavy poultry and large roasts securely.
- Multiple uses: Some oven-safe wire racks also work for cooling baked goods or roasting smaller foods.
However, a roasting rack does not automatically make meat juicier. Moisture retention also depends on the cut, internal temperature, and resting time.
The original claim that using a rack can improve juiciness by up to 30% needs supporting evidence before it can be treated as a reliable measurement.
Best Types of Meats to Roast on a Rack
Whole poultry and large, tender cuts of meat benefit most from a roasting rack. They need enough space for hot air to circulate, and their drippings can collect beneath them without soaking the underside.
Here are some of the best choices.
- Whole turkey: A V-shaped rack supports the bird while keeping the lower skin above the roasting juices. It also leaves space for vegetables and aromatics in the pan.
- Whole chicken: A rack encourages browning around the legs, wings, and underside. It is especially useful when you want crisp skin.
- Prime rib: A sturdy rack supports the roast and helps heat reach more of its surface. You can collect beef drippings for gravy.
- Beef tenderloin: A flat rack keeps the meat away from pooled juices, helping preserve its browned exterior.
- Pork loin: Raising the roast allows rendered fat to drain into the pan and reduces moisture buildup underneath.
- Pork shoulder: A rack works for uncovered roasting. However, it is optional when you cook the shoulder covered in liquid for a tender, braised result.
- Leg of lamb: A rack supports the cut and promotes more even exposure to oven heat.
For whole poultry, the rack should support the bird without letting it lean against the pan’s sides.
The pan must also be deep enough to catch drippings safely.
How to Use a Roasting Rack Step by Step
Using a roasting rack is straightforward. You need an oven-safe roasting pan, a rack that fits inside it, your prepared meat, and a food thermometer.
Follow these steps for reliable results.
- Choose your rack and pan. Make sure the rack sits securely inside the pan. It should support the roast without tipping or bending.
- Preheat the oven. Use the temperature recommended for your recipe and the type of meat. For conventional meat and poultry roasting, USDA guidance calls for an oven temperature of at least 325°F (163°C).
- Prepare the meat. Season it as desired. Pat the surface dry with paper towels if you want better browning. Avoid washing raw poultry, which can spread bacteria around your kitchen.
- Place the meat on the rack. Center the roast so its weight is evenly supported. Position whole poultry breast-side up unless your recipe specifies otherwise.
- Put the rack inside the pan. Keep the roast above the drippings and away from the pan’s sides. Add vegetables or aromatics underneath if desired.
- Roast and check doneness. Monitor browning and use a food thermometer to check the thickest part of the meat, avoiding bone.
- Rest and serve. Remove the roast carefully, allow the appropriate resting time, and use the drippings for gravy or sauce.
For specific oven settings and estimated cooking times, refer to the official FoodSafety.gov meat and poultry roasting charts.
What Temperature Should Meat Reach on a Roasting Rack?
A roasting rack does not change the safe minimum internal temperature of meat. Always use a food thermometer, even if the exterior looks fully cooked.
The following temperatures are based on the US government’s safe minimum internal temperature guidelines.
| Type of Meat | Minimum Internal Temperature | Required Rest |
|---|---|---|
| Chicken and turkey | 165°F (74°C) | No additional safety rest required |
| Beef, lamb, and veal roasts | 145°F (63°C) | At least 3 minutes |
| Pork roasts | 145°F (63°C) | At least 3 minutes |
Warning: Do not judge meat safety by skin color, browning, or cooking time alone. A roasting rack improves airflow but cannot guarantee doneness. Check thick cuts with a food thermometer and follow the appropriate minimum temperature and resting guidelines.
Top Tips for Cooking With a Roasting Rack
For the best results, focus on airflow, rack stability, temperature control, and flavorful drippings. Small adjustments to how you arrange the food can make a noticeable difference in browning.
Maximizing Airflow Benefits
A roasting rack works best when hot air can move around the food. If the meat touches the pan’s sides or several pieces are packed together, airflow becomes restricted.
Follow these practical tips:
- Use the correct rack size: Choose one that sits level inside the pan and supports the meat securely.
- Leave space around food: Aim for at least an inch between separate pieces when possible.
- Avoid overloading: Roast in batches if the rack cannot hold everything without crowding.
- Keep the roast above liquids: Do not add enough water or stock to submerge the meat when you want a browned, roasted exterior.
- Watch the surface: If the top browns too quickly, loosely cover that area with foil while the interior finishes cooking.
Improved airflow can affect cooking speed, but the difference is not predictable. Start checking internal temperature before the estimated cooking time ends.
Enhancing Flavor Development
A roasting rack can help produce deeper flavor by allowing the exterior to brown while drippings collect below.
Place thick-cut onions, carrots, garlic, or herbs beneath the rack to add flavor to the pan juices. Citrus slices can also add aroma to poultry.
For a more flavorful sauce, separate excess fat from the cooked drippings. Then add a suitable liquid to dissolve the browned bits left in the pan.
This technique is called deglazing. The Michelin Guide’s deglazing instructions explain how to turn those browned bits into a sauce.
Watch the pan during roasting. If the drippings begin to burn, adding a little water or stock beneath the rack can help, provided it does not reach the meat.
Pro Tip: If your vegetables need deeply browned edges, roast them in a separate pan instead of placing everything under the meat. This gives the vegetables direct contact with the hot pan and makes their cooking time easier to control.
Common Mistakes When Using a Roasting Rack
Most roasting rack mistakes involve poor positioning, overcrowding, or incorrect temperature control. These problems can cause uneven browning, unstable cooking setups, or meat that is not properly cooked.
Improper Rack Placement
A roasting rack should sit securely inside the pan, with enough room around the meat for hot air to circulate.
Avoid these common placement errors:
- Using a rack that is too small or unstable for the roast.
- Letting the meat touch the pan’s sides.
- Positioning a large roast where it sits too close to the oven’s heating elements.
- Using a damaged rack that cannot support the food’s weight.
Center the rack inside the pan and check its stability before adding meat.
Also, distinguish between the roasting rack inside the pan and the oven shelf that holds the pan. They serve different purposes.
For example, a large turkey may need a lower oven-shelf position to leave enough clearance above the bird.
Overcrowding The Rack
Overcrowding restricts airflow and traps moisture between pieces of food. This can produce pale, damp surfaces instead of evenly browned ones.
Leave space between chicken pieces, vegetables, or smaller roasts. Avoid stacking food unless the rack was designed for multiple levels.
If you need to cook several large pieces, use another suitable pan or prepare them in batches.
A larger rack is not always better. It still needs to fit securely inside the roasting pan.
Ignoring Temperature Guidelines
Temperature mistakes can cause undercooked meat, dry interiors, or damaged cookware. A rack does not compensate for an incorrect oven setting.
Keep these points in mind:
- Use the oven temperature specified by a reliable recipe and appropriate food-safety guidance.
- Check the maximum oven temperature allowed for both the rack and pan.
- Measure the internal temperature in the correct part of the meat.
- Account for the required resting time before serving.
- Do not assume two roasts of similar size will cook in exactly the same amount of time.
Whole turkeys need extra attention because different areas of the bird can cook at different rates.
The CDC’s turkey safety guidance recommends checking the thickest part of the breast and areas near the thigh and wing joints, while avoiding bone.
How to Clean and Maintain Your Roasting Rack?
Clean your roasting rack after every use to remove grease, food residue, and juices from raw meat. Regular care also helps protect the finish and extend the rack’s useful life.
- Let the rack cool. Avoid placing a very hot rack directly into cold water, especially when the manufacturer warns against sudden temperature changes.
- Soak if necessary. Use warm, soapy water to loosen stubborn grease and baked-on food.
- Wash gently. Clean between wires and around joints with a soft sponge or suitable brush.
- Rinse thoroughly. Remove soap and food residue from all surfaces.
- Dry completely. Make sure the rack is dry before putting it away to reduce corrosion risk.
- Inspect for damage. Check for loose wires, broken welds, unstable legs, or damaged coatings.
Uncoated stainless steel racks generally tolerate regular cleaning well, but always follow the manufacturer’s instructions.
Nonstick racks need more care. Avoid harsh scouring pads, steel wool, and sharp utensils that can scratch the coating.
For example, the USA Pan cooling rack care guide recommends warm, soapy water, gentle cleaning tools, and thorough drying. It also specifies an oven-temperature limit of 450°F for its coated cooling racks.
Do not reuse a rack that held raw meat for cooling ready-to-eat food until you have washed it thoroughly.
Versatile Uses for Roasting Racks
Roasting racks are useful for more than whole chickens and holiday turkeys. Depending on their design, they can support vegetables, smaller foods, and baked goods.
Here are some practical ways to use one:
- Roast vegetables: An oven-safe flat rack can hold larger vegetable pieces above the pan. However, roasting directly on a baking sheet may create better browning on cut surfaces.
- Cook several smaller cuts: Use a stable flat rack for chicken pieces, pork portions, or other foods that benefit from airflow.
- Cool baked goods: A clean wire rack can help cookies and cakes cool without trapping steam underneath.
- Drain rendered fat: The rack allows grease from suitable meats to drip into the pan during cooking.
- Collect flavorful juices: Use the drippings beneath poultry or beef roasts to prepare gravy.
- Support cooked food briefly: A clean, stable rack can help keep food above pooled juices while you prepare it for serving.
Not every rack is suitable for every task. Always consider its wire spacing, weight capacity, coating, and oven-temperature rating.
Can You Use a Cooling Rack for Roasting?
Yes, but only if the cooling rack is specifically rated for oven use. Some racks are made only for cooling baked food and may have coatings or components unsuitable for roasting temperatures.
Manufacturer limits vary. For example, Nordic Ware states that its Multi-Purpose Oven and Cooling Rack is oven-safe up to 500°F (260°C).
That limit applies to that specific product, not every cooling rack.
Before roasting, confirm that the rack has no plastic or rubber parts that are unsuitable for oven use.
Recommended Roasting Racks for Home Cooks
The right roasting rack depends on your pan size, the foods you prepare, and how often you roast large cuts. A sturdy stainless steel rack is a practical general-purpose choice for many home cooks.
Compare the main types below.
| Type | Material | Features |
|---|---|---|
| Wire Roasting Rack | Stainless Steel | Flat support for roasts and smaller foods; available in sizes that fit many roasting pans |
| Nonstick Rack | Coated Metal | Easier food release; requires careful cleaning and attention to heat limits |
| Adjustable Rack | Stainless Steel | Adjustable support or folding design for different foods and storage needs |
| Heavy-Duty Rack | Stainless Steel | Strong construction for large roasts; may have a V-shaped design or lifting handles |
What Should You Look for When Choosing a Roasting Rack?
Start by measuring the inside of your roasting pan. The rack must fit securely without pressing against the sides.
Then compare these features:
- Size and fit: Make sure the rack supports the full length and width of your usual roast.
- Material: Stainless steel is a practical choice for durability and easy maintenance.
- Oven rating: Confirm the maximum temperature before using the rack at high heat.
- Weight support: Choose a sturdy design for heavy turkeys or large cuts of beef.
- Shape: V-shaped racks suit rounded roasts, while flat racks offer more flexibility for smaller items.
- Cleaning: Consider whether the rack has hard-to-reach joints, delicate coatings, or dishwasher restrictions.
If you regularly cook whole poultry, a sturdy V-shaped rack is often the most useful option. For smaller meals and multiple cooking tasks, a flat oven-safe wire rack may offer greater flexibility.
Frequently Asked Questions
What Do I Use if I Don’t Have a Roasting Rack?
You can use an oven-safe wire cooling rack that fits securely inside your roasting pan. Thick rolls of aluminum foil or a sturdy bed of carrots and onions can also support the meat. Avoid unstable bowls and racks without confirmed oven-safe ratings, especially when roasting heavy poultry.
What to Cook in a Roasting Pan With Rack?
A roasting pan with a rack is ideal for whole chicken, turkey, beef roasts, pork loin, and leg of lamb. It keeps these foods above their drippings while hot air circulates. You can also roast suitable vegetables on a flat rack and use the collected juices for gravy.
What if My Roasting Pan Does Not Have a Rack?
You can still use your roasting pan without its original rack. Arrange thick pieces of onion, carrot, or potato beneath the meat, or make sturdy supports from rolled aluminum foil. Make sure the roast stays stable and that the pan catches its drippings. Check doneness with a thermometer.
Does a Chicken Need to Be Roasted on a Rack?
No, a chicken does not need a roasting rack to cook safely. However, a rack can improve airflow and help the underside brown. You can roast chicken directly in a suitable pan or on a bed of vegetables. Whichever method you choose, cook it to a safe internal temperature of 165°F (74°C).
Can You Put a Cooling Rack in the Oven?
You can put a cooling rack in the oven only when its manufacturer confirms it is oven-safe. Some metal cooling racks are designed for roasting, while others are intended only for cooling food. Check the temperature limit, coating, and construction before putting one in a hot oven.
Should You Put Water in the Bottom of a Roasting Pan?
You do not always need water in the bottom of a roasting pan. For dry roasting, an uncovered pan allows the meat to brown. A small amount of water or stock may help prevent drippings from burning. Keep the liquid below the meat if you want a roasted rather than braised exterior.
Conclusion
A roasting rack is a practical tool for improving airflow, encouraging browning, and collecting flavorful drippings. It is especially useful for whole poultry and large roasts.
Choose a sturdy, oven-safe rack that fits your pan, leave room for air to circulate, and use a food thermometer to check doneness. With the right setup and simple cleaning, your rack can serve you through many meals.
Sources
- FoodSafety.gov, Meat and Poultry Roasting Charts: Recommended oven temperatures, cooking times, and roasting guidance.
- FoodSafety.gov, Safe Minimum Internal Temperatures: Food thermometer use, safe meat temperatures, and resting times.
- Centers for Disease Control and Prevention, Preparing Your Holiday Turkey Safely: Safe turkey handling, temperature checks, and roasting practices.
- USA Pan, Frequently Asked Questions: Cooling rack oven-temperature limits and cleaning instructions.
- Nordic Ware, Multi-Purpose Oven and Cooling Rack: Product-specific oven safety and care instructions.
- Michelin Guide, Technique Thursdays: How to Deglaze Your Pan: Using browned pan drippings to prepare sauces.