
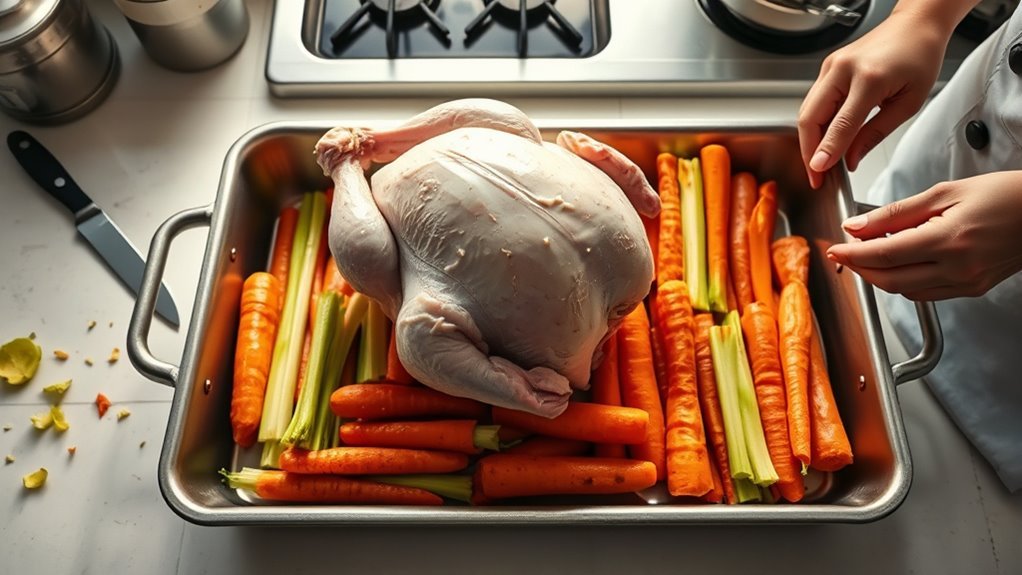
Did you know that a roasting rack can greatly enhance your turkey’s flavor and texture? By elevating the bird, it allows hot air to circulate evenly, ensuring a beautifully cooked meal. Whether you’re short on space or just want to get creative, making your own roasting rack is simpler than you might think. With a few common materials, you can achieve impressive results that elevate your cooking game. Let’s explore how you can craft the perfect rack for your next feast.
Why A Roasting Rack Makes Your Turkey Perfect

When you want your turkey to shine at the dinner table, a roasting rack is essential. This simple tool elevates your turkey, allowing hot air to circulate freely, promoting even heat distribution for that perfect roast.
By raising the turkey, it prevents the bottom from becoming soggy, ensuring those delicious drippings are collected for flavorful gravies.
Using a roasting rack also enhances moisture retention, reducing the risk of overcooking while keeping your turkey juicy and tender.
Using a roasting rack boosts moisture retention, ensuring your turkey stays juicy and tender while minimizing the risk of overcooking.
Plus, a well-structured rack supports the turkey’s weight, ensuring stability and consistent cooking throughout.
Imagine pulling out a beautifully browned bird, its crisp exterior glistening under the light. That’s the magic a roasting rack brings to your holiday feast, transforming a simple turkey into a show-stopping centerpiece.
Embrace the liberation of effortless cooking and elevate your culinary game with this essential tool!
Materials You Can Use for DIY Roasting Racks
When you’re ready to get creative with your roasting rack, search no more than your kitchen!
You can repurpose common household items, whip up edible vegetable alternatives, or even craft clever solutions with aluminum foil.
These materials not only elevate your turkey but also enhance the flavor of your meal.
Common Household Items
Creating a roasting rack doesn’t have to be complicated or require special tools—many common household items can do the job beautifully. You can easily shape aluminum foil into thick ropes or spirals to create a sturdy, disposable roasting rack that elevates your turkey perfectly.
Alternatively, arrange wooden chopsticks in a grid pattern for a stable surface that provides ample support. Metal cooling racks from your baking supplies work wonders too, allowing heat circulation while collecting drippings.
For an extra flavor boost, use large chunks of leftover vegetables like carrots and potatoes to elevate the turkey and enrich your gravy.
Finally, any sturdy baking rack fitting your roasting pan can serve as a practical DIY roasting rack.
Edible Vegetable Alternatives
An innovative way to elevate your turkey while enhancing flavor involves using edible vegetables as a roasting rack. You can create an edible roasting rack with leftover veggies like celery, onions, and carrots, which not only support the turkey but also infuse the drippings with rich flavor for gravy.
Chop these vegetables into large, uniform chunks to guarantee stability and prevent tilting. Halved potatoes can add even more flavor while doubling as a side dish.
This setup creates a natural cushion, allowing heat circulation around the turkey and assuring moisture and taste permeate the meat. By using these vegetables, you minimize waste and elevate your turkey for the ultimate cooking experience.
Enjoy the delicious results!
Creative Foil Solutions
Crafting a DIY roasting rack with aluminum foil can revolutionize your cooking experience in just a few simple steps.
Start by scrunching a long sheet of foil into a thick rope and shape it into a spiral or figure 8. This sturdy base will elevate your turkey, allowing for excellent heat retention and even cooking.
If you’re roasting larger meats, double up on the foil layers for added height, keeping the meat from touching the pan directly.
This versatile method isn’t just for turkey; it works wonders for chicken and steak too!
Best of all, you can whip up this handy rack in about 10 minutes, making it a perfect solution for last-minute meal preparations.
Step-By-Step Instructions for A Foil Rack
Making a roasting rack out of aluminum foil is a simple and effective solution that can elevate your cooking game.
Start with a long sheet of heavy-duty aluminum foil for stability. Scrunch the foil into a thick rope and shape it into a spiral or figure 8. This creates a sturdy base for your turkey. Place your makeshift roasting rack in the center of the roasting pan, elevating the turkey above the bottom to allow heat to circulate evenly.
If you’re roasting a larger turkey, add extra layers of foil to increase the height for best results.
This method isn’t just for turkey; it works well for other meats too, like steak. Following these simple steps guarantees your meat reaches the desired internal temperature while enhancing flavors.
You’ll find this versatile solution makes your roasting experience both efficient and satisfying. Enjoy your culinary liberation!
Make An Edible Roasting Rack With Veggies
Transforming your cooking experience can be as simple as using leftover vegetables to create an edible roasting rack. Start by chopping celery, onions, and carrots into large, uniform chunks for stability.
Don’t forget to toss in halved potatoes for added flavor and elevation. Arrange these vibrant vegetables in a single layer at the bottom of your roasting pan. This not only supports the turkey but also creates a natural cushion that enhances the drippings, perfect for a rich gravy or sauce.
As the turkey roasts, the vegetables infuse their flavors into the meat, elevating your dish to new heights. Plus, by making an edible roasting rack, you’re minimizing waste and utilizing ingredients you already have on hand.
Embrace this liberating approach and watch as your meal transforms into a flavorful masterpiece, all while reducing your kitchen waste!
How To Build A Sturdy Rack Using Chopsticks
Elevate your roasting game by building a sturdy rack using wooden chopsticks. This DIY roasting solution isn’t only eco-friendly but also a creative way to utilize materials you already have at home.
Here’s how to construct it:
- Gather 6-12 pairs of wooden chopsticks and arrange them in a grid pattern, like a tic-tac-toe layout.
- Make sure the chopsticks are spaced adequately to support your turkey, allowing heat to circulate effectively.
- Aim for a height of at least three layers for ideal stability during roasting.
For added support, you can tie the corners of your chopstick grid with kitchen twine or unwaxed dental floss.
This simple method transforms your roasting pans into a functional area, allowing for even cooking and a delightful feast.
Say goodbye to flimsy racks and enjoy a sturdy, cost-effective alternative that doesn’t compromise on quality!
Creative Alternatives For Roasting Racks
When you’re in the kitchen and find yourself without a traditional roasting rack, don’t worry—there are plenty of creative alternatives that can work just as well.
Try the Foil Rack Method: scrunch a long sheet of aluminum foil into a thick rope and shape it into a spiral to elevate your turkey for even cooking.
For a flavorful twist, use an Edible Roasting Rack made from leftover vegetables like celery and carrots; they’ll enhance the taste and create a delicious side dish.
A Wire Cooling Rack can also be repurposed—simply place it over your roasting pan for great heat circulation.
If you’ve got smaller cuts, mold two Toaster Oven Racks into a V-shape for a compact solution.
Each of these DIY Roasting options guarantees you can still achieve mouthwatering results without the fuss of a traditional rack.
Use Your Roasting Rack Effectively
To get the most out of your roasting rack, make sure it’s properly placed to allow air to circulate around your meat.
Using a sturdy baking sheet underneath will catch drippings and simplify cleanup, while avoiding overcrowding lets hot air flow freely.
Don’t forget to regularly check the internal temperature and let your meat rest afterward for the best flavor and moisture!
Proper Rack Placement
Proper rack placement is essential for achieving that perfectly roasted turkey or meat. Start by positioning your rack in the center of the roasting pan to guarantee even heat circulation. This not only promotes even cooking but also allows for those delicious drippings to gather below.
Consider these key points for ideal rack placement:
- Elevate the rack enough to let drippings collect, perfect for your gravy.
- Always place the turkey breast side up for even browning and moisture retention.
- Maintain adequate space around the meat; overcrowding hinders airflow and can lead to a soggy exterior.
With these tips, your roasting experience will be a liberating journey toward culinary perfection. Enjoy the process and savor the results!
Cleaning and Maintenance Tips
Although it might be tempting to toss your roasting rack in the dishwasher after a big meal, taking the time to clean and maintain it properly will extend its life and guarantee consistently delicious results.
For your nonstick roasting rack, handwash it with mild soap and a soft sponge to protect its coating. Avoid using metal utensils that could scratch the surface.
If you have a stainless steel rack, soak it in warm water with a gentle cleaner to tackle stubborn residues while keeping that shine.
Always confirm your rack is completely dry before storing it to prevent rust.
Periodically check for warping or damage to confirm even cooking results and safety during use.
Happy roasting!
Frequently Asked Questions
How Do I Clean My Roasting Rack After Use?
To clean your roasting rack, start by soaking it in warm soapy water.
For stubborn stains, try baking soda or vinegar as safe cleaning techniques.
If it’s stainless steel, a gentle scrub with a non-abrasive sponge works wonders.
Remember to check material considerations, as different materials require different care.
After cleaning, rinse thoroughly and dry to prevent rust.
Following these maintenance tips will keep your rack in great shape for future meals!
Can I Adjust the Height of My Roasting Rack?
Absolutely, you can adjust the height of your roasting rack!
By utilizing various rack materials, you enhance roasting efficiency and explore different cooking techniques. A well-constructed rack allows for height adjustments, ensuring ideal airflow and heat distribution.
Just make sure the rack stability is intact when you modify its height.
Whether you’re roasting a turkey or veggies, these tweaks can elevate your culinary game, giving you freedom in the kitchen.
Enjoy experimenting!
What Size Roasting Pan Is Best for My Rack?
For your roasting rack, choose a roasting pan with dimensions that comfortably fit your rack while allowing airflow.
Stainless steel or enameled cast iron are ideal material choices for even heat distribution.
When considering the best brands, look for ones known for durability, like All-Clad or Le Creuset.
Confirm your pan’s oven compatibility aligns with your cooking needs, and remember to follow maintenance tips essentials to keep it in top shape!
Are There Safety Tips for Using a Homemade Rack?
When using a homemade rack, prioritize safety by ensuring your materials have heat resistance and sufficient weight capacity.
Check for stability concerns during assembly; loose connections can lead to accidents. Use sturdy, non-flammable materials to prevent hazards.
Always test your rack with lighter items before loading it up.
How Can I Store My Roasting Rack When Not in Use?
To store your roasting rack when it’s not in use, consider vertical storage ideas like hanging it on a wall or using hooks inside a cabinet.
Compact storage methods, such as sliding it under a shelf, can save space. You might also explore rack storage solutions that fit neatly in a drawer.
For seasonal storage tips, wrap it in a cloth to protect it while stashed away, keeping your kitchen organized and clutter-free.
Conclusion
With your DIY roasting rack crafted, you’re ready to elevate your turkey like a chef showcasing a masterpiece. Whether you chose aluminum foil or chopsticks, you’ve guaranteed even cooking and moisture retention. Remember, a well-cooked turkey is the heart of your feast, bringing everyone together around the table. So, embrace your creativity and enjoy the delicious results. Your roasting rack is the unsung hero of your holiday meal—let it shine!