
A shiny new skillet may look impressive, but the magic lies in its seasoning. Properly seasoning your pre-seasoned cast iron skillet enhances its durability and creates a natural nonstick surface, essential for successful cooking. You might think it’s a simple task, yet the process requires attention to detail. By following a few straightforward steps, you can guarantee your skillet becomes a reliable kitchen companion for years to come. Ready to learn how?
Why Seasoning Your Cast Iron Matters
Seasoning your cast iron skillet isn’t just a chore; it’s an essential step that transforms your cooking experience. This process creates a protective layer through polymerization, where oils bond to the metal, preventing rust and enhancing nonstick properties.
A well-seasoned cast iron cookware allows you to cook with confidence, even with acidic foods like tomatoes, without worrying about damage. Regular seasoning not only maintains your skillet’s durability but also improves heat distribution and retention, ensuring your dishes are consistently delicious.
With each use, cooking with fats and oils contributes to building up that coveted nonstick surface. Imagine pulling out a skillet that’s not just functional but also a kitchen heirloom, ready to last a lifetime.
Essential Supplies for Seasoning Your Skillet
To season your cast iron skillet effectively, you’ll need a few key supplies.
Start with a high smoke point oil, like vegetable or canola, to guarantee a smooth, even coating.
You’ll also want some paper towels for cleaning and buffing, plus aluminum foil to catch any drips during the process.
Recommended Oils
Choosing the right oil is essential for achieving a perfectly seasoned cast iron skillet. For the best results, opt for recommended oils with a high smoke point, like vegetable oil, canola oil, or flaxseed oil.
These oils create a durable nonstick surface that enhances your cooking experience. When applying, remember to use a thin, even layer; this prevents pooling and stickiness during the seasoning process.
Avoid oils like olive oil or butter, as their lower smoke points can lead to a sticky mess. If you’re re-seasoning, consider using specialty seasoning sprays designed for cast iron for consistent application.
Ultimately, choose Kosher-certified oils to avoid GMOs, ensuring a healthier choice for your kitchen.
Cleaning Supplies Needed
After selecting the right oils for seasoning your cast iron skillet, it’s time to gather the cleaning supplies you’ll need to prep your pan.
Start with warm, soapy water and a non-abrasive sponge to make certain your skillet is free from any factory residue. For stubborn bits, keep a stiff brush or scraper handy.
A lint-free cloth or paper towels are essential for drying the skillet thoroughly—this step helps prevent rust.
Don’t forget to have aluminum foil ready to catch any drips during the seasoning process.
With these cleaning supplies in hand, you’re well on your way to achieving a beautifully seasoned skillet that will serve you for years to come!
Clean Your Skillet Thoroughly
Before you start seasoning your cast iron skillet, it’s essential to clean it thoroughly.
Begin by washing it with warm, soapy water to remove any industrial coatings or residue. A gentle scrub with a non-abrasive sponge will guarantee a smooth surface, setting the stage for perfect seasoning.
Essential Cleaning Steps
Cleaning your cast iron skillet thoroughly is essential for maintaining its longevity and performance.
Start by hand-washing your pre-seasoned skillet with warm, soapy water to eliminate any factory residues or dust. Use a non-abrasive scrub brush to carefully clean the surface, preserving the seasoned layer.
Rinse well with hot water, then dry immediately with a lint-free cloth or paper towel to prevent rust. For extra moisture removal, place the skillet on a stovetop flame for a few minutes until it’s completely dry.
Finally, apply a light layer of cooking oil inside and out; this not only maintains the seasoning but also protects your skillet from moisture, ensuring it’s ready for your next culinary adventure.
Removing Industrial Coatings
Industrial coatings on new pre-seasoned cast iron skillets can hinder their cooking performance, so it’s crucial to remove them before seasoning.
Start by cleaning the skillet thoroughly with hot, soapy water. Grab a scrub brush or steel wool to verify you’re effectively removing those industrial coatings.
Rinse it under warm water to wash away any soap residue, as excess soap can interfere with the seasoning process.
Once clean, dry the skillet completely with a lint-free cloth or paper towel to prevent rust.
For extra assurance, place the skillet on a stovetop burner over low heat for a few minutes. This step will eliminate any lingering moisture, setting the stage for a successful seasoning process.
Apply the Right Oil for Seasoning
When you’re ready to season your cast iron skillet, choosing the right oil is essential for achieving that perfect non-stick surface. Opt for oils with high smoke points, like vegetable, canola, or flaxseed oil. These oils guarantee effective polymerization during the seasoning process, creating that durable finish you crave.
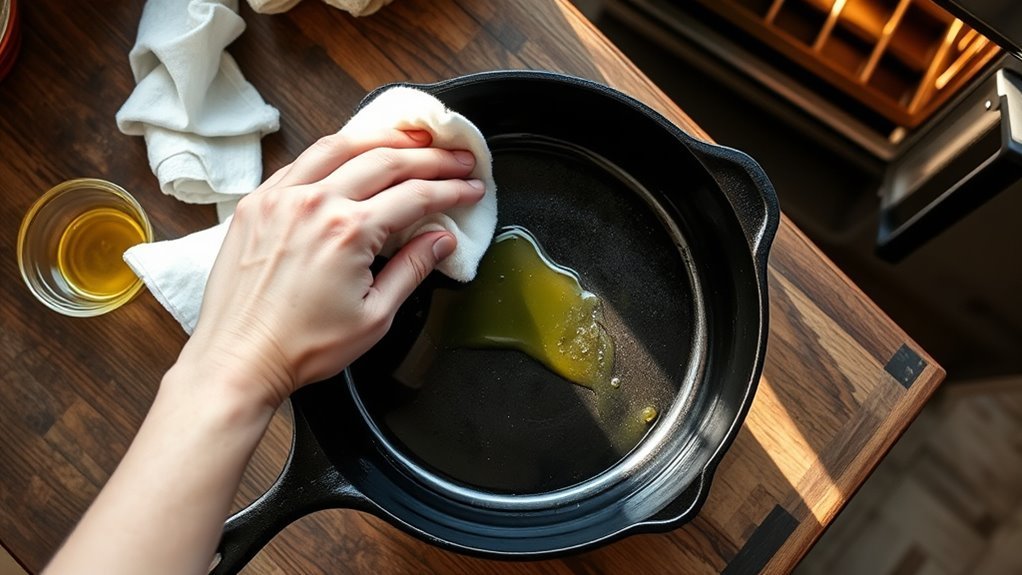
Apply a thin layer of oil to the skillet’s surface, buffing it until it looks non-greasy. This prevents pooling and stickiness, which can ruin your hard work. Flaxseed oil stands out for its ability to create a hard, long-lasting finish when layered correctly.
Avoid oils with low smoke points, like olive oil or butter, as they can break down and leave a sticky residue.
Remember to reapply oil after each cleaning to maintain your skillet’s seasoning and prevent rust. This simple step empowers you to keep your cast iron in top shape for years to come!
Preheat Your Oven for Optimal Seasoning
To achieve the best seasoning for your cast iron skillet, preheating your oven is an important step you shouldn’t overlook. Set your oven to a scorching temperature between 450°F and 500°F (230°C to 260°C). This high heat is vital; it facilitates polymerization, transforming the oil into a robust, non-stick layer that’ll make cooking a breeze.
Before you start, place a sheet of aluminum foil on the bottom rack to catch any drips while your skillet’s upside down. It’s wise to guarantee good ventilation since the high heat can create smoke from the oil.
Once you’ve preheated, let your skillet bake upside down for at least one hour. This time allows the seasoning to bond effectively, laying a solid foundation for your future cooking adventures. Trust this process; your skillet will thank you with every delicious meal!
Bake Your Skillet Upside Down
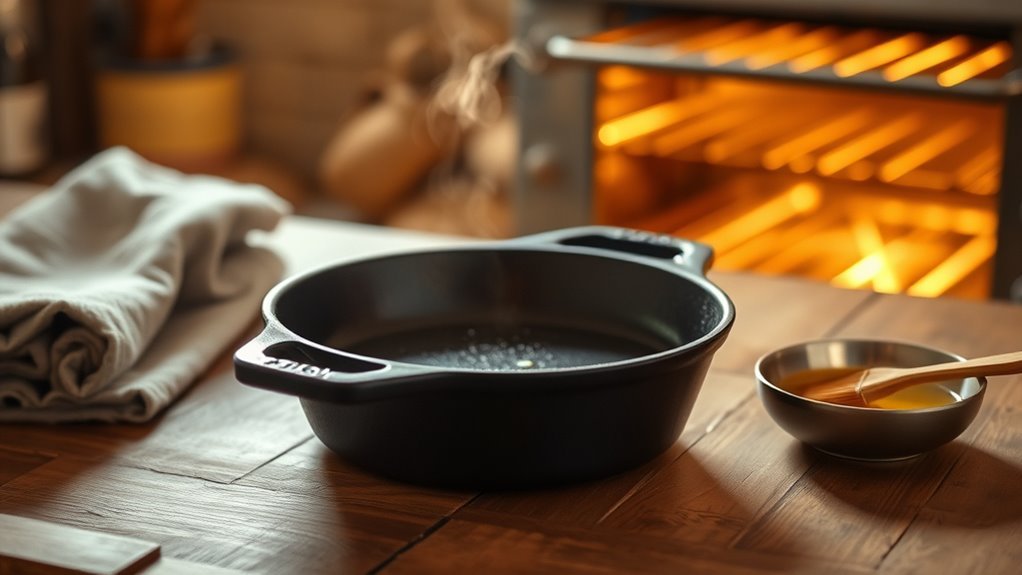
Baking your skillet upside down is an essential step in guaranteeing an even seasoning layer that’ll enhance its non-stick properties. This method allows excess oil to drip off, preventing any pooling that could ruin your hard work.
Start by preheating your oven to 450°F (230°C). Once it’s ready, place a baking sheet or aluminum foil on the lower rack to catch any drips. Then, carefully arrange your oiled skillet upside down on the middle rack.
Bake your skillet upside down for 30 minutes; this duration allows the oil to polymerize effectively, forging a durable layer of seasoning. After the time’s up, turn off the oven and let the skillet cool inside.
This cooling process not only guarantees safety but also enhances the bonding of the seasoning layer, solidifying that beautiful non-stick surface you’ve just created. Enjoy the freedom of cooking with your newly seasoned skillet!
How Often to Reseason Your Skillet?
How often should you reseason your skillet to keep it in top shape? To build those essential layers of seasoning, aim to reseason every 2-3 months during the first year. This practice not only enhances your skillet’s durability but also creates that coveted nonstick surface.
If you notice food starting to stick or the finish looking dull, it’s a clear sign that reseasoning is needed.
Be mindful of high-acid foods like tomatoes until your skillet is well-seasoned, as they can strip away those hard-earned layers. Regular cooking with oil or fat helps maintain and reinforce the seasoning naturally over time.
If your skillet develops a sticky surface, it’s time to reseason to remove any excess oil and restore a smooth finish. By consistently tending to your skillet, you’ll enjoy its benefits for years to come.
Identifying a Well-Seasoned Skillet
When you inspect a well-seasoned cast iron skillet, you’ll notice its smooth, shiny surface, a demonstration of the polymerized oils.
As you run your fingers over it, the texture should feel almost velvety, with no rust or peeling in sight.
When cooking, you’ll enjoy the effortless release of food, proving that your skillet’s seasoning is in top shape.
Visual Characteristics of Seasoning
A well-seasoned cast iron skillet gleams with a smooth, glossy finish, a tribute to the strong bond formed between the oil and the metal.
To identify the visual characteristics of your skillet, pay attention to these key features:
- Color: Look for a deep, dark black or brown hue, indicating effective polymerization during heating.
- Surface: A properly seasoned skillet boasts a non-stick surface, making it easy for food to release without sticking.
- Condition: Confirm there are no rust spots or flaking seasoning; these signs reveal poor care or insufficient seasoning.
Touch and Texture Feel
The moment you run your fingers over a well-seasoned cast iron skillet, you’ll notice its smooth, slightly glossy surface that feels slick and inviting. This texture signals effective seasoning, where oil has polymerized to create a durable layer.
You won’t feel any rough patches or flaking; those textures hint at uneven seasoning that needs attention. Instead, the skillet’s dark, deep black color showcases the successful buildup of multiple layers.
As you touch the surface, it should feel dry and non-greasy, indicating that excess oil has been buffed away. Press down lightly, and you’ll sense a slight resilience, a reflection of how well the oil has bonded with the iron, enhancing its nonstick properties.
Performance During Cooking
While cooking, you’ll quickly notice how a well-seasoned cast iron skillet transforms your culinary experience. Its smooth, nonstick cooking surface allows your food to glide effortlessly, minimizing sticking.
Here’s how to identify that perfect skillet:
- Appearance: Look for a dark, shiny finish. This indicates layers of polymerized oil, a sign of effective seasoning every time.
- Heat Distribution: A well-seasoned skillet heats evenly, ensuring consistent results whether you’re frying or baking.
- Flavor Enhancement: Foods develop rich flavors and beautiful browning thanks to the skillet’s excellent heat retention and distribution properties.
With proper care, you can even cook acidic foods without harming the seasoning, giving you the freedom to explore diverse recipes confidently.
Cleaning Your Skillet After Seasoning
After seasoning your skillet, it’s crucial to clean it properly to maintain that hard-earned finish.
Begin by hand-washing with hot water only—skip the soap, as it can strip away the seasoning layer. Grab a stiff brush or a non-metal scrubber to gently remove any food residue without damaging that precious surface.
Once you’ve scrubbed it clean, dry your skillet thoroughly using a lint-free cloth or paper towel to prevent rust from forming.
To keep that seasoning intact, lightly rub a thin layer of cooking oil over the entire surface after cleaning. This not only preserves the seasoning but also creates a protective barrier against moisture.
Finally, store your skillet in a dry place, and consider placing a paper towel inside to absorb any lingering moisture.
With these simple steps, you’ll guarantee your skillet remains a reliable companion in your culinary adventures.
Common Seasoning Mistakes
Seasoning a cast iron skillet can feel like an art, but many home cooks unknowingly make mistakes that can sabotage their efforts. Avoiding these common pitfalls will help you achieve that perfect, non-stick finish.
- Excessive Oil: Applying too much oil can lead to a sticky surface. Instead, use a thin layer and buff it out thoroughly.
- Inadequate Preheating: If you don’t preheat your oven properly or place the pan upside down, oil can pool, preventing a proper bond during seasoning.
- Poor Cleaning: Skipping the cleaning step or leaving soap residue can hinder the seasoning process. Always guarantee your skillet is clean and dry before applying oil.
Frequently Asked Questions
Do I Need to Do Anything With a Pre-Seasoned Cast Iron Skillet?
You don’t need much to care for your pre-seasoned cast iron skillet, but a little maintenance goes a long way.
Enjoy the pre-seasoned benefits by washing it lightly with hot water before use. Always apply a thin layer of oil to enhance the seasoning.
Forget the myths about soap; stick to a stiff brush for cleaning. Regularly check for rust and re-season as needed to keep your skillet in prime cooking condition.
What Ruins Cast Iron Seasoning?
You might think cast iron seasoning‘s indestructible, but common mistakes can ruin it. Excessive soap or abrasive cleaners strip away that precious layer, while cooking acidic foods can damage it, leaving a metallic taste.
Overheating an empty skillet creates stickiness, and failing to dry it immediately invites rust.
To master cast iron care, remember these seasoning tips: avoid harsh cleaning products, steer clear of acidic dishes early on, and always dry your skillet promptly.
Should I Season Cast Iron at 350 or 450?
You should season cast iron at 450°F for the best results. This higher seasoning temperature helps the oil bond effectively, creating a durable, nonstick surface.
If you choose 350°F, you mightn’t achieve the same level of seasoning quality. For ideal skillet maintenance, use a high smoke point oil, and remember to repeat the process for enhanced performance.
Your skillet deserves the freedom of a robust seasoning that lasts!
How to Use Pre-Seasoned Cast Iron Pan First Time?
To use your pre-seasoned cast iron pan for the first time, start by hand-washing it with hot water to eliminate factory residues.
Dry it thoroughly, then apply a light coat of oil for enhanced non-stick properties.
Preheat the skillet gradually over low to medium heat before cooking your first meal.
Explore various cooking techniques, and remember to avoid acidic foods initially.
Regular maintenance tips, like reapplying oil, will keep it in top shape!
Conclusion
By seasoning your pre-seasoned cast iron skillet, you’re not just creating a nonstick surface; you’re forging a bond with a timeless kitchen companion. Like a well-worn book, each layer of seasoning tells a story of delicious meals and shared moments. As you care for it, you’re not just cooking; you’re crafting culinary memories. Embrace the art of seasoning, and watch as your skillet transforms into a cherished heirloom, ready to serve up flavors for generations to come.