

Imagine firing up your cast iron grill for the first time, only to find it sticky and uneven. You want that perfect sear, but it all starts with proper seasoning. This essential process not only enhances flavor but also extends your grill’s life. Ready to transform your grill into a nonstick powerhouse? Let’s walk through the steps to guarantee your grilling experience is nothing short of exceptional.
Why Properly Seasoning Your Cast Iron Grill Matters
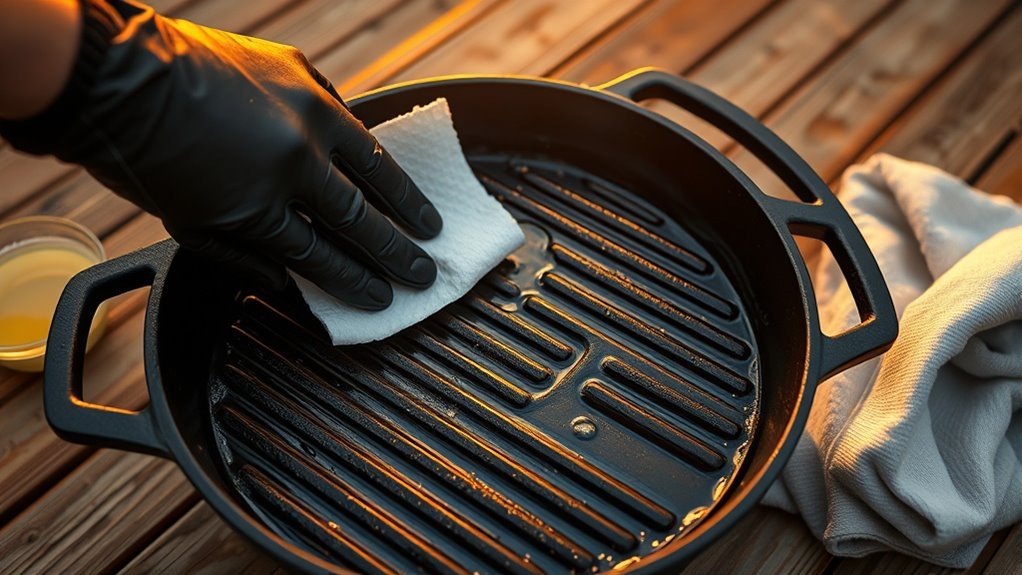
When you properly season your cast iron grill, you’re not just enhancing its aesthetics; you’re creating an essential protective layer that improves its performance and lifespan.
The seasoning process is a beautiful dance of polymerization, where oil bonds to the metal surface to form a durable, nonstick coating. This well-seasoned cast iron can withstand high heat, allowing you to grill meats and vegetables without the frustration of sticking.
Neglecting the seasoning can lead to rust formation and food sticking, diminishing your cooking experience. Regular maintenance of your grill’s seasoning guarantees peak results, giving you the freedom to explore bold flavors and techniques.
A well-maintained cast iron grill isn’t just a tool; it’s a partner in your culinary adventures, ready to serve you for decades. Embrace the magic of seasoning, and let your grill shine in all its glory!
What You Need to Prepare for Seasoning
To kick off the seasoning process for your cast iron grill, you’ll need to gather a few key items and guarantee your grill grates are in top shape.
Start by ensuring your grates are free from rust, food residue, and debris. A clean surface is essential for effective seasoning. Moisture is your enemy, so dry the grates completely to prevent rust formation.
Here’s what you’ll need:
- High smoke point oil (like peanut or canola)
- Paper towels or a cloth for applying the oil
- Grill brush for a thorough cleaning
- Oven thermometer to monitor temperature
Once everything’s ready, lightly coat the grates with a layer of oil.
Preheat your grill to around 300°F, maintaining this heat for 2-3 hours to allow the oil to polymerize effectively.
Your cast iron grill will thank you later!
Step-by-Step Guide to Cleaning Your Grill
Cleaning your cast iron grill doesn’t have to be a chore. With the right tools and techniques, you can keep your grill grates in top shape while preserving their seasoning.
Let’s explore the essential cleaning tools you’ll need and the effective methods to use for a spotless finish.
Essential Cleaning Tools Needed
A well-maintained cast iron grill requires the right tools for effective cleaning and upkeep. Equip yourself with these essentials to guarantee your grill stays in top shape:
- Chain mail scrubber: Perfect for gently removing food debris without harming the seasoning.
- Stiff brush: Great for tackling stubborn spots without stripping the cast iron cookware.
- Warm water: Soak grates to loosen residue before scrubbing for a thorough clean.
- High smoke point oil: Use this to lightly coat grates post-cleaning, preserving the seasoning and protecting against rust.
With these tools in hand, you can confidently maintain your cast iron grill, enhancing its longevity and performance while enjoying the liberation of delicious meals.
Effective Cleaning Techniques Explained
Effective cleaning techniques can make all the difference in maintaining your cast iron grill’s performance and longevity. Start by ensuring the grates are free of rust and food residue—grab a stiff brush for a thorough clean.
If you encounter tough residue, heat the grill to a high temperature to burn off leftovers, then scrub away. After cleaning, dry the grates completely to prevent rust; a paper towel works wonders here.
To protect your grill, lightly coat the grates with a high smoke point oil, like peanut or canola oil. Regularly clean the grates after each use with minimal soap and water to maintain that perfect seasoning and prolong your grill’s lifespan.
Enjoy the freedom of a well-cared-for grill!
Choosing the Best Oil for Seasoning
When it comes to seasoning your cast iron grill, selecting the right oil can make all the difference. Choosing an oil with a high smoke point is essential to avoid sticky residues and guarantee a smooth surface.
Selecting the right oil with a high smoke point is crucial for achieving a smooth, durable seasoning on your cast iron grill.
Here are some great options:
- Peanut oil: Excellent for high heat and flavor.
- Grapeseed oil: Neutral taste with a high smoke point.
- Canola oil: Affordable and versatile for seasoning.
- Lard or Crisco: Traditional choices that create durable seasoning layers.
Avoid oils like olive oil or butter, as they burn easily and can lead to uneven seasoning.
When applying, be sure to use a thin layer of your chosen oil, making sure it appears almost dry before heating. This technique will help achieve a strong bond and lasting performance, liberating your grill from the burdens of wear and tear.
Embrace the power of the right oil for a beautifully seasoned cast iron grill!
Applying Oil for Even Coverage
To achieve a perfectly seasoned cast iron grill, applying oil evenly is vital. Start by selecting a high smoke point oil, like peanut or canola.
Using a lint-free cloth, apply a thin layer of oil to all surfaces—grates, exterior, and every crevice. This guarantees you’re preventing pooling and achieving uniform coverage. Focus on those tricky corners; they’re often neglected, leading to rust or uneven seasoning.
Once you’ve coated the grill, wipe off any excess oil until it appears nearly dry. This step is critical to avoid a sticky texture later on.
Remember, it’s better to apply multiple thin layers of oil rather than one thick one. Repeat this process 2-3 times for a robust seasoning foundation that liberates your grilling experience.
Consistency is key; your efforts will lead to a beautifully seasoned grill ready for delicious meals.
Preheating Your Grill for the Seasoning Process
Before you plunge into the seasoning process, it’s essential to preheat your grill properly, as this sets the foundation for a durable nonstick surface.
Here’s how to make certain you’re ready to go:
- Clean your grill grates thoroughly to remove any rust or debris.
- Preheat gradually to avoid thermal shock, aiming for a stable temperature between 300°F and 450°F.
- For gas grills, ignite all burners for even heat; with charcoal, make sure coals are hot and evenly spread.
- Place the clean, oiled grates on the grill and maintain the temperature for 2-3 hours to allow the oil to polymerize.
Taking these steps guarantees your grill is primed for the seasoning process, helping you achieve that coveted nonstick layer.
Remember, a little patience goes a long way, and repeating the heating process can further enhance your grill’s surface.
Enjoy the liberation that comes with a perfectly seasoned grill!
Ideal Heating Time and Temperature for Seasoning
To achieve the perfect seasoning for your cast iron grill, you’ll want to preheat it to a temperature between 300°F and 500°F.
Maintaining this heat for at least 1 to 2 hours allows the oil to bond effectively, creating a strong protective layer.
Plus, setting the grill upside down in the oven at 450°F helps catch any drips, ensuring your seasoning process is as effective as possible.
Optimal Temperature Range
When it comes to seasoning your cast iron grill, getting the temperature just right is essential for achieving that perfect nonstick surface. The ideal temperature range for seasoning is between 450°F to 500°F, which allows for effective polymerization of the oil.
Here’s what you need to keep in mind:
- Preheat your grill to around 325°F to 375°F using indirect heat for even distribution.
- Apply a thin layer of oil, wiping off excess to avoid a sticky finish.
- Maintain the temperature for 45–60 minutes at 450°F to form a durable layer of seasoning.
- Repeat the process 2–3 times for enhanced durability and performance.
Following these steps will liberate your grill from sticking and elevate your cooking experience!
Heating Time Recommendations
Achieving the perfect seasoning on your cast iron grill requires careful attention to both heating time and temperature. Preheat your grill to a range between 300°F and 500°F, ensuring even heat distribution.
For best results, maintain a heating time of at least 1 hour at maximum temperature on the grill, or 2–3 hours if using the oven method. This allows for proper polymerization of the oil, creating a durable, non-stick surface.
Remember to place your cast iron grill grates upside down to avoid oil pooling, which can lead to sticky spots. Aim to repeat this heating and oiling process 2–3 times to build a robust initial layer of seasoning.
Finally, let your grill cool gradually to prevent thermal shock.
Pre-Seasoning Preparation Steps
Before diving into the seasoning process, it’s essential to prepare your cast iron grill properly for ideal results. A clean surface is vital for effective oil adhesion, so start by ensuring your grill is free from rust and food residue.
Here’s what you need to do:
- Use a high smoke point oil, like peanut or canola oil.
- Apply a thin, even layer of oil to prevent sticky residue.
- Preheat your grill to a temperature between 300°F to 500°F.
- Season the grill grates for 2-3 hours to create a strong nonstick layer.
Once you’ve completed these pre-seasoning steps, let the grill cool completely before considering additional layers.
This preparation sets the stage for a liberated grilling experience!
Troubleshooting Common Seasoning Issues
Although seasoning a cast iron grill can seem straightforward, you might encounter some common issues that can affect its performance. If your seasoning looks uneven or patchy, it’s likely due to excess oil. Apply a thin, even layer before heating to avoid pooling.
Flaking seasoning can happen if the oil layers weren’t fully polymerized; simply re-clean the grill grates and re-season to build a stronger bond.
Finding dark residue on your towels while drying? That’s normal and shows seasoning buildup—just keep using the grill to enhance it over time.
If you notice rust, scrub those areas with a chain mail scrubber, wash, dry thoroughly, and re-season to restore that protective layer.
Finally, to prevent sticky surfaces, make sure to heat your grill to a high temperature, ideally between 450°F and 500°F, during the seasoning process.
Essential Tips for Long-Lasting Grill Seasoning
To guarantee your cast iron grill stays in top shape, it’s essential to follow some key practices that promote long-lasting seasoning. By mastering these techniques, you can enjoy perfectly seasoned grill grates for years to come.
- Use oils with high smoke points like peanut or canola.
- Clean grates thoroughly to remove rust and food residue.
- Apply a thin, even layer of oil to avoid pooling.
- Gradually heat the grill to around 300°F for 2-3 hours.
These practices ensure the oil bonds well and forms durable layers of seasoning.
These essential techniques help achieve a strong bond, creating resilient layers of seasoning for your grill.
After each use, wipe down the grates with a little oil to maintain that protective layer and prevent rust. This simple routine extends the life of your cast iron pans, allowing you to relish the freedom of cooking on a well-seasoned grill.
Embrace these tips, and your grill will thank you with delicious meals for years!
Storing Your Cast Iron Grill Properly
When it comes to storing your cast iron grill, ensuring it’s kept in a dry environment is essential to avoiding rust. Start by applying a light coating of oil on the grill surfaces before placing it away; this creates a protective barrier against oxidation.
Make sure the grill is completely cool and dry—trapping moisture is a surefire way to invite rust.
If you’re stacking multiple cast iron pieces, always place a paper towel or cloth between them. This absorbs any moisture and prevents scratching, keeping your grill in top shape.
Regularly inspect your cast iron grill for signs of rust or damage, and address any issues promptly.
By taking these steps, you’re not just storing; you’re preserving a piece of culinary freedom that can last for generations.
With a little care, your cast iron grill will be ready to serve up delicious meals whenever you are!
Frequently Asked Questions
What Ruins Cast Iron Seasoning?
You can ruin cast iron seasoning by using harsh cleaning methods, like soap or abrasive pads, which strip away the protective oils.
Cooking acidic foods in poorly seasoned cookware can erode that layer, making food stick.
Neglecting rust prevention, such as failing to dry your cast iron completely after washing, invites moisture and rust.
Finally, storing your skillet in a damp place without proper oiling can lead to disaster for your seasoning.
How Do You Season a Cast Iron Grill for the First Time?
“An ounce of prevention is worth a pound of cure.”
To season your cast iron grill for the first time, start with thorough preparation: clean those grates well.
Use high smoke point oil, applying a thin layer evenly. Preheat your grill to about 300°F, then bake the oiled grates for 2-3 hours.
Repeat this process to build a solid seasoning layer. Remember, good grill maintenance keeps your cast iron in top shape!
Do You Oil Cast Iron After Seasoning?
Yes, you should definitely oil your cast iron after seasoning.
Use a thin layer of high smoke point oil, like vegetable or canola, to maintain that nonstick surface. This simple maintenance tip reinforces the seasoning and prevents rust.
Make it a habit to oil regularly, especially after high-heat cooking. Wipe off any excess oil with a paper towel for even coverage.
Your cast iron will thank you by lasting longer and performing better!
What Are Some Common Mistakes When Seasoning Cast Iron?
When it comes to seasoning cast iron, don’t throw caution to the wind. Common mistakes include using the wrong oil types, which can lead to a sticky mess, and skipping essential cleaning steps that leave debris behind.
Ignoring maintenance tips like gradual heating can crack your cookware. Also, missing those vital heating cycles weakens the seasoning.
Conclusion
By following these steps, you’ll guarantee your cast iron grill remains a trusty companion for culinary adventures, much like a knight’s sword, always ready for battle. A well-seasoned grill not only enhances the flavor of your meals but also extends its lifespan, allowing you to create memorable feasts for years to come. Remember, with a little care and attention, your grill will become a beloved heirloom, passed down through generations, just like the finest of family recipes.